
Customer AutoPay Settings
Find out how customers can manage their AutoPay account and view upcomming charges.
Customer AutoPay Experience and Details
Customers can manage AutoPay from their My Account dashboard if the feature is enabled and allowed to the Account.
First, AutoPay must be enabled at the store level before any of the Account-level settings below take effect. Set Enable AutoPay (Admin) to Yes for Admin-created orders, and Enable AutoPay (Storefront) to Yes for storefront orders and customer self-service. See AutoPay for store-level setup and the dunning schedule.
Configure AutoPay on the Storefront as a Customer
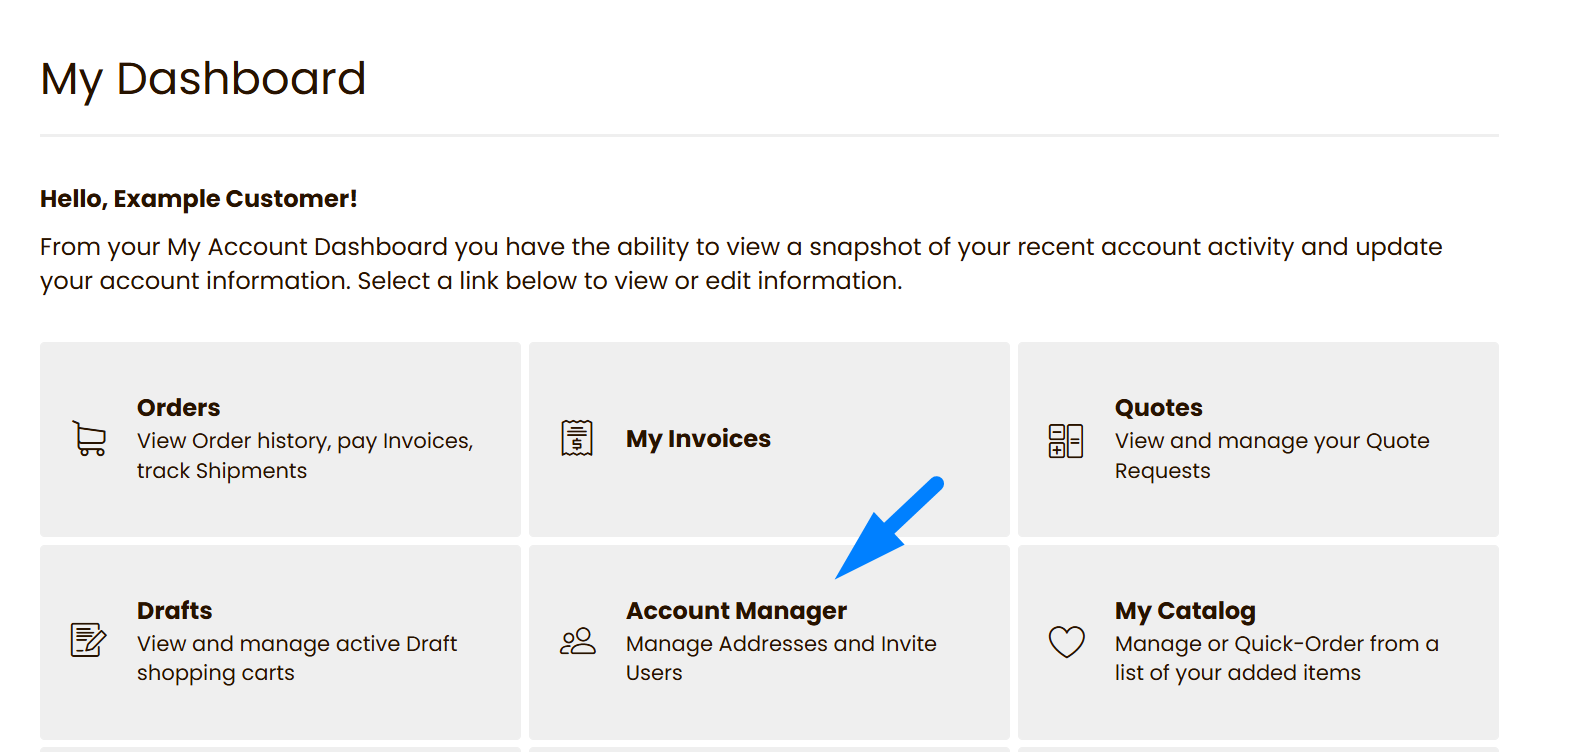
Here's how a customer can update their AutoPay payment account or disable automatic payments entirely.
The customer can sign in and go to Account Manager → AutoPay. From there, they select Edit to open the AutoPay drawer.
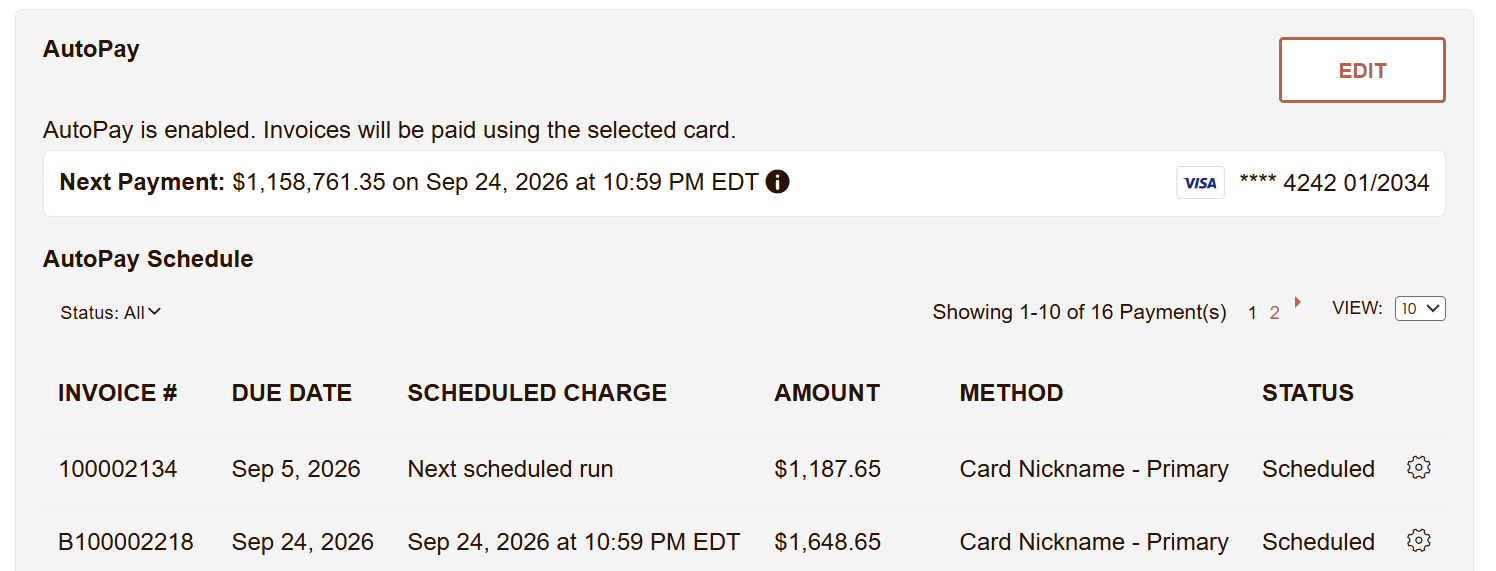
In the drawer, the customer can enable or disable AutoPay, and select their AutoPay payment account from saved cards.
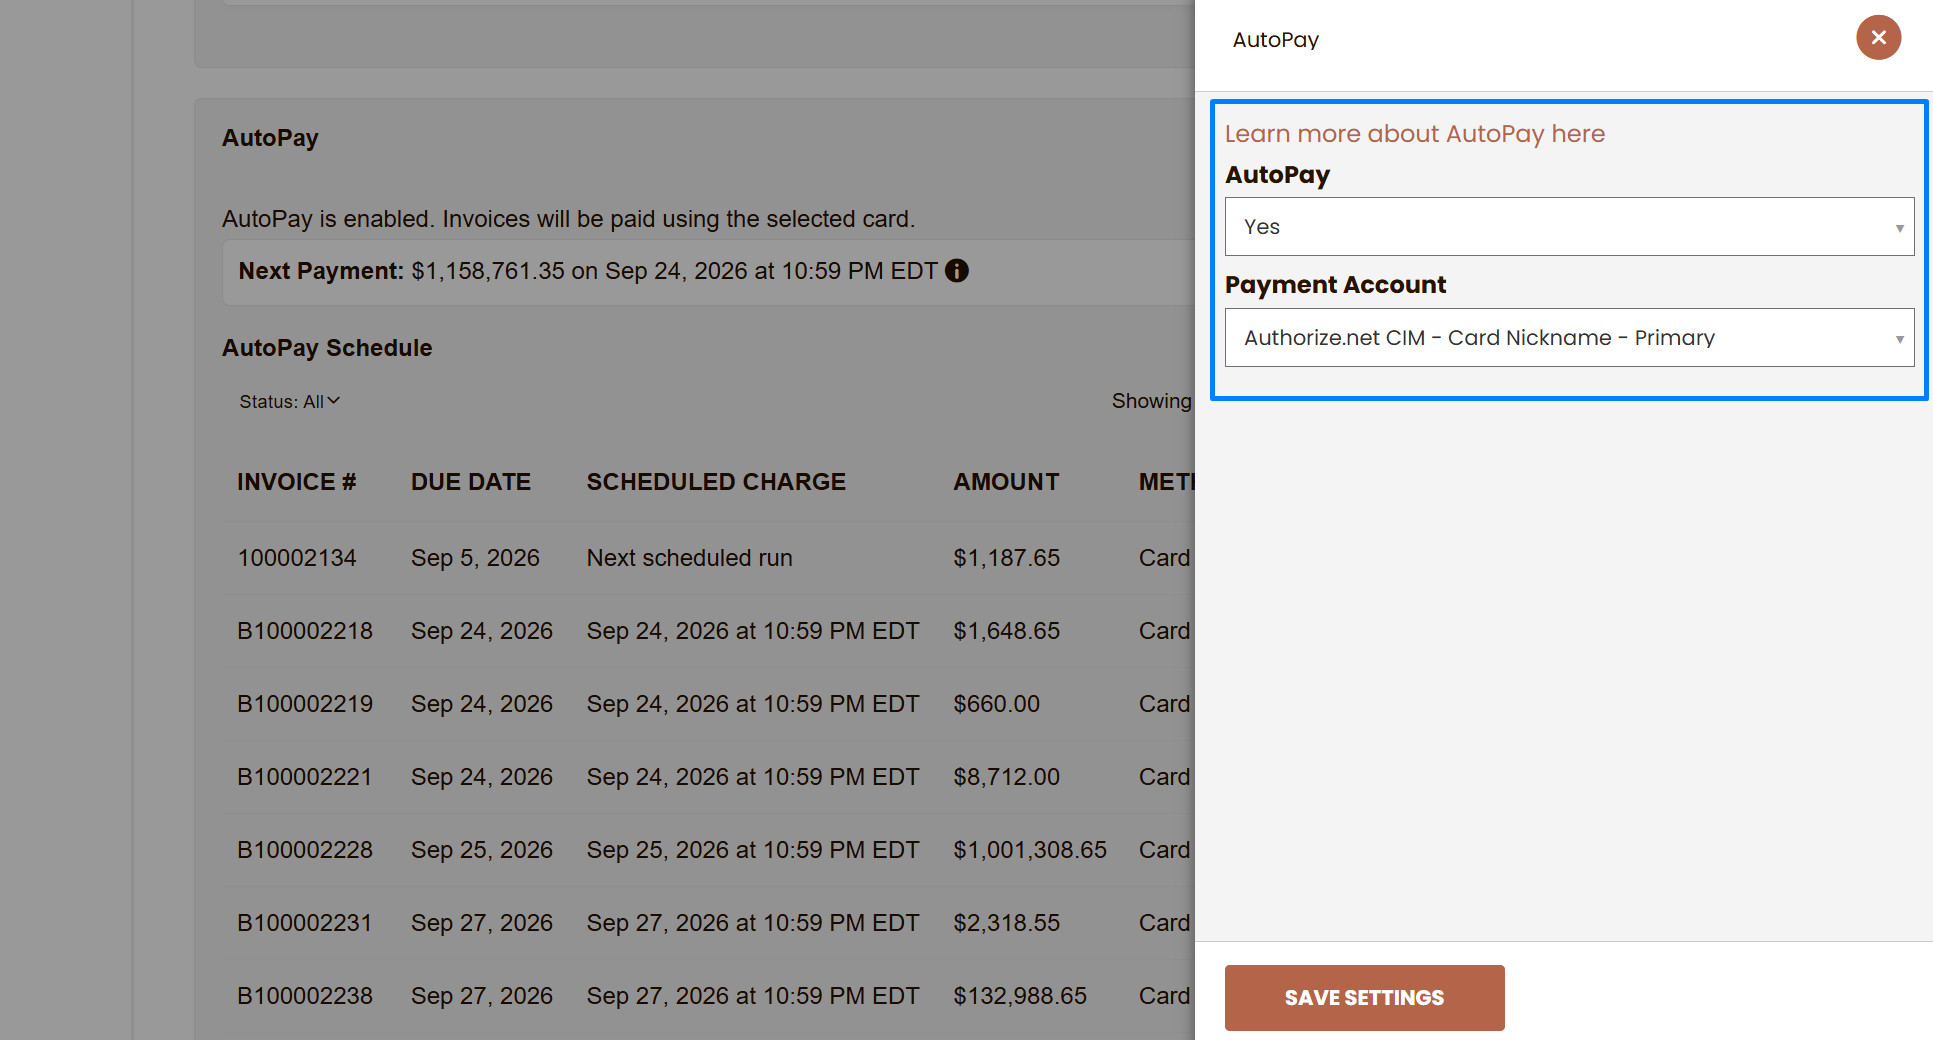
AutoPay supports Stripe and Authorize.Net saved cards, Braintree saved credit cards, and Stripe ACH saved accounts. Braintree bank accounts are not supported. Customers must first add their Stripe ACH account through the storefront before selecting it for AutoPay. See Stripe ACH Saved Accounts.
How Customers See Scheduled Charges
Customers can review upcoming auto-payments inside My Account > Account Manager, through invoice details, and on AutoPay-related emails.
The exact payment timing depends on the invoice due date and the Account’s configured grace period. Customers should review specific invoice details and due dates, along with AutoPay emails if they need to understand when a payment is expected.
My Invoices
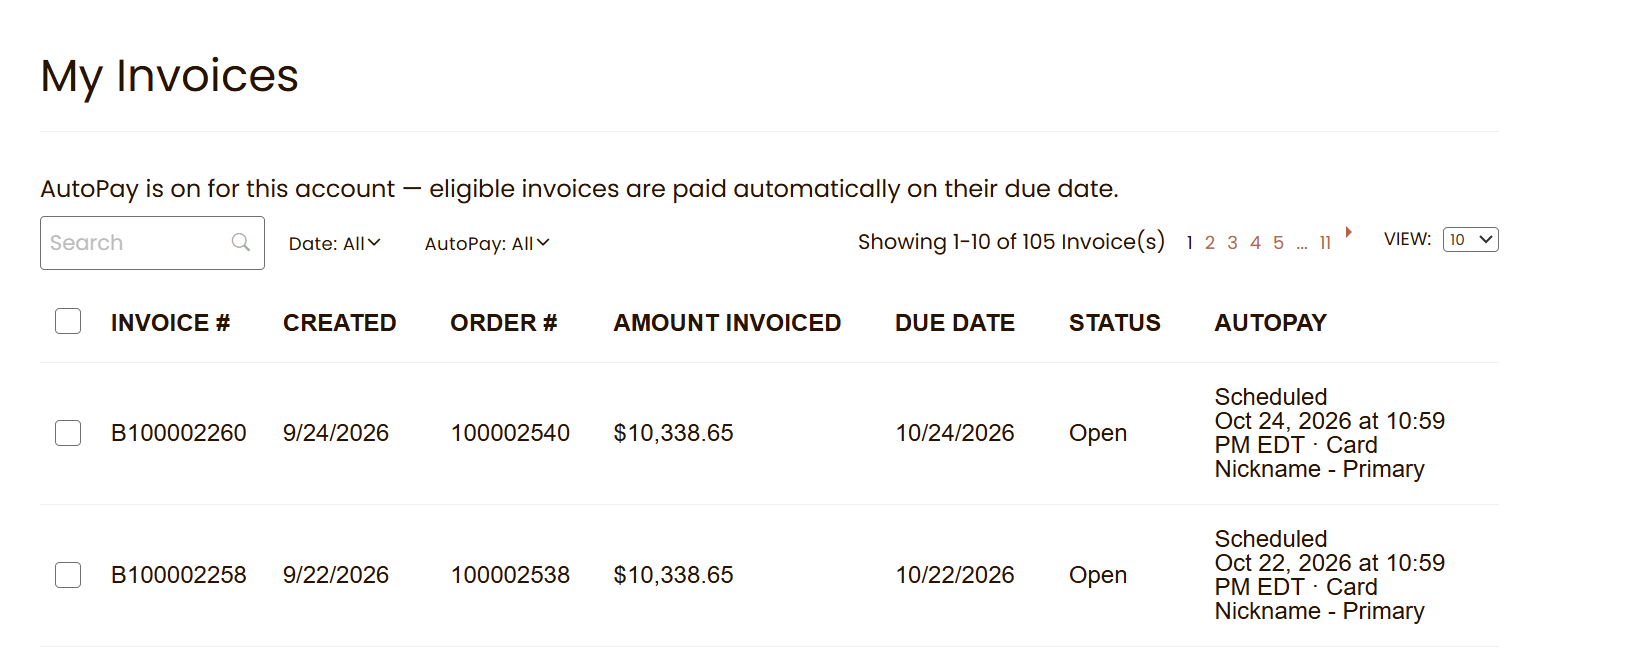
When AutoPay is enabled for the Account, customers see an AutoPay message at the top of My Invoices.
The banner confirms that AutoPay is enabled for the Account so customers understand that eligible invoices may be charged automatically. Each Invoice displays its scheduled payment date and payment method under the AutoPay column.
Configure AutoPay for the customer Account as an internal Admin
AutoPay is configured at the Account level. Once enabled, the selected payment method and grace period apply to eligible open invoices for that Account.
AutoPay collects payment on individual Invoices. Accounts using Statement billing can use AutoPay when Allow Payment by Invoice is enabled. Statements cannot be paid automatically.
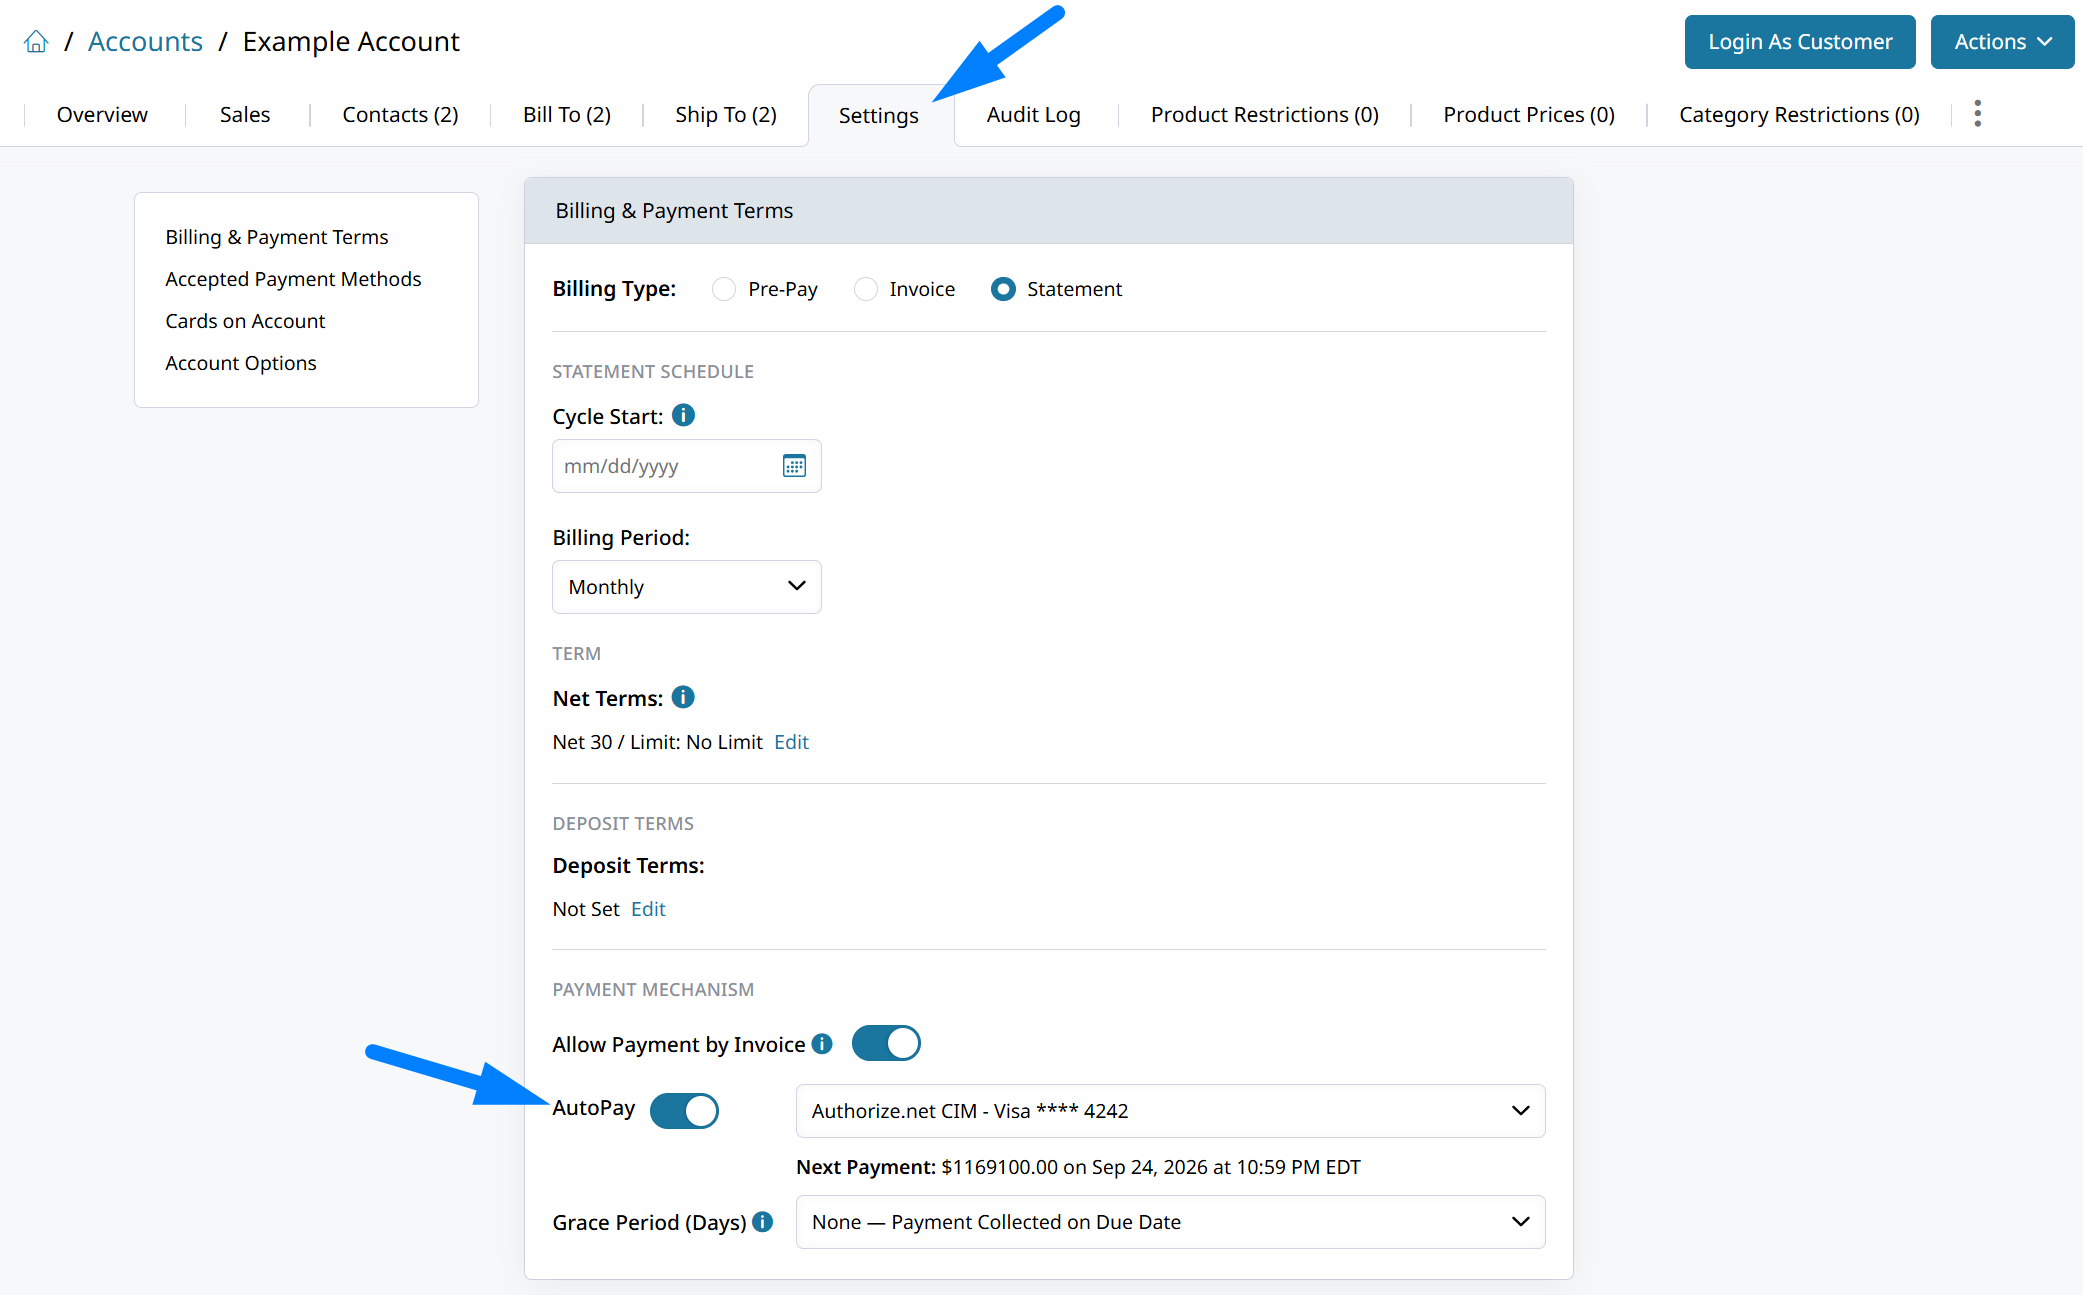
Step 1 - Enable AutoPay for Account
From the Zoey Admin go to Accounts, open one, then click Settings tab to manage their Billing & Payment Terms, including automatic payment. AutoPay is available to pay Invoices automatically after their due date with consideration to set grace period.
Toggle AutoPay to enable automatic payment collection and then select the saved payment method details.
Step 2 - Select Payment Account
Use the Payment Account dropdown to choose the saved card or bank account that should be charged.
Only saved payment methods available through supported gateways can be selected. Saved cards on Stripe or Authorize.Net and saved credit cards on Braintree can appear as AutoPay options; Stripe ACH saved accounts are also supported. Braintree bank accounts and PayPal payment methods are not available for AutoPay. Braintree credit cards are supported even though Braintree is a PayPal service.
If the payment method you expected does not appear, confirm that it was saved through a supported gateway. You can learn more in Saved Cards.
Step 3 - Configure Grace Period
Use the Grace Period (Days) dropdown to choose how long Zoey should wait after the invoice due date before attempting AutoPay.
You can select a grace period from None to 30 days. The default option is None — Payment Collected on Due Date.
For example:
-
If an invoice is due July 30 and the grace period is set to None, AutoPay attempts payment on July 30.
-
If an invoice is due July 30 and the grace period is set to 3 days, AutoPay attempts payment on August 2.
AutoPay uses the invoice due date. If your Account uses Net Terms, the invoice due date is based on the Account’s terms or individual invoice settings.
How AutoPay Works
When AutoPay Charges
AutoPay checks eligible invoices automatically. A charge is attempted when the invoice due date plus the configured grace period is less than or equal to the current date and time.
Zoey checks for eligible AutoPay invoices every minute, so payment is typically attempted within about 60 seconds of becoming eligible.
For example:
- If an invoice is due July 30 and the grace period is set to None, AutoPay attempts payment on July 30.
- An invoice is due on July 30 and the Account has a 3-day grace period. AutoPay attempts payment on August 2.
AutoPay charges invoices only on or after the due date plus grace period.
What “Next Payment” Means
The Next Payment date shows when Zoey expects the next invoice to become due for AutoPay.
Invoices become eligible for AutoPay on their due date plus the Account’s configured grace period.
If payment fails and Enable Dunning (Retry) is enabled, Zoey retries the payment once per day until the maximum retry limit is reached.
This date helps admins and customers understand the next upcoming scheduled AutoPay activity for the Account. It is based on eligible invoice timing and should reflect the expected due date behavior after the latest AutoPay updates.
Updated about 3 hours ago