Customer Registration Form
You can have multiple Customer Registration Forms to onboard different types of customers.Learn how to create additional registration forms and add them to your store below.
Overview
Customer Registration Forms enable new customers to request an Account to order from your store. What type of Account and the information needed will depend on how you configure your registration forms.
You can find your registration forms in Web Settings > Customer Settings > Account Request/Registration
Customer Registration Forms
There is one default registration form which can be configured as shown below. Your store will contain a link to this default registration form at /customer/account/create.
You can also create additional registration forms to onboard customers into a different Customer Groups.
Restricted storefront means visitors can't get to the internal registration page.
Append
?fstate=registeronto your store's URL to automatically open the registration page on a private store.
Default Registration Form
You must choose the Account Registration Type and Default Customer Group Assignment for all registration forms. Whether approval is needed before the Account is created, or if email confirmation by the customer is required, can also be set for each.
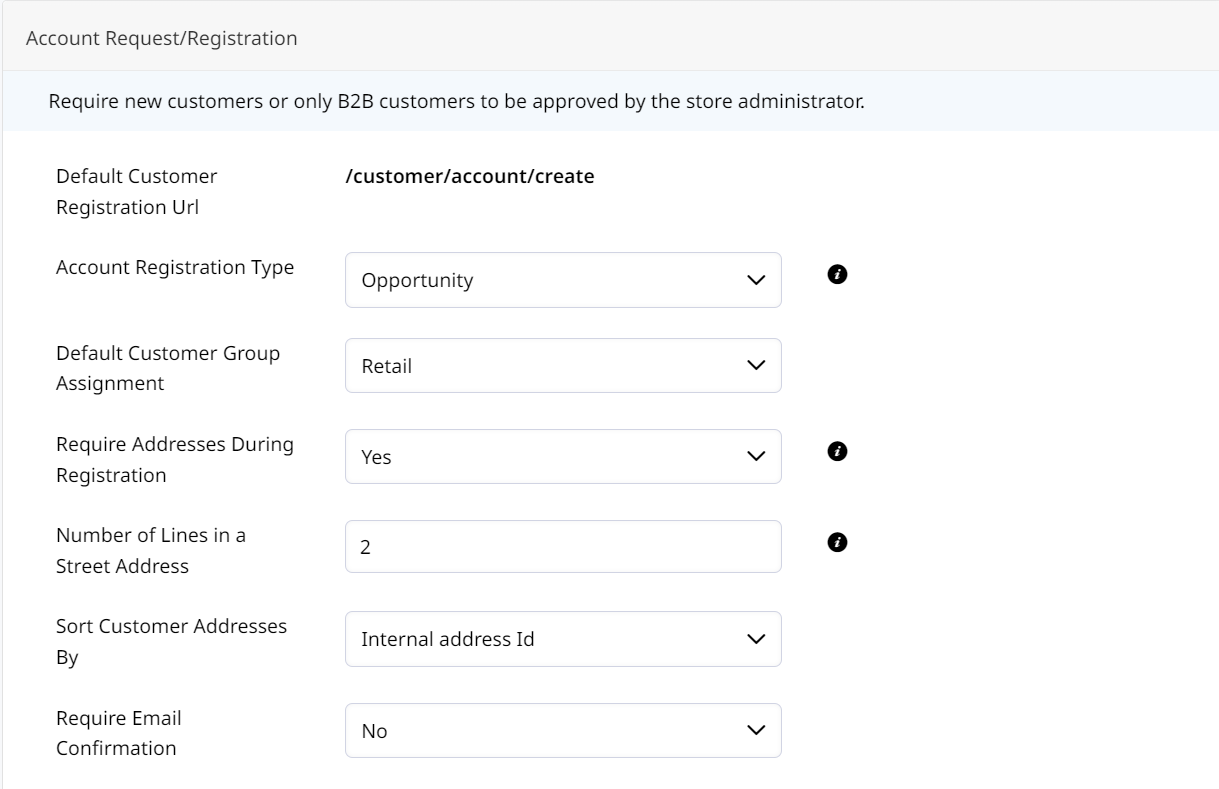
- Account Registration Type
When a customer requests an account they can be created as a Contact, or as a Lead and Contact, or Opportunity and Contact. If you do not require account approval you can also have the registration create an Account and Contact. - Default Customer Group Assignment
Select the Customer Group that customers customers will be placed in when they register through this form. - Require Addresses During Registration
If enabled, address will be assigned as the Default Billing and Default Shipping address for the customer. - Number of Lines in a Street Address
Leave empty for default (2). Valid range: 1-4 - Require Email Confirmation
When set to Yes, the registrant will be sent an email to confirm their account and set up their password. - Default Shipping Methods for Registered Account
Set the default allowed shipping methods that Accounts will be created with. If left blank, the account will not restrict shipping methods. - Default Payment Methods for Registered Account
Set the default allowed payment methods that Accounts will be create with. If left blank, the account will not restrict payment methods. - Default Invoice Payment Methods for Registered Account
Set the default allowed invoice payment methods that Accounts will created with. If left blank, the account will not restrict invoice payment methods.
Shipping and Payment Method Restrictions can be set globally based on Customer Group, or set individually on each Account. Learn more here.
Required Customer Attributes in Customer Registration Forms
Adding Customer Attributes to your Registration Forms allows you to require additional information or files to be uploaded.
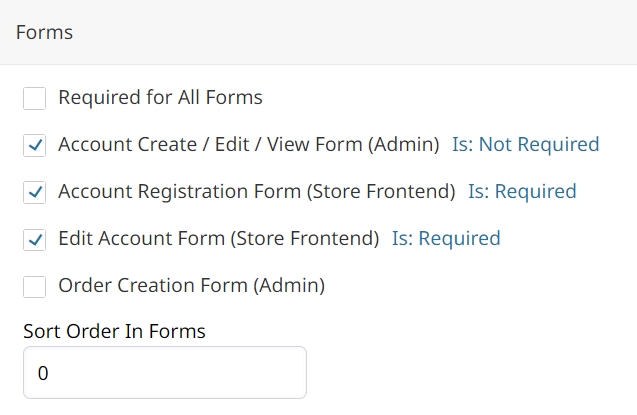
You can find your Customer Attributes in Customers > Attributes. Any Account, Contact, or Address attributes can be required on your registration form by checking off Forms settings.
You can create new attributes, such as file uploads or drop-down menus, and make them visible/required on each form.
Go to Customers > Attributes > Create New Attribute > Forms, check the box for each Form you want to display the attribute on.
You may also uncheck these options within Attributes you wish to remove from your Forms.

Adding More Customer Registration Forms
You can create multiple registration forms for different approval flows for each type of customer.Each additional form will have its own Registration URL that can be added to your Store's Theme or sent directly to customers.
In Web Settings > Customer Settings > Account Request/Registration, there is a default Customer Registration Form. Click Add Customer Group Form to begin setting up your additional registration form.
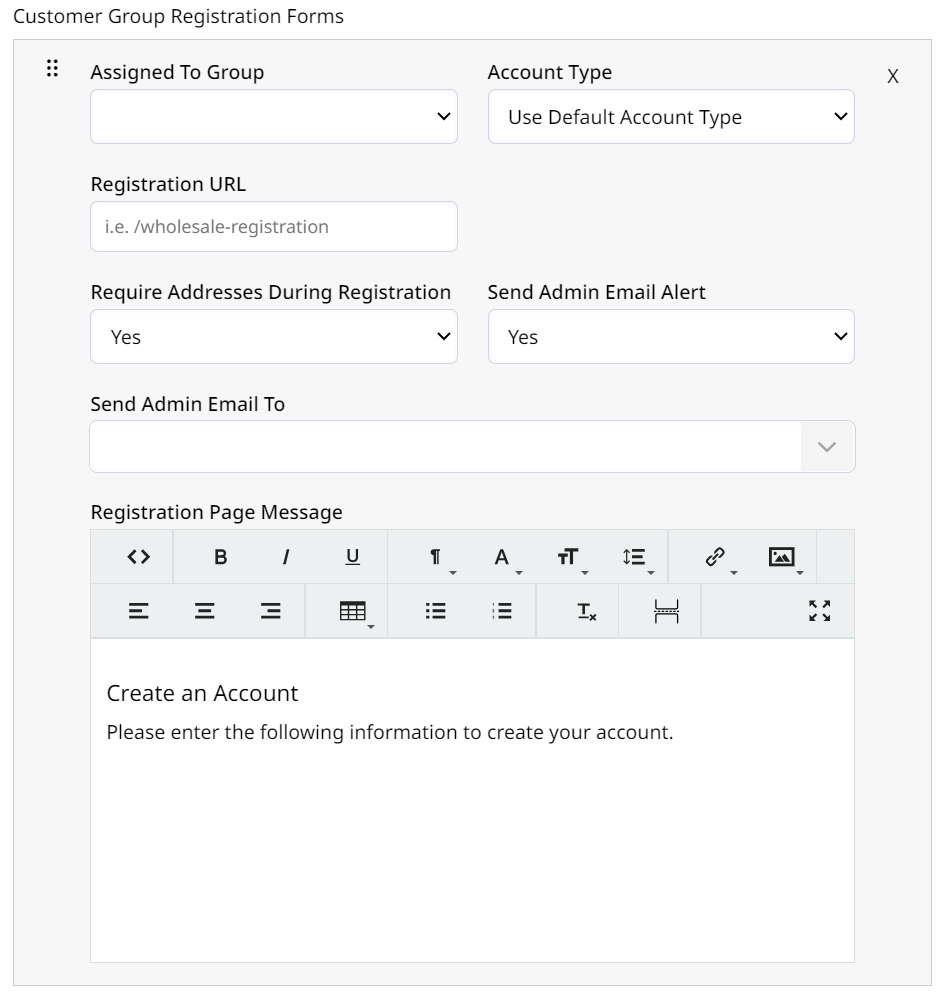
- Choose which Customer Group these registrants will belong to.
- Decide what type of Account the customers are registering for.
- Opportunity, Lead or Account. Account will bypass approval. You may use Leads or Opportunities to move customers through the onboarding process until they are converted into an Account, which required approval.
- If customers are registering as a Contact then you must decide if they should be approved before being allowed access.
- Define the Registration URL such as
/wholesale-registrationor/retail-registration. You may add this link to your Theme > Homepage > Account Links or add a registration link to the Header Navigation links. - Set if an alert should be sent when a customer requests an account, and who it should be sent to.
- Customize your Registration Page Message.
Validate Input Length for Registration Form Fields
Each field on your Registration Form is an Account, Contact, or Address Attribute.The fields and their options are configured in Customers > Attributes.
The fields on your registration form can have minimum or maximum character requirements!
You can also validate that registrants are entering an email address, just numbers, or just letters!
Click Here to learn more about attribute validation rules.
Updated 10 months ago