Uploading Image Files
Upload your images to Zoey before setting them on the Products. If your images are stored on your computer, you can upload them to Zoey using the method below.
Note: This method is good for up to 1000 images. This Image Import tool may be slow, so if you have a larger catalog of images, you may find better success with Importing Images from an External Source (URL)
Upload your Product Images into Zoey, and then add the images to your Products.
Upload Your Images
To upload your images, follow the below steps:
- From your Control Panel, navigate to Import & Export > Product Images

- Upload your images in one of two ways:
- Click Upload Files on the top right corner to view your computer folders and select the images
- Drag and Drop the images from the image's folder on your computer to this page
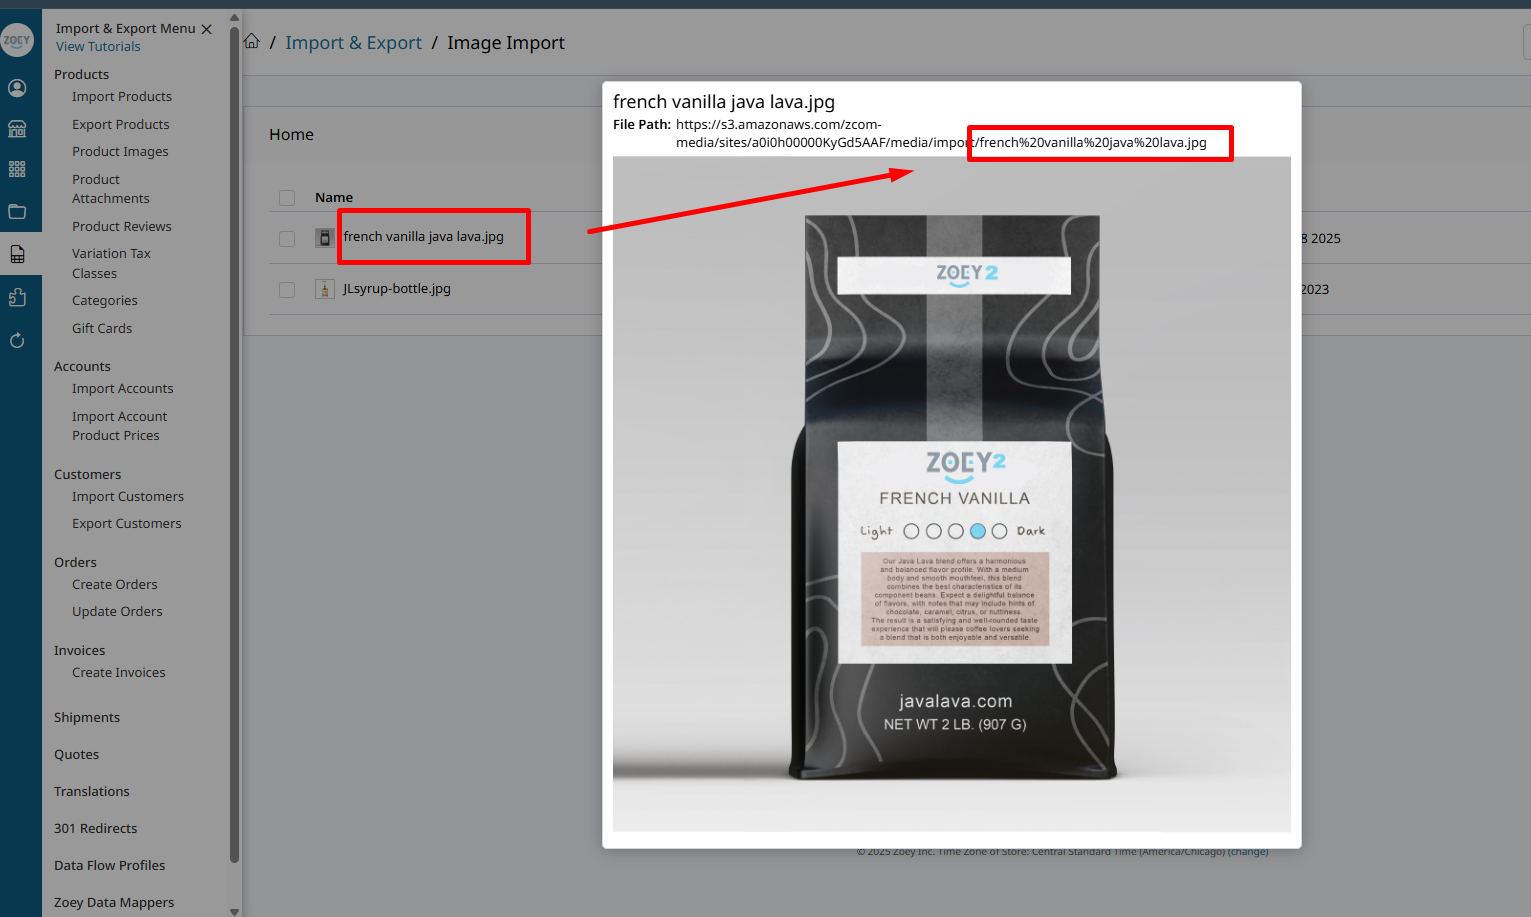
You should now see your uploaded images, file names and have the option to delete. You can also click on the image to preview and find the File Path.
Troubleshoot Image Upload

Each image is queued for upload and shows its progress. The total number of completed uploads is shown along with any errors.
Click on Show Errors to see which images failed to upload and the reason why.

The file names and their errors can be exported to CSV by clicking Export Errors.
Click on Retry Upload to attempt to upload those same files again.
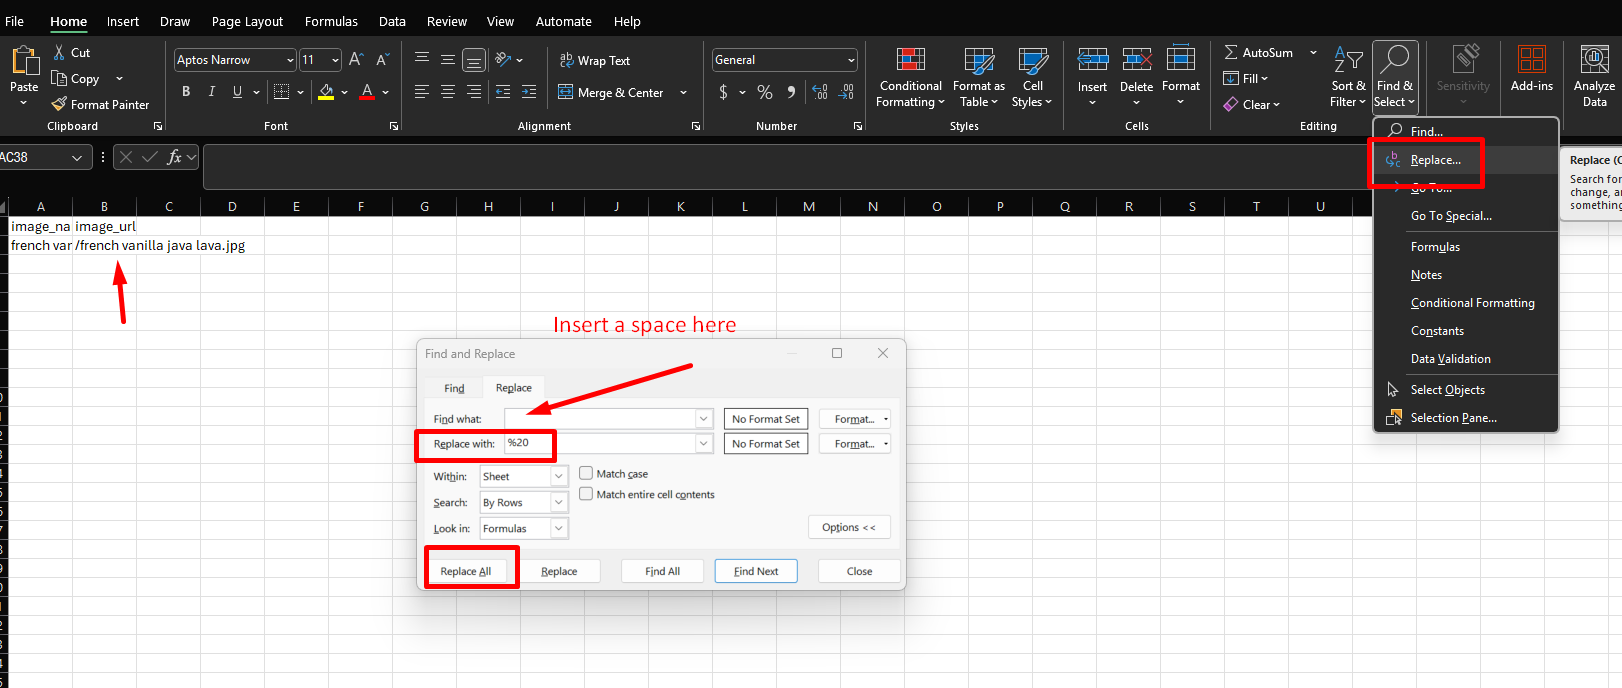
IMAGE NAMES CANNOT HAVE SPACES.Spaces within image names are replaced with %20 in the Product Images folder. If your image names have spaces, you will have to replace all exported file path spaces with %20 to avoid importing broken image links.
Folder or file names with special characters or spaces causes issues when exporting and importing. We recommend using a hyphen or underscore in place of spaces, and spelling out "and" in place of "&."
Optional - Managing Images In SubFolders
If you would like, you can Create Subfolders using the pulldown tab next to Upload Files. We recommend completing a successful upload and import before moving onto more complicated things like the subfolders.

Export Image Paths For CSV Files
When working on your Product Image Import CSV you can now use the "Relative Paths" to map your SKUs to images uploaded through the steps above.
To get the image paths of the images, click "Export to CSV For Import". That option provides a spreadsheet with the required column headers for import.

Then edit your spreadsheet to add the SKU column and link products to their images.
If your Image File Names match the product SKUs exactly, you can simply Export to CSV For Import and then change the
image_namecolumn to beskuand the file will be ready for import to set each image on each product.
Example Image CSV Import
| sku | image | _media_image |
|---|---|---|
| sample-sku | /my-image.jpeg | /my-image.jpeg |
Tips
- Every image file name must match the one uploaded exactly including the file path and capitalization.
- If your image file names have spaces or parenthesis in them, your store will automatically replace the space and parenthesis with an underscore. If your file was named "First product Image(1).jpg", it will now be "First_product_Image1.jpg" and must be listed as such in your CSV file.
- Every image name in the spreadsheet must start with a forward slash: /
- Example: /image.jpg
- Example: /folder/image.jpg
- There should be no empty rows between SKUs. Every row must have at least one value if there is a following row being used.
- SKUs can only be entered once.
- You can add the same image to every product, you just need a new row with each SKU.
- If you are using Folders, these must also be included.
- As with every CSV file Zoey uses, you must save this as a Windows CSV file.
Updated 4 months ago