Inventory Locations
Zoey has the ability to manage your products in multiple Inventory Locations.
Overview
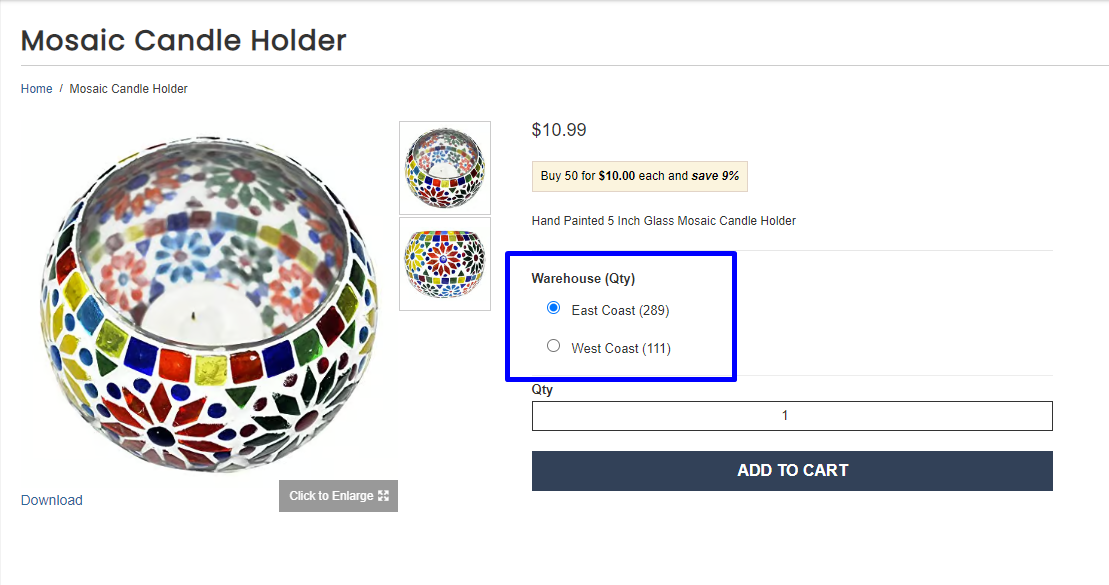
When inventory locations are enabled, each item ordered on your store is assigned to a specific Inventory Location (warehouse) for fulfillment, either selected by the customer or automatically based on your configuration.
If enabled, customers can choose their preferred warehouse when adding items, allowing a single order to include products from multiple locations or be split by fulfillment location.
Alternatively, Zoey can automatically assign the best warehouse for each item. If only one location is available, it’s selected by default; if multiple are available, assignment is based on your store’s setup, such as customer access and fulfillment preferences.
This ensures every item is routed to the appropriate warehouse, keeping inventory accurate and fulfillment efficient.
Read through each section below to learn about the Inventory Location features in Zoey!
Inventory Location Settings
- Go to Products > Settings > Inventory Locations.
- Enable the feature.
- Review the settings below to control how inventory locations work in the storefront and in Zoey Admin.
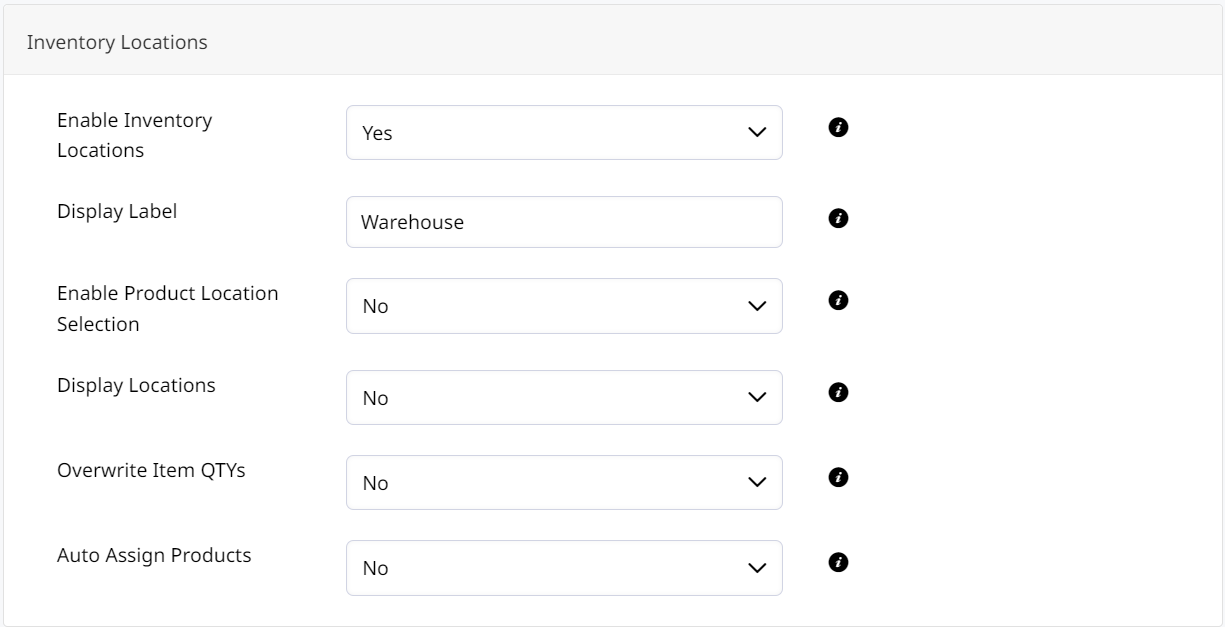
Use these settings to control how customers and admins work with inventory locations:
- Enable Product Location Selection
Set this to Yes to let customers choose an inventory location when adding a product to the cart.- Enable on Product Lists — Show the selector on category pages and other product lists.
- Overwrite Item QTYs
Set this to Yes to use the combined quantity across available inventory locations for out-of-stock checks instead of the product-level quantity.
Overwrite Item QTYs uses the combined stock quantity across locations to determine whether a product is in stock.
If any location has a positive quantity, the product is treated as in stock.
When this setting is enabled, data mappers export that combined quantity.
- Allow Selection for Admin Only
Set this to Yes to show location selection only in Zoey Admin. If you enable this, also enable Auto Assign Products so storefront items can still receive an inventory location. - Auto Assign Products
Set this to Yes to automatically assign a location when a product has only one inventory location. - Only Auto Assign Products if Customer Group has access to Inventory Location
Set this to Yes to limit automatic assignment to locations the customer group can access.
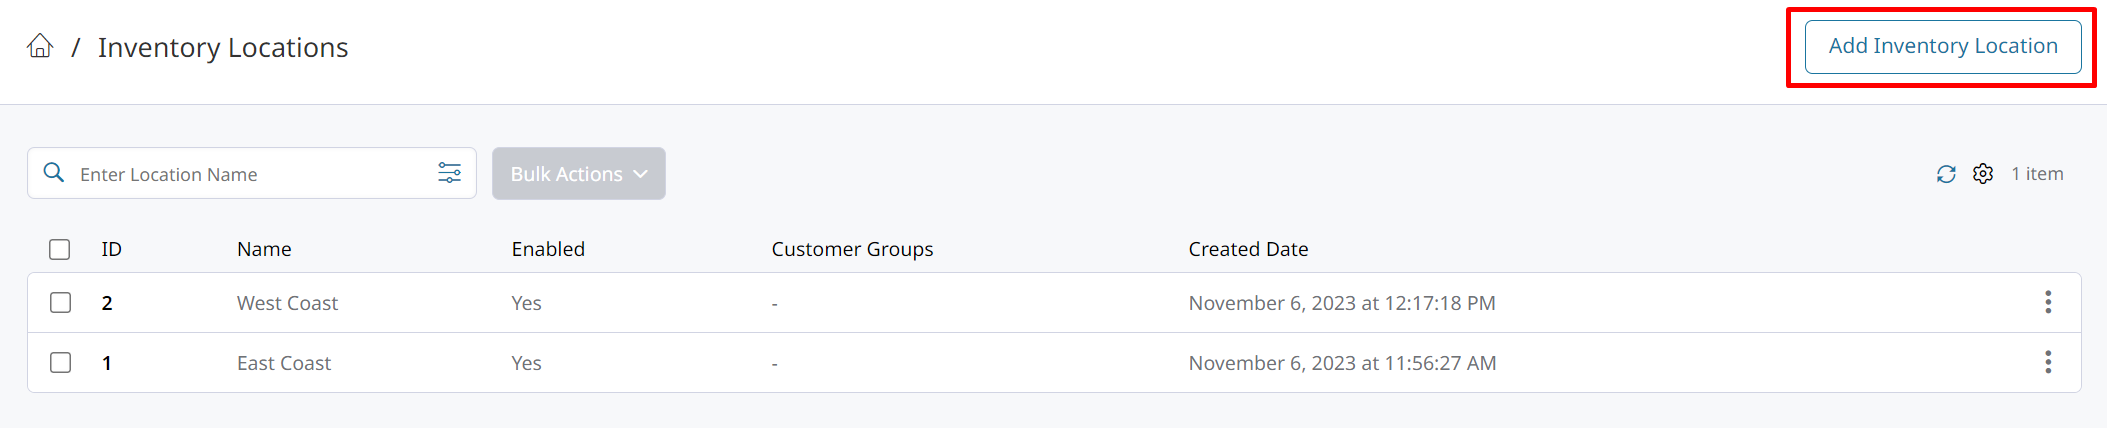
Creating an Inventory Location
Create an inventory location to define a warehouse, store, or other fulfillment source.
- Go to Products > Inventory Locations.
- Click Add Inventory Location.
- Configure the settings below.
Use the settings below when creating the new inventory location.
| Inventory Location Settings | |
|---|---|
| Location Name | Enter a name for your inventory location, for example, "Northeast Warehouse" |
| Enabled | Select Yes to enable |
| Show QTY on Product Page | Selecting Yes will display this locations quantity on the product page. |
| Customer Groups | Select which Customer Groups have access to this Inventory Location. If no Customer Groups are selected the Inventory Location will be available for all Customer Groups. |
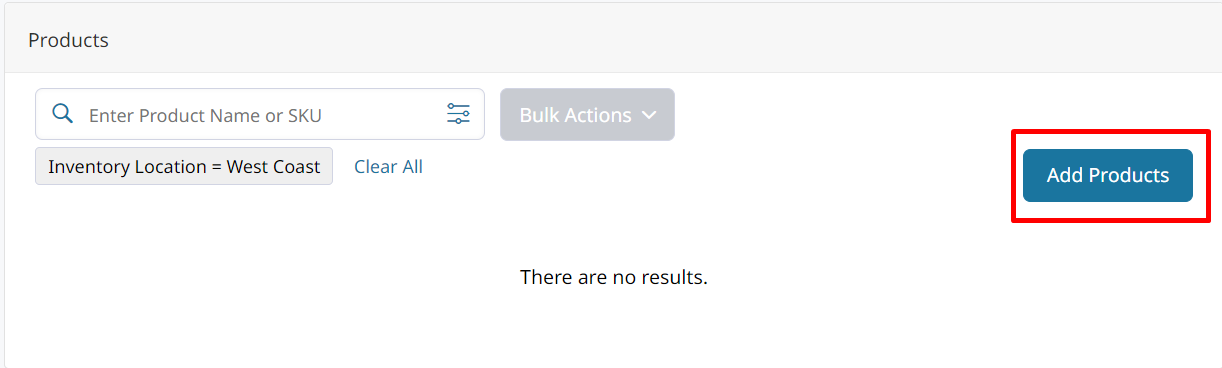
1. Add Product to an Inventory Location
After you save the inventory location:
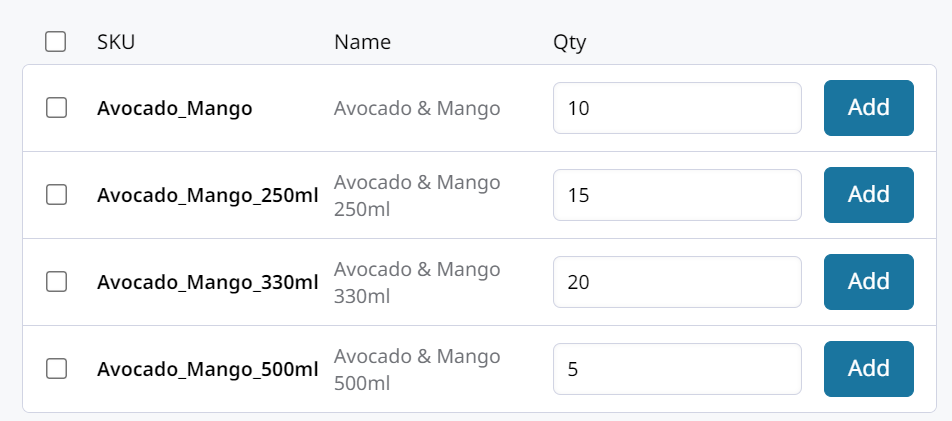
- Click Add Products.
- Select the products you want to assign to that location.
- Enter the quantity for each product.
Item quantities at your Inventory Locations can also be updated via API or CSV import!
2. Add Product Quantity to an Inventory Location
Option 1: Set Inventory Location Quantities through Import
Set stock quantity for your inventory locations through product CSV import.
The column headers for this import are as follows:
| sku | inventory_location_East Coast | inventory_location_West Coast |
|---|---|---|
| Avocado_Mango_500ml | 10 | 20 |
| Avocado_Mango_330ml | 15 | 30 |
| Avocado_Mango_250ml | 20 | 40 |
- Inventory location names are case-sensitive and should include any spaces.
You can also use the Zoey API or one of our existing DataMapper integrations to keep inventory location stock in sync.
Option 2: Manually Set Product Quantity at Inventory Location
To update quantity manually:
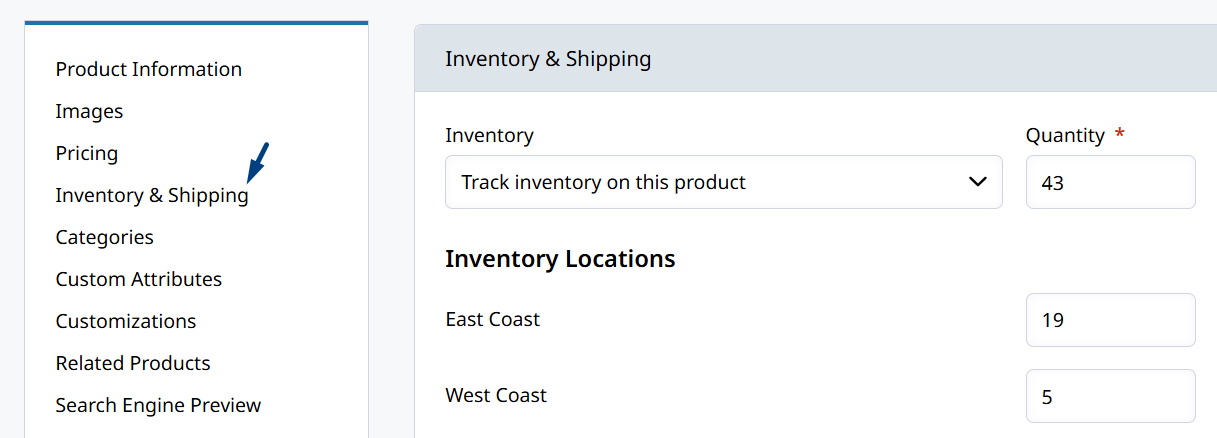
- Open the product and go to Settings > Inventory & Shipping.
- Find the Inventory Locations section.
- Enter the quantity for each location.
This only appears if Inventory Locations are enabled in Products > Settings.
Add the product to each location first, then set the quantity for that location.
How Location Available Stock is Displayed on the Storefront
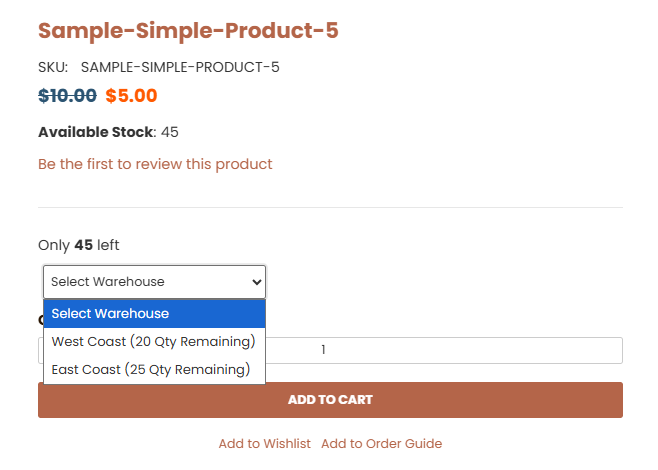
When Inventory Locations are enabled, the QTY shown on the storefront no longer reflects the product’s default qty, but instead represents the combined inventory from all accessible locations. Zoey adds up the available quantities from each inventory location the customer is allowed to order from and displays that total as the available quantity.
For example:
- A product has 5 units in Warehouse A, and 10 units in Warehouse B
- The customer has access to order from both locations
- The storefront will display 15 units available
If a customer only has access to order from certain locations, only those locations are included in the total available qty they're shown.
This ensures customers always see accurate availability based on where they are allowed to order from, while still using the familiar QTY field on the storefront.
Display Location Available Stock in Admin
To show location stock in Zoey Admin:
- Open the Products grid.
- Click the gear ⚙️ icon.
- Search for
Location. - Click each location you want to add to the grid.
The grid then displays the stock quantity for each product at each selected inventory location.
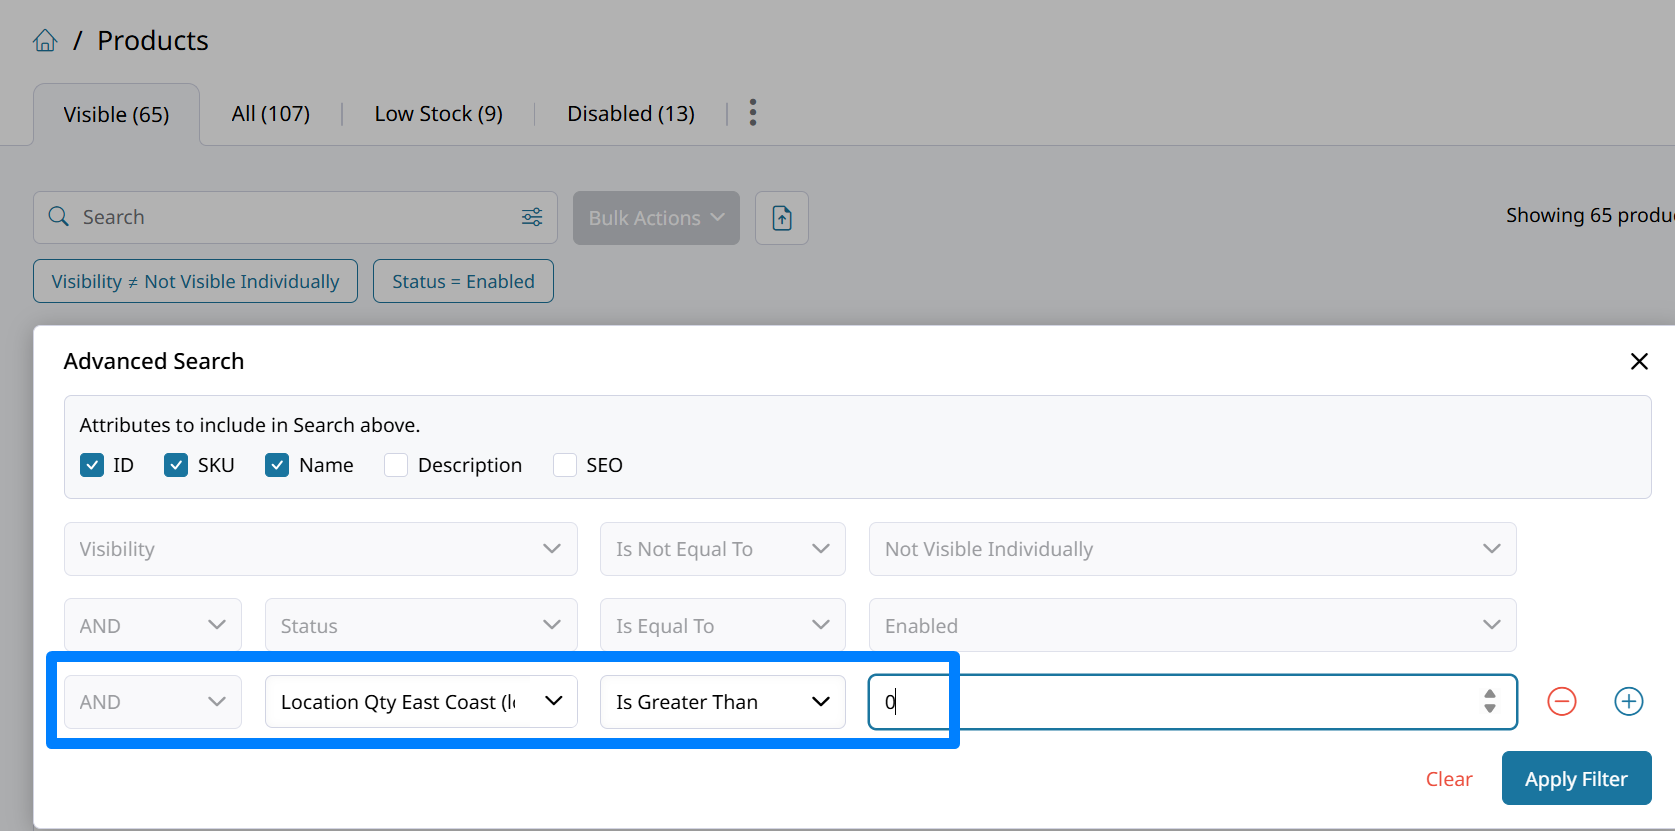
You can also filter products by whether their stock is at a certain inventory location!
Split Orders by Inventory Location
This feature allows an order placed on the store-front to be split into multiple orders based on Inventory Locations.

| Split Order Settings | |
|---|---|
Enabled |
Yes |
Use Letter Suffix |
When set to Yes, split order numbers will append -A, -B, -C... instead of -1, -2, -3 |
Split Mode |
Inventory Location |
Split Backorder Items |
Do Not Split Backorders |
Show Message If Order Will Be Split |
Do Not Show |
Only Split Shipments |
When set to Yes, only Shipping rates will be calculated for each split quote. Only a single order will be created. |
Export Inventory Location Product Stock Quantities
An Inventory Location mapper to export Product stock
Zoey Data Mappers can export your Products to provide data to other systems. Commonly our customers ask to schedule exports of Product Inventory so that other systems can be kept up to date after sales, returns, or updates are made in Zoey.
To export your Inventory Location Stock Quantities, create the Product Export Data Mapper.
Filter by Inventory Location
To export the product inventory at specific locations, set Use Advanced Filters to Yes and leave Apply Advanced Filters Only Once to No.
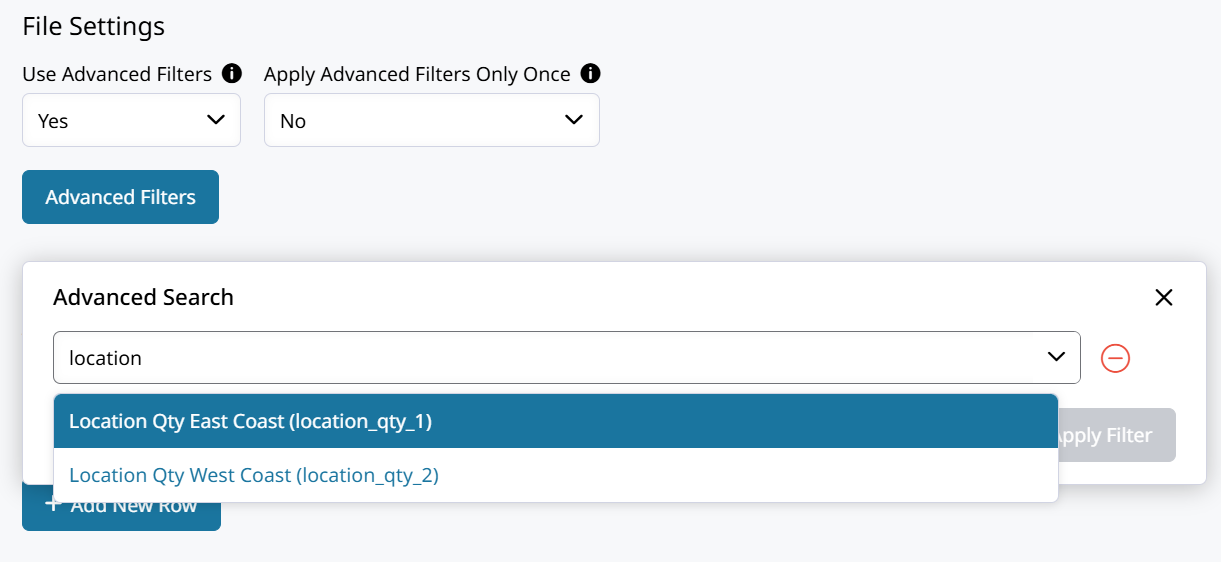
Search for Location to see all of the Inventory Locations.
Set a filter for each Inventory Location you want to export product inventory for. Use is set for any product at the location to be exported regardless of quantity. Or use greater than or less than to filter products by a quantity threshold at the location.
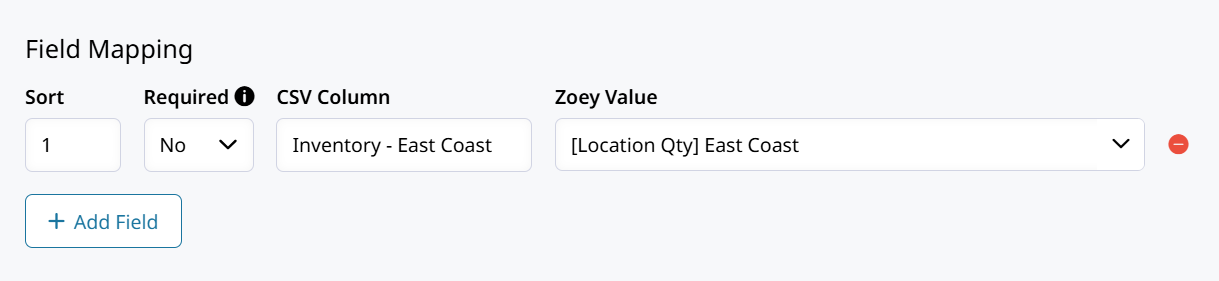
Inventory Location Field Mapping
Now we can add the fields (columns on the export sheet) which will display the quantity of each product in stock at each location.
Search for "Location" under the Zoey Value for the Location Qty fields to be returned. Select the qty field for the specific Inventory Location you want to display the stock for.
How to Automatically Assign the Inventory Location to the Item being added to Cart
Use these settings to hide the storefront selector and assign a fulfilling location automatically:
- Go to Products > Settings > Inventory Locations.
- Enable the feature and set Enable Product Location Selection to Yes.
- Set Allow Selection for Admin Only to Yes. This hides location selection from storefront customers and keeps it available in Zoey Admin.
- Set Auto Assign Products to Yes. Products are automatically assigned a fulfilling location.
- Set Only Auto Assign Products if Customer Group has access to Inventory Location to Yes. Items are assigned only to locations available to the customer group.
Shipping product from many different warehouses?Check out Inventory Location Priority to learn how to set the priority which determines the hierarchy of fulfillment locations per customer group.
Updated 3 months ago