Customers - Importing & Exporting with NetSuite
NetSuite to Zoey Customer Import
You can import your NetSuite Customers into Zoey with a variety of controls.
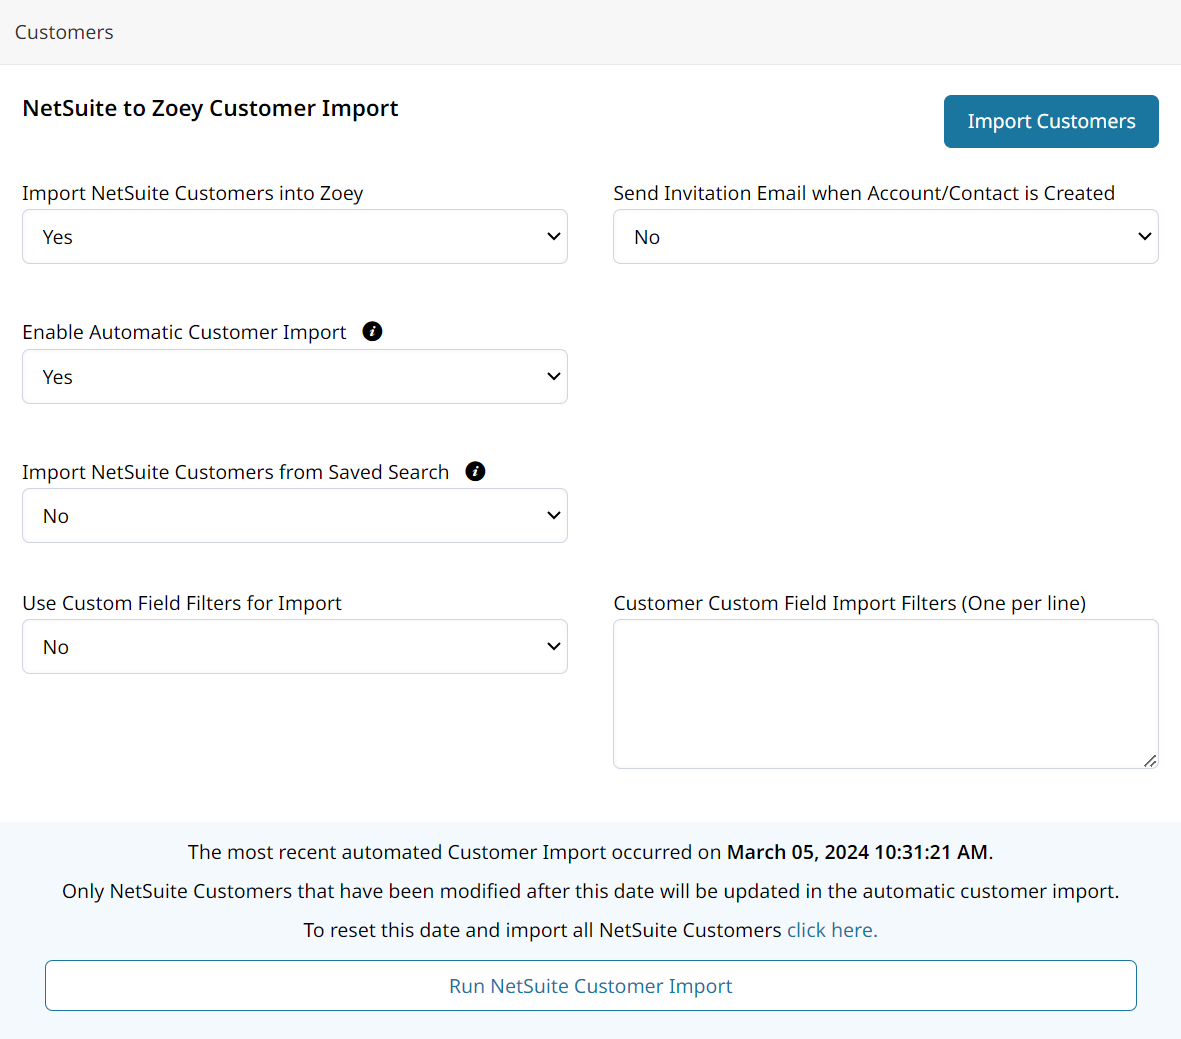
- Import NetSuite Customers into Zoey
When enabled, customers will be synced from NetSuite to Zoey. - Enable Automatic Customer Import
When enabled, customers will be synced from NetSuite to Zoey every 4 hours. - Send Invitation Email when Customer is Created
When enabled, Zoey will send a New Account Confirmation email. - Import NetSuite Customers from Saved Search
When set to Yes, NetSuite Customers will be imported from a Saved NetSuite Search.We highly recommended using a Saved Search to import your customers.The syncing of customers occurs much quicker when using a Saved Search.
Click Here to learn how to set up the Saved Search in NetSuite.
- Use Custom Field Filters for Import
When set to Yes, filters entered into Customer Custom Field Import Filters will be used to determine if a customer will be imported.
Import Behavior
- Company Customers without Contacts
- Customers with Contacts
Customer imported into Zoey as an Account. Customer Contacts will be imported into Zoey as Contacts that will be assigned to the Account. - Customers without Contacts
NetSuite Customers without Contacts can be created as either a Zoey Contact, or as a Zoey Account with a Contact. Customer.
- Customers with Contacts
- Individual Customers
NetSuite "Individual" Customers can be created as either a Zoey Contact or a Zoey Account with an assigned Zoey Contact.- Create as Contact
When importing Individual Customers as Contact, they will be synced under their full name. - Create as Account and Contact
When importing as Account and Contact, the Account Name will first check the "Company Name" then "First Name Last Name - NetSuite ID".
- Create as Contact
Customers in NetSuite should be synced to Zoey as Accounts.NetSuite Customers set as "Individuals" will be synced to Zoey as Contacts unless Create as Account and Contact is selected. It is always recommended to use Accounts in Zoey, rather than Contacts on their own.
Contact Settings
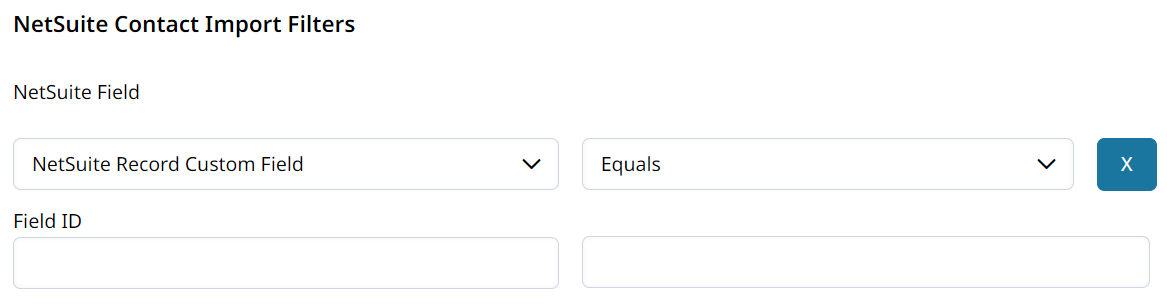
- Use NetSuite Contact Import Filters
When set to Yes, Contacts which meet the filter condition will be imported into Zoey.
You can then choose the NetSuite field, and set the condition for Contact import.
Customer Group Settings
- Customer Group Source
Allows you to choose which NetSuite data is used to determine the Zoey Account's Customer Group.
Address Settings
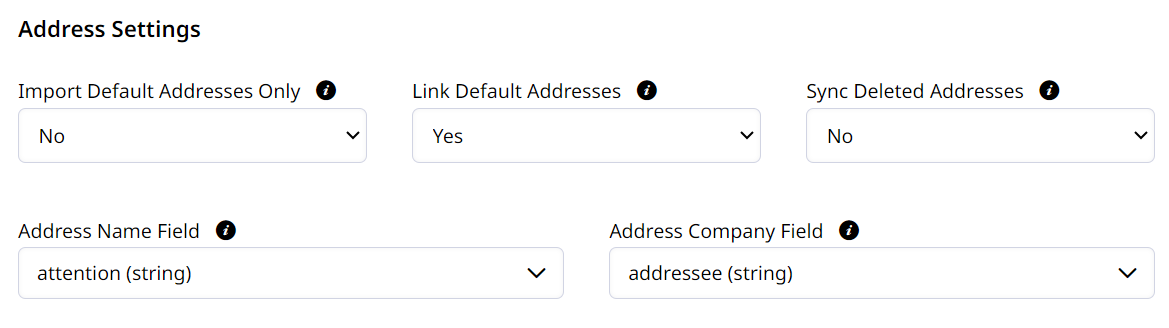
- Import Default Addresses Only
When set to Yes, only the Default Billing and Default Shipping Address will be imported from NetSuite Customers. - Link Default Addresses
When set to Yes, the Default NetSuite Billing/Shipping Address will be set as the Default Billing/Shipping Address for the Zoey Account. - Sync Deleted Addresses
When set to Yes, an Address that was previously imported from a NetSuite Address that has been deleted from the NetSuite Customer will be deleted from the Zoey Account. - Address Name Field
Field used to determine first and last name when parsing NetSuite address objects. - Address Company Field
NetSuite field to determine the Company name for billing and shipping addresses.
Net Terms Settings
Map the NetSuite Terms to the Zoey Terms in the Payment Mapping section.
Net Terms are imported from the NetSuite Customer to the Zoey Account by default, and just need to be mapped.
- Ignore Credit Limit Check
When set to Yes, Net Terms will be imported from the NetSuite Customer even if there is no Credit Limit defined on the Customer.
Payment Method Settings
- Import Payment Methods on First Import Only
When set to Yes, Payment Methods will only be Imported from NetSuite on the first import when the Zoey Account is being created.
Shipping Method Settings
- Import Shipping Methods on First Import Only
When set to Yes, Shipping Methods will only be Imported from NetSuite on the first import when the Zoey Account is being created.
Tax Settings
- Taxable Customers Tax Class
The Zoey Tax Class Customers will be assigned to when imported into Zoey if the NetSuite customer is set as Taxable. If "Use Group Tax Class" is selected, the customer will use the Tax Class for their Customer Group. - Tax Exempt Customers Tax Class
The Zoey Tax Class Customers will be assigned to when imported into Zoey if the NetSuite customer is NOT set as Taxable. If "Use Group Tax Class" is selected, the customer will use the Tax Class for their Customer Group.
Default Account Shipping Method
- Add Shipping Method (Button)
Select the Shipping Method and set the condition to enable it for imported Accounts.
Default Account Payment Methods
- Add Payment Method (Button)
Select the Payment Method and set the condition to enable it for imported Accounts.
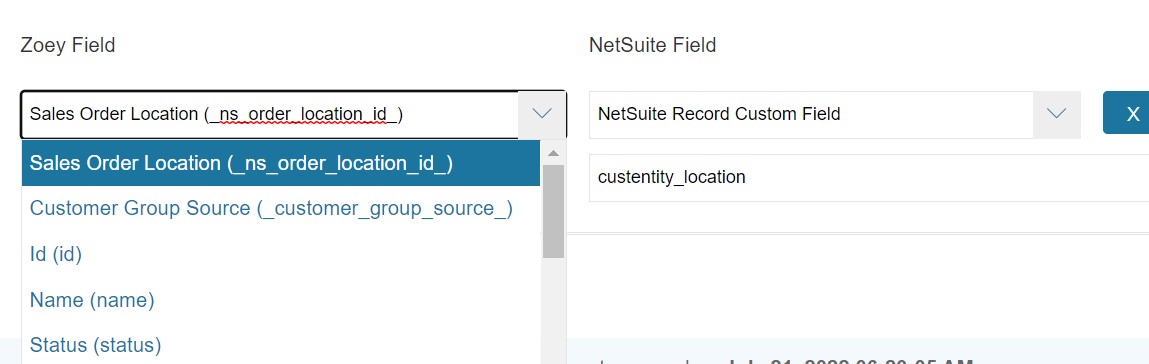
NetSuite Customer Import Field Mapping
This section enables you to choose extra Customer data to sync from NetSuite into Zoey.
- Add Field (Button)
- Choose the Zoey Field (Account Attribute) to put the data in.
- Select the NetSuite Field to pull the data from.
- To choose a Custom Record Field, you must select NetSuite Record Custom Field and then type the exact name of the field.
NetSuite Drop-down Fields can be imported to Zoey Text Attributes!Append
::nameonto the end of the NS field code to import its label, instead of the value ID.
Zoey to NetSuite Customer Export
Zoey can export Accounts and their details to NetSuite!
Contacts without an Account will not be synced to NetSuite.
- Export Zoey Accounts and Contacts to NetSuite
When set to Yes, Accounts and Contacts data can be exported from Zoey to NetSuite through either the "Create NetSuite Customers for Sales Orders" setting or by pressing theSync To NetSuitebutton in the NetSuite tab of the account or contact. - Assign Primary Currency
To use this feature, Zoey Currencies must be mapped to NetSuite Currencies in the
Currency Mappingsection of this page.When set to Yes, if the Zoey Account's Customer Group has Currencies restricted to a single currency then that currency will be set as the Primary Currency on the NetSuite Customer
🚧 This feature should only be used if your NetSuite Environment supports multiple currencies. - Create NetSuite Customers for Sales Orders
When set to Yes, a NetSuite Customer will be created when creating a NetSuite Sales Order if the Zoey Account or Contact is not mapped to an existing NetSuite Customer.
Create NetSuite Customers for Sales Orders must be enabled for NS Customers to be created automatically.
- Sync Custom Fields to NetSuite
When set to Yes, fields will be synced to the Customer in NetSuite according to the rules specified in Required Customer Fields Rules.
Zoey Account/Contact Export Field Mapping
- Select the NetSuite Field to sync data to.
You can choose NetSuite Record Custom Field and provide the Field ID and Field Type to push data to that field.
Be sure that the data you are sending from Zoey is the right type for the field in NetSuite.
- Choose the Zoey attribute to send its data to the specified field in NetSuite.
Sales Reps
Sales Reps are mapped from the Zoey Account to the NetSuite Customer.NetSuite then sets the Customer's Sales Rep on each of their Sales Orders.
The Sales Rep listed on the Order is not synced to your NetSuite Sales Order.The Sales Rep on the Zoey Account is set as the NetSuite Customer's Sales Rep for all Sales Orders.
- Assign Sales Rep
When set to Yes, the NetSuite Customer Sales Rep will be assigned to the Zoey Account/Customer if the NetSuite Customer Sales Rep Name is assigned to a Zoey Team Member on this store. - Assign Partners
When set to Yes, the NetSuite Customer Partners will be assigned to the Zoey Account/Customer if the NetSuite Customer Partner Name is assigned to a Zoey Team Member on this store. - Sales Reps Custom Field Reference
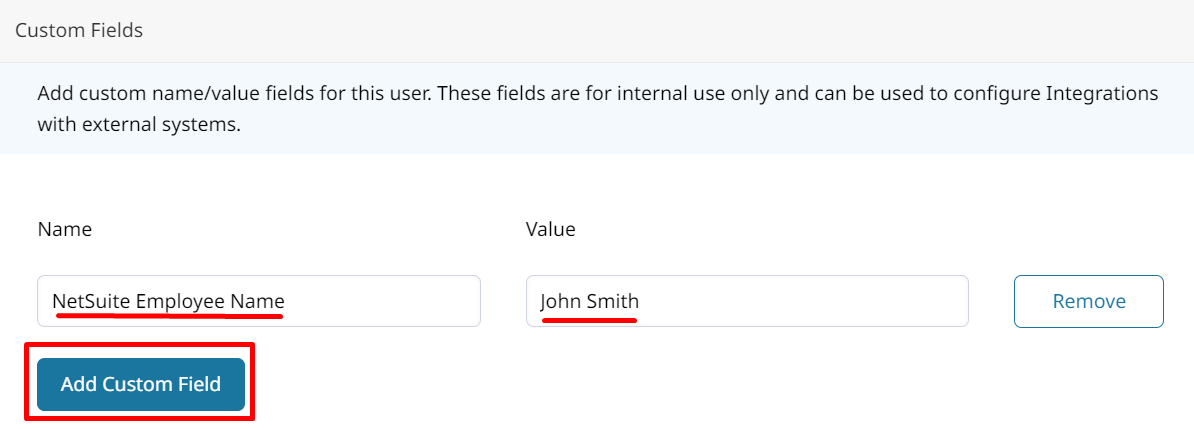
This is the Custom Field created on a Zoey Team Member used to link them to a NetSuite Sales Rep or Partner. Custom Fields can be created on the Team > User List page when editing a Zoey Team Member. This Custom Field should contain the Employee Name exactly as it appears in NetSuite as that is what is used for matching.
How to Map Zoey Sales Reps to NetSuite Employees
-
Create a Custom Field on each of your Users within Team > User List. Simply open a user and click Add Custom Field and create a field which will contain the Name of your employee in NetSuite.
-
Add the newly created Custom Field to your NetSuite Integration Settings within Customers > Sales Reps

-
Save your changes. The Name value in the custom field will now be used to match Sales Reps between systems.
Updated about 2 months ago