NetSuite Subsidiary and Location
The Subsidiary a Sales Order is sent to depends on the default settings or an Account's specific Sales Order Subsidiary ID.
NetSuite Sales Order Subsidiary
Sales Orders being sent to NetSuite are organized by Subsidiary. Orders are recorded to the Customer's default subsidiary unless mapped otherwise.
Set the Subsidiary for an Account
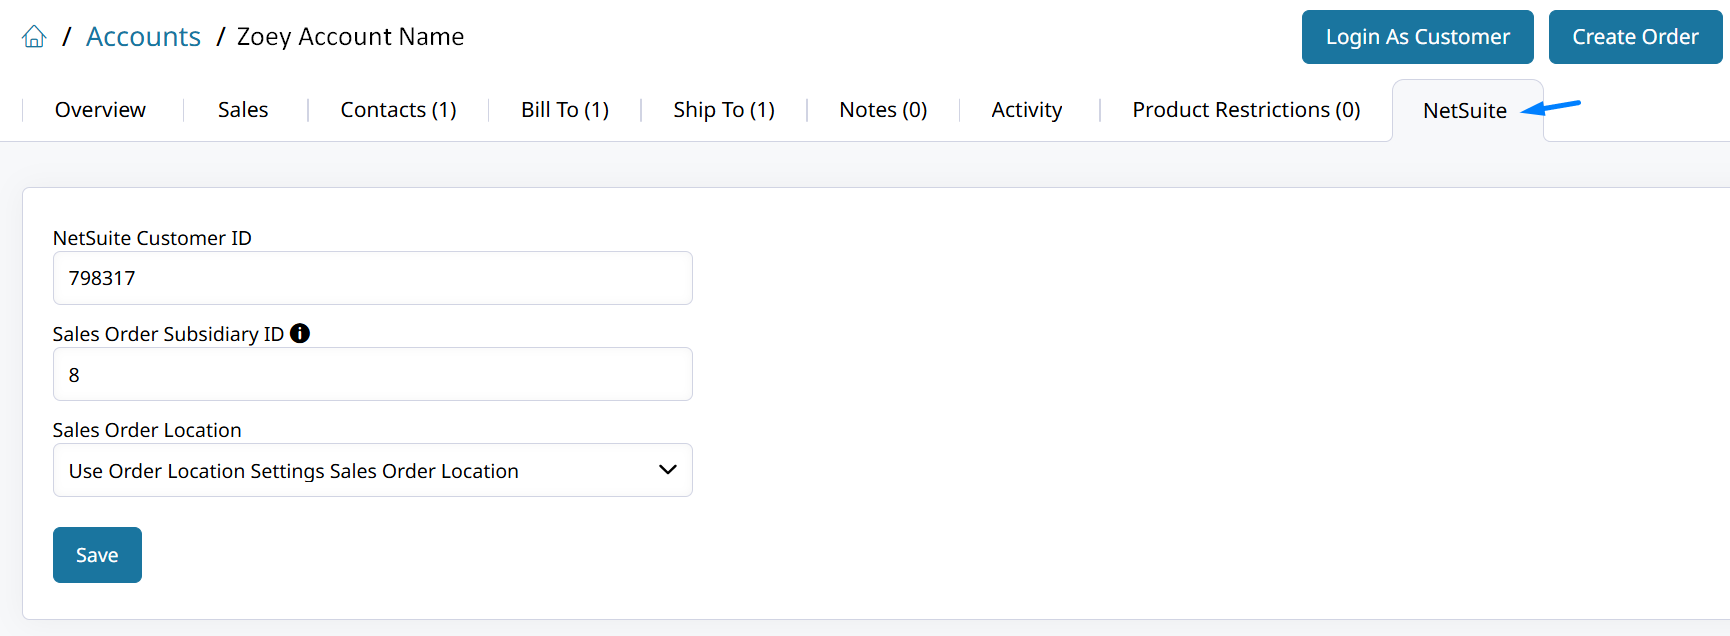
To set a specific Subsidiary that an Account please open up that customer record in Zoey.
Then click on the NetSuite tab to see the following fields:
- NetSuite Customer ID
Internal ID of the NetSuite Customer linked with the Zoey Account. - Sales Order Subsidiary ID
NetSuite Sales Orders created for this Account will always use this Subsidiary ID.
Enter the internal ID number of the NetSuite Subsidiary for this customer's orders. - Sales Order Location
NetSuite Sales Orders created for this Account will use this Location.
The NetSuite Location can be used to track inventory and can be mapped to Zoey Inventory Locations.
Click Here for the Zoey NetSuite Integration's Location Settings.
Default Subsidiary and Location
NetSuite's default subsidiary will be used unless specified otherwise. The Inventory Locations can be mapped between systems so that orders are fulfilled from the right warehouse in NetSuite.
Find the Zoey NetSuite Integration Location settings here.
Import NetSuite IDs to Zoey Account
The NetSuite Customer ID, Sales Order Subsidiary ID, and Sales Order Location can be set or updated in bulk through the Account Import. Use the column headers below to create a CSV that will set these values.
| account_id | account_netsuite_customer_id | account_netsuite_subsidiary_id | account_netsuite_location_name |
|---|---|---|---|
| 3163 | 798317 | Use Order Location Settings Sales Order Location | |
| 3432 | 624790 | 5 | RNT - NY |
Example Data Above
Accounts > Bulk Actions > Export Account Data To Edit will include these NetSuite Account Data columns.
Change Account NetSuite Subsidiary or Location
To change the NetSuite Subsidiary for Sales Orders set on each of your Zoey Accounts in bulk:
- Start by selecting the Accounts by checking the box to their left.
- Click Bulk Actions and then Export Account Data To Edit.
- Download the CSV file.
- Open that spreadsheet and remove all of the columns except those 4 shown in the table above.
- Make your edits to the data of each Account on the CSV.
- Upload the CSV through the Accounts import.
This process works for many other bulk changes in Zoey! The Sales Orders for each of the updated Accounts will now be recorded to the updated Subsidiary and Location.
Updated 8 months ago