Okta OpenID
Allow your Okta users to sign into a Zoey Storefront using their Okta login credentials.
SSO is not available on all plans.Please refer to https://www.zoey.com/pricing/ for more information on SSO availability. If you are on a plan with out it, contact Support for more information on adding it to your Store.
Setup in Okta
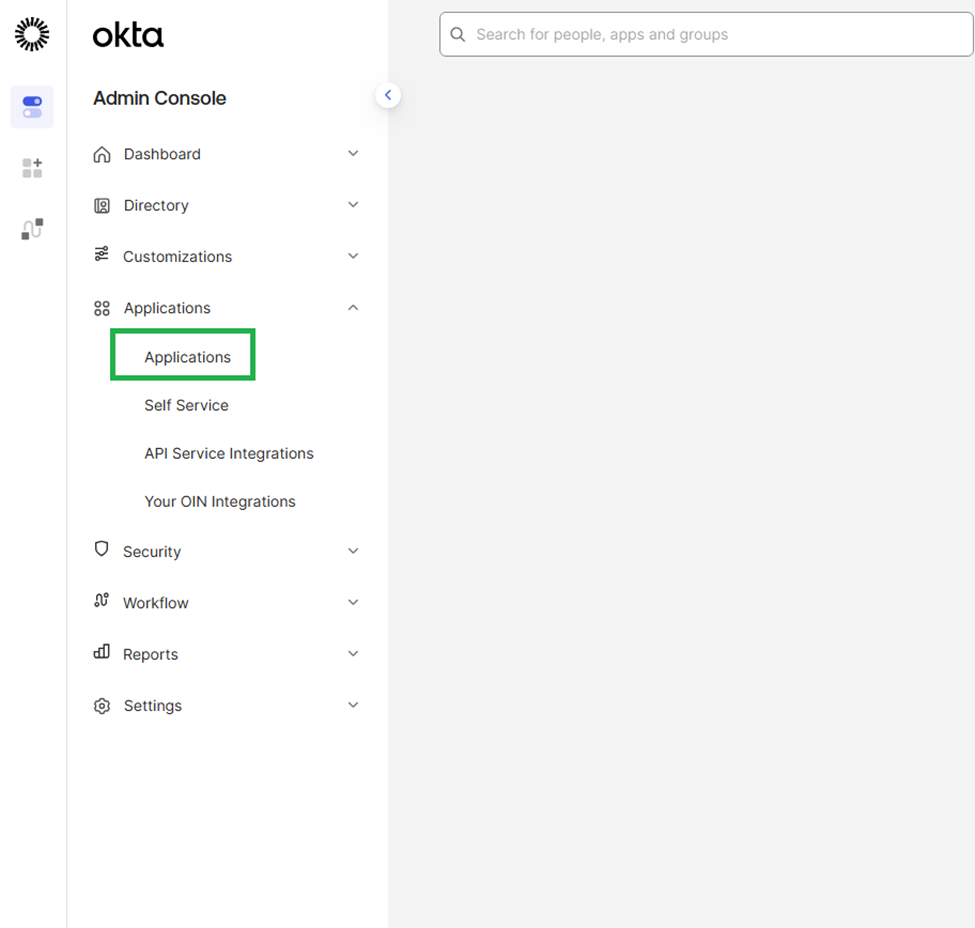
In Okta, select the Applications menu item
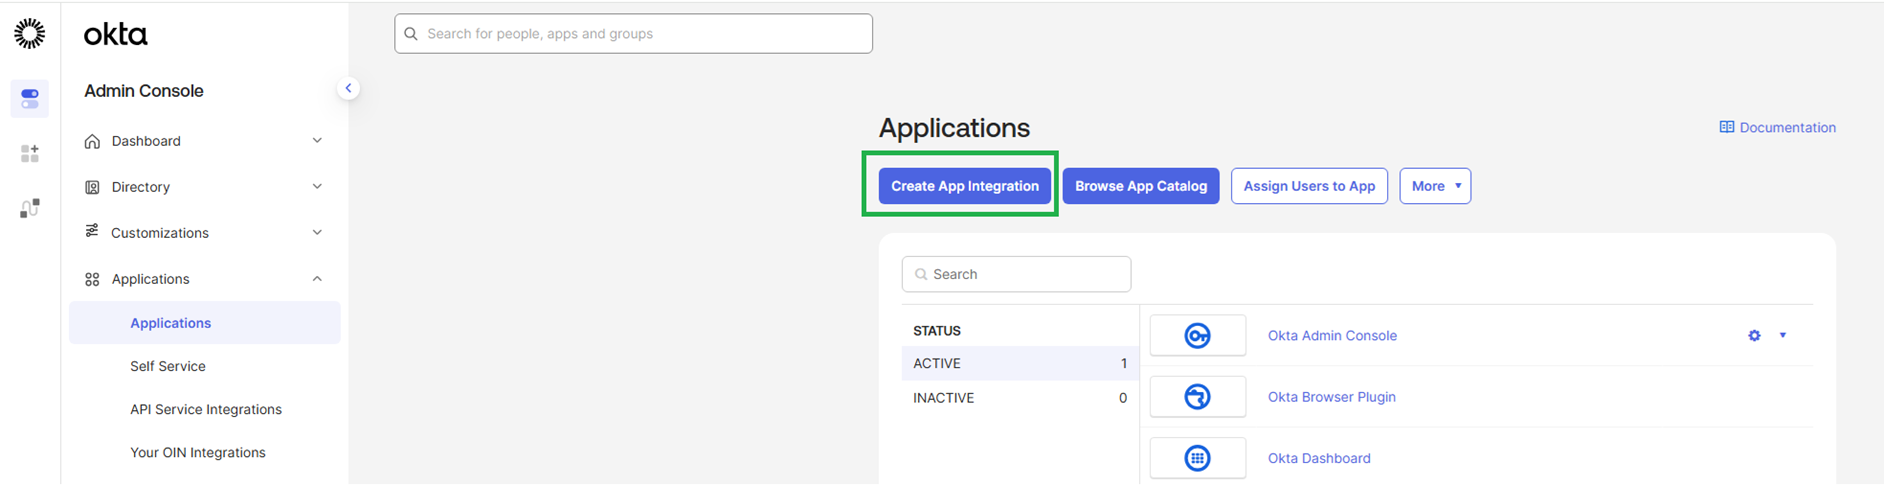
Click on Create App Integration
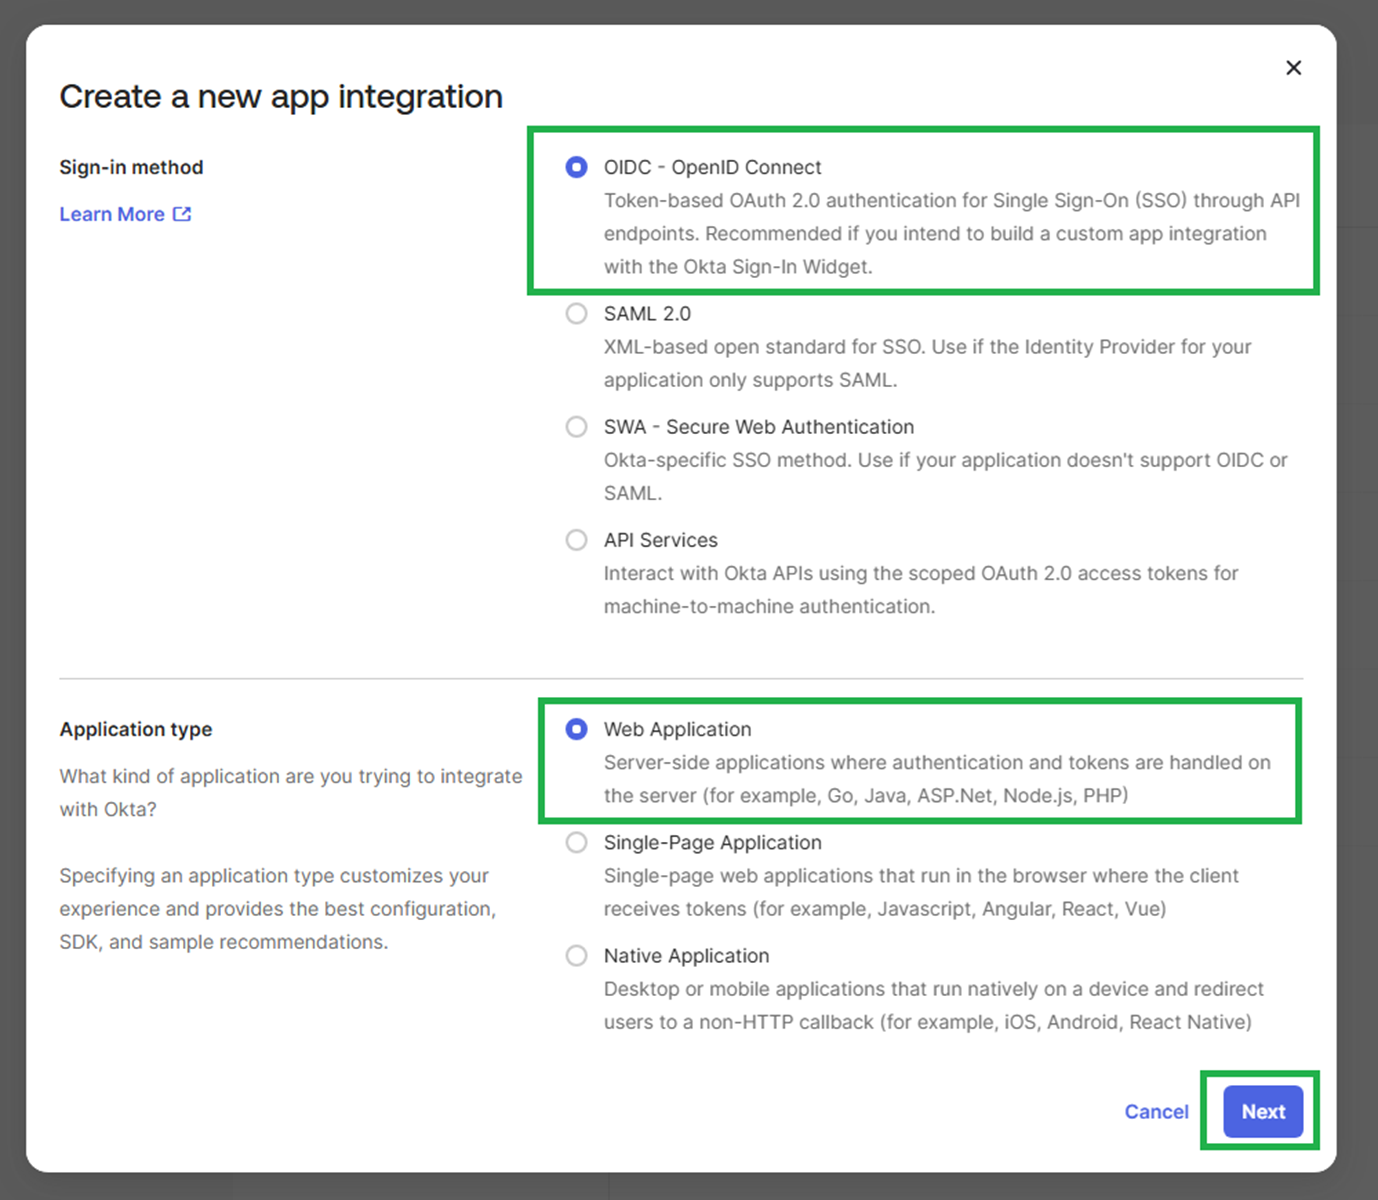
Sign-in method - Select OIDC - OpenID Connect
Application type – Web Application
Click Next
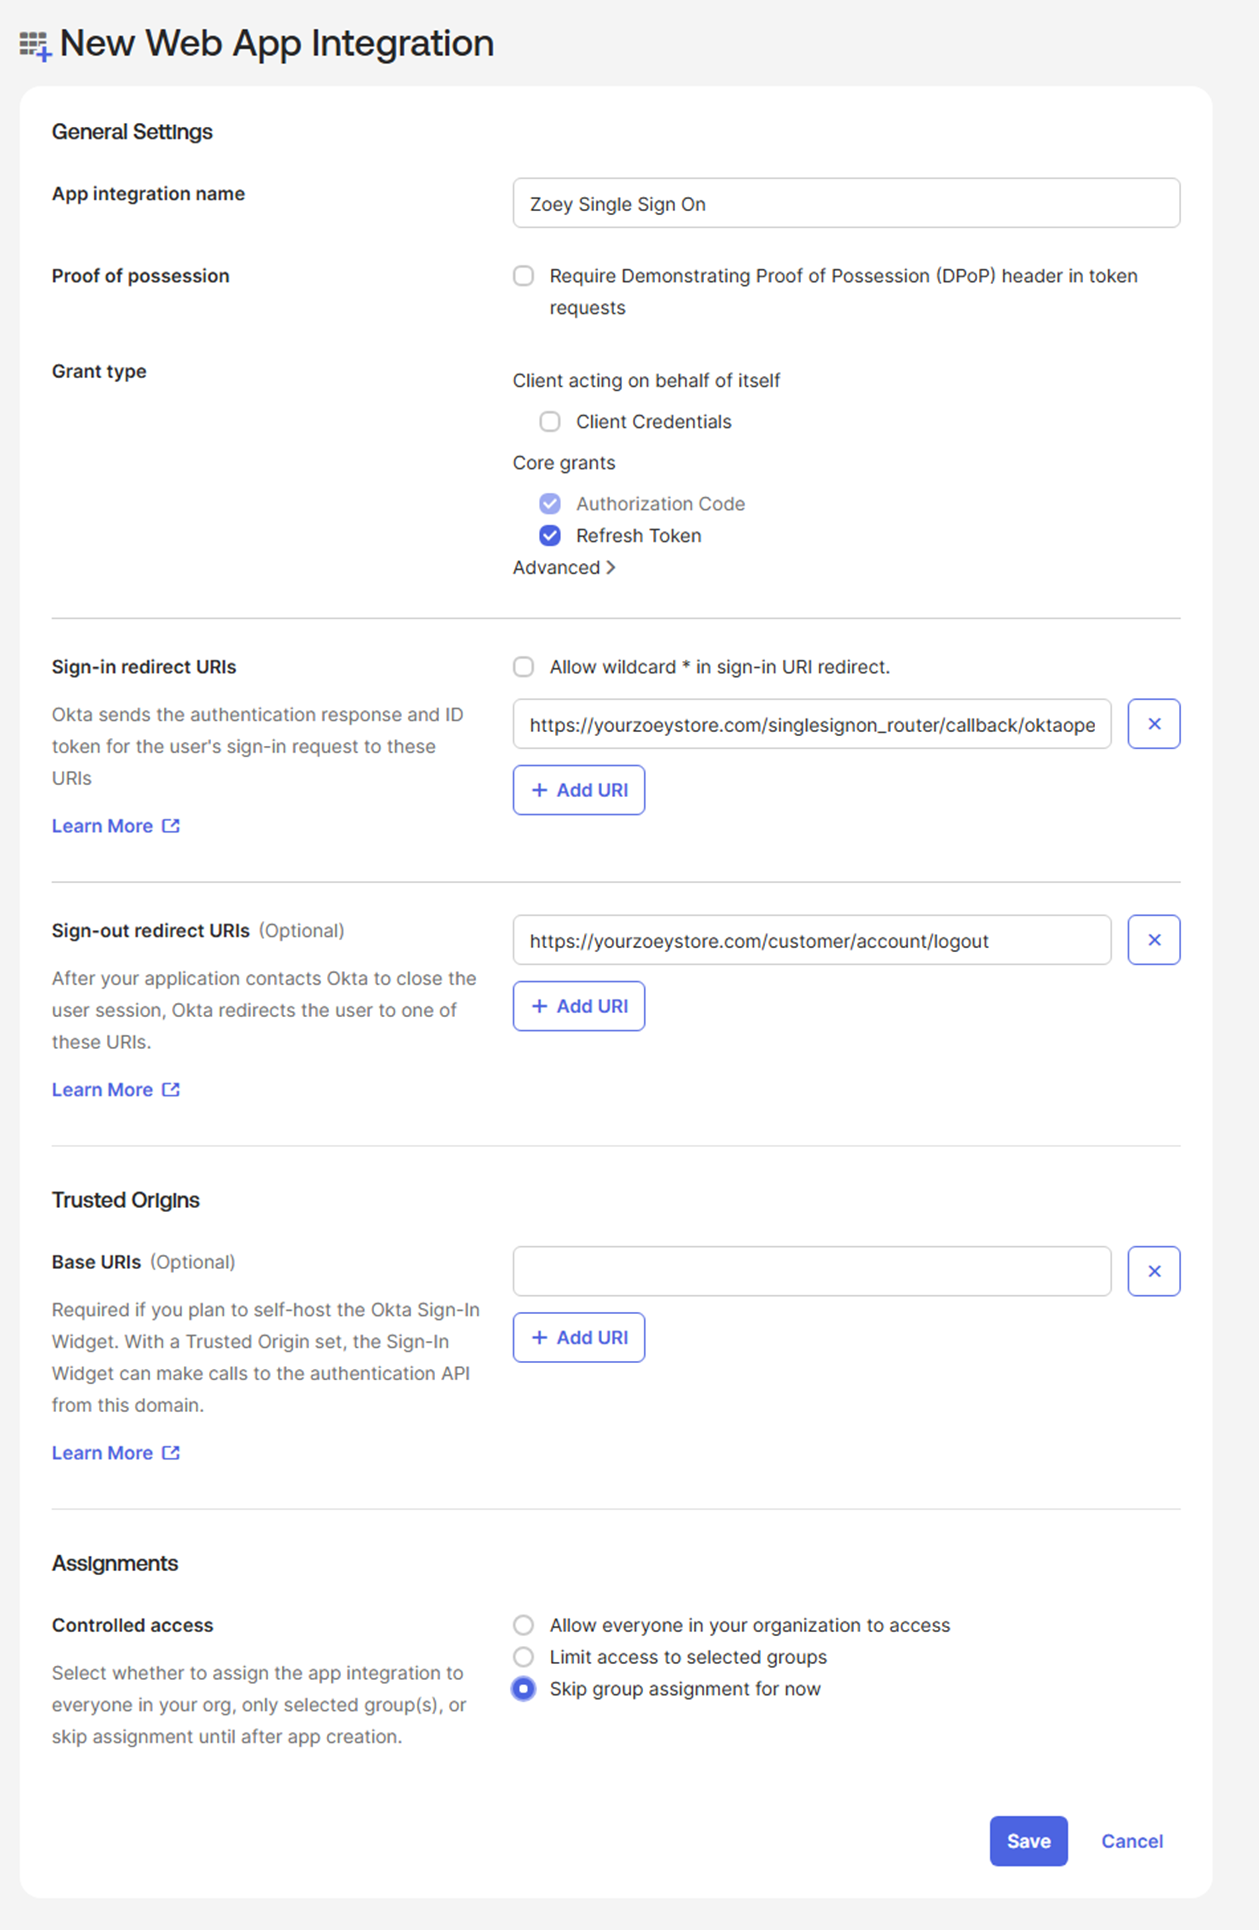
App integration name
Zoey Single Sign On (or other applicable name)
Grant type > Core Grants:
Authorization Code
Refresh Token
Sign-in redirect URIs
https://yourzoeystore.com/singlesignon_router/callback/oktaopenid/
Sign-out redirect URIs
https://yourzoeystore.com/customer/account/logout
Both the Sign-in and Sign-out redirect URLs should use the base URL of the Storefront of your Zoey Store. Note that this URL may be different than the URL of your Zoey Admin Panel
Controlled access
Specify which of your Okta users should have access to the application.
This step can be skipped on setup, but users must be assigned to the application before they can Log-In using their Okta logins.
Click Save.
After the application is saved, you will be redirected to the General tab.
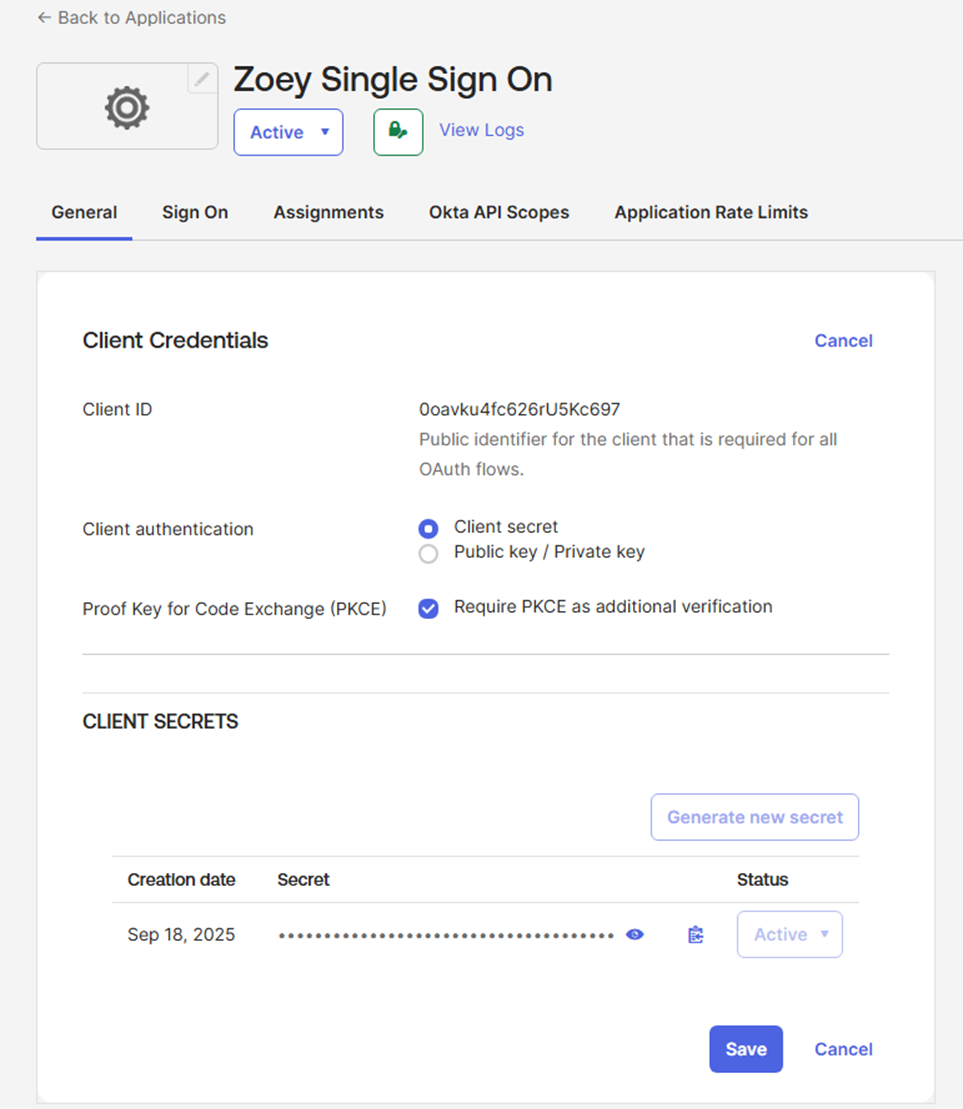
In the Client Credentials section, click Edit
Tick Proof Key for Code Exchange (PKCE)
Click Save
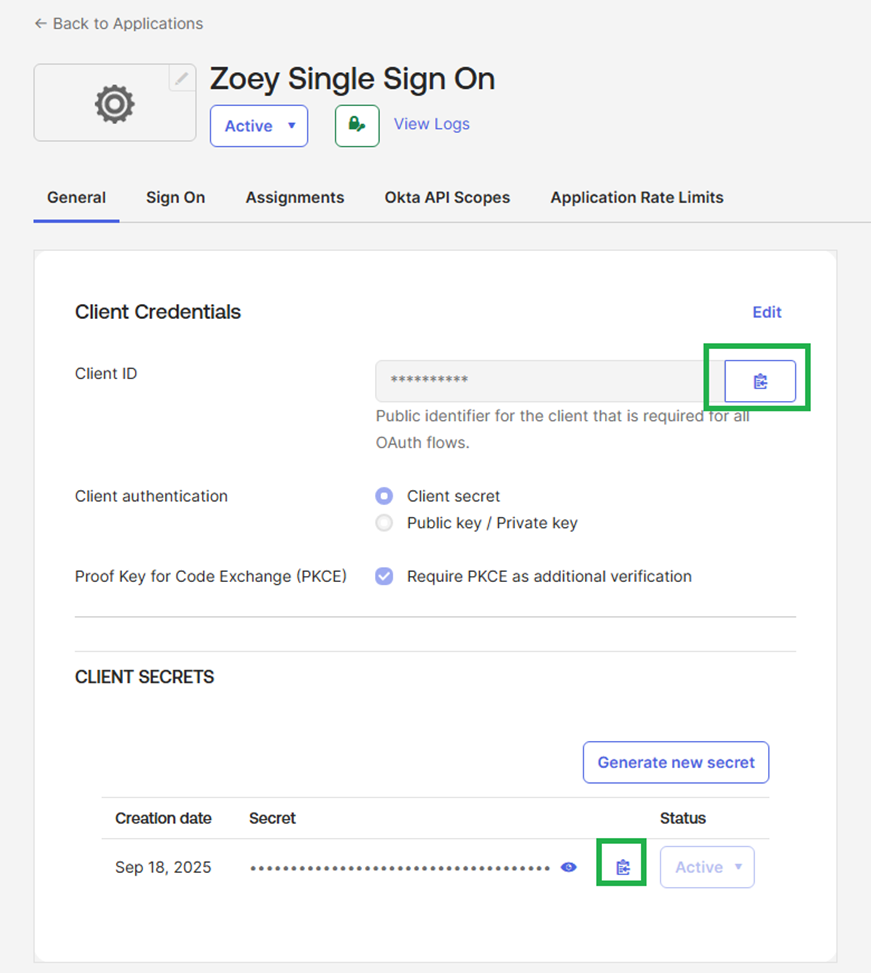
When prompted in Zoey, enter the Client ID and Client Secret from the General tab. You can copy these values to the clipboard as needed.
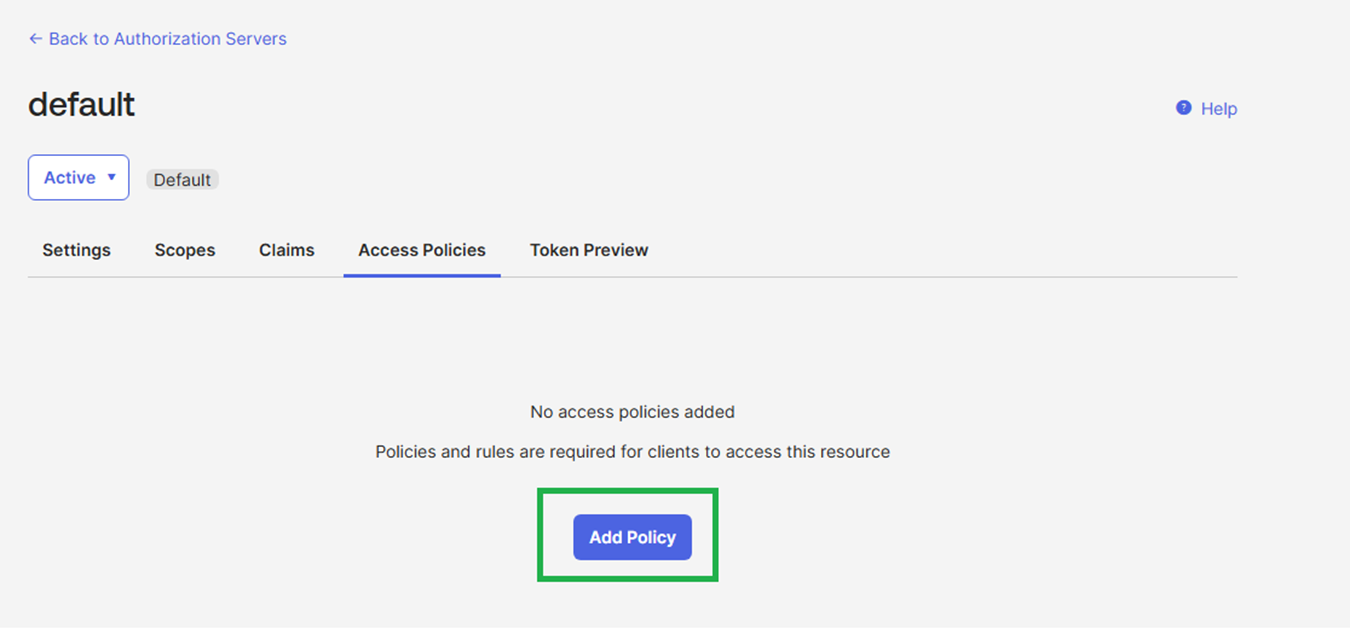
The Open ID application will require an assignment to an Authorization Server. If you have an existing Authorization Server you can add the application to it. To add the application to the default server, follow the steps below.
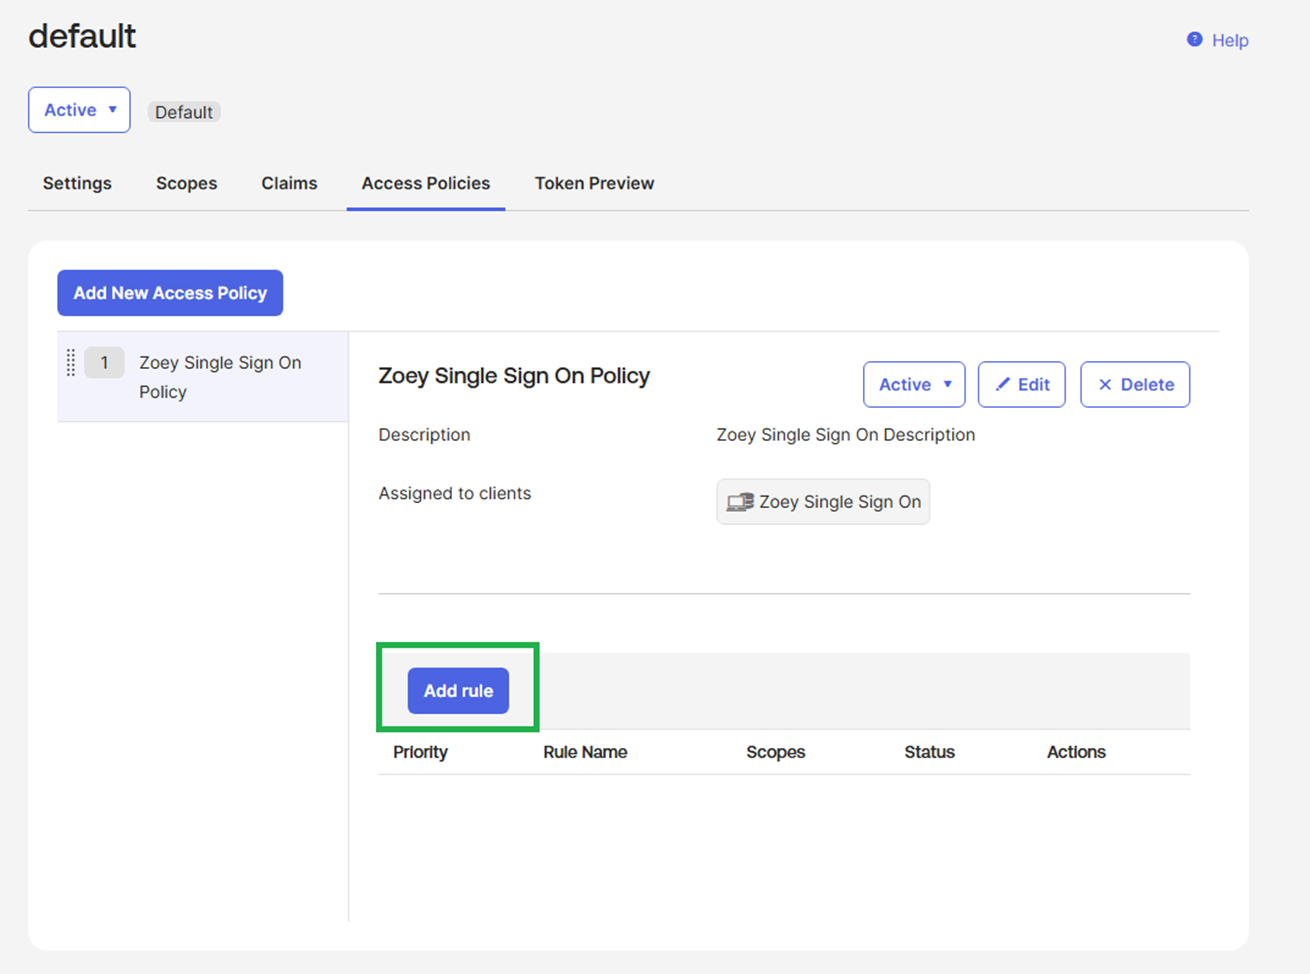
Navigate to Security > API in the left menu, then click the “default” Authorization Server.

Click the Access Policies tab and click on Add Policy.
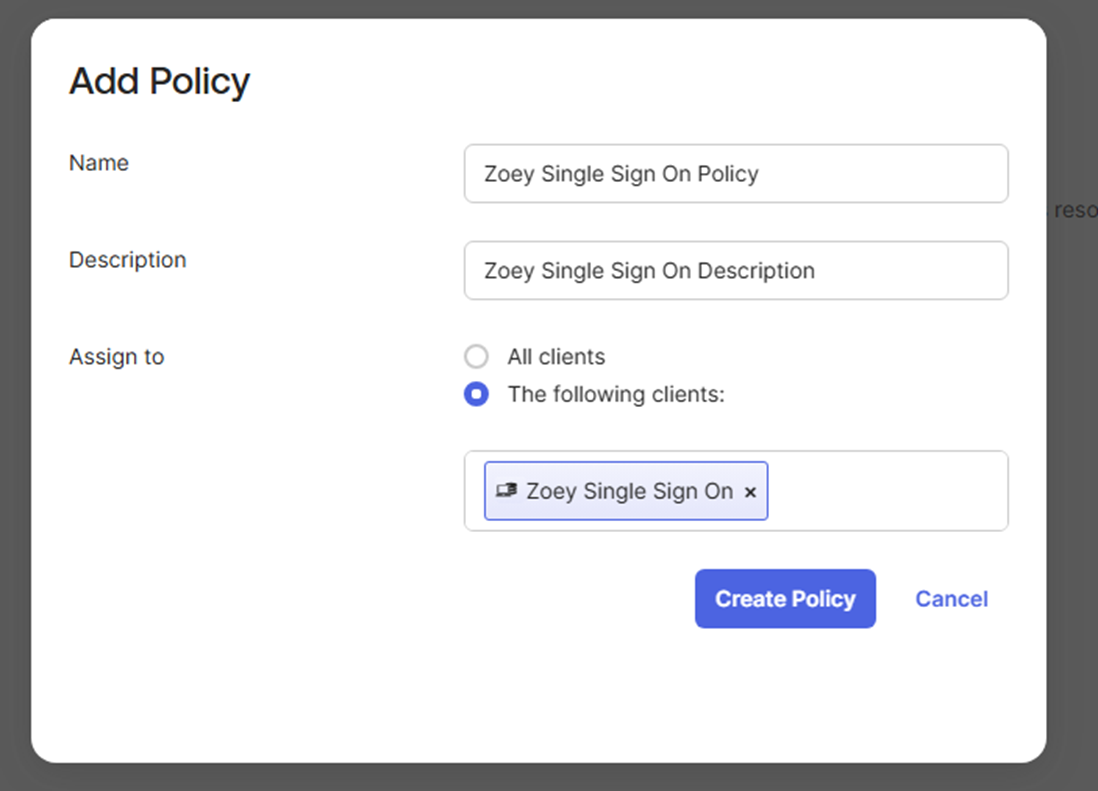
Provide a name and description for the policy then assign it to the Zoey Single Sign On Application client.
Click on Create Policy.
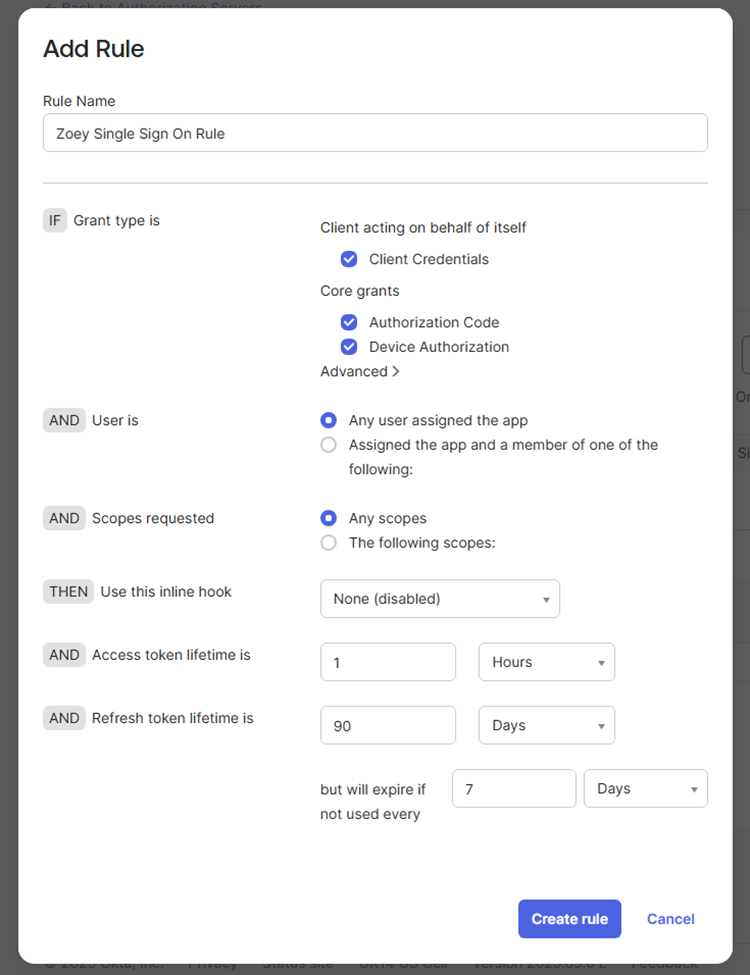
Click on Add rule in the policy:
Provide a name for the rule. The default values can be used for the other fields, or customize these as necessary. Click Create Rule.
You're now ready to connect in the Zoey OKTA OpenID Integration!
Setup Okta SSO in Zoey
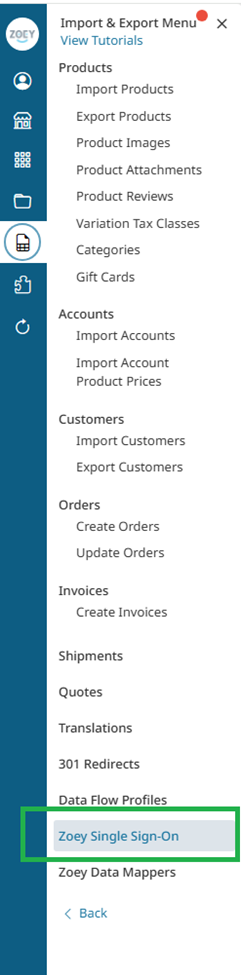
In your Zoey Admin, open the Import & Export Menu and navigate to Zoey Single Sign-On.
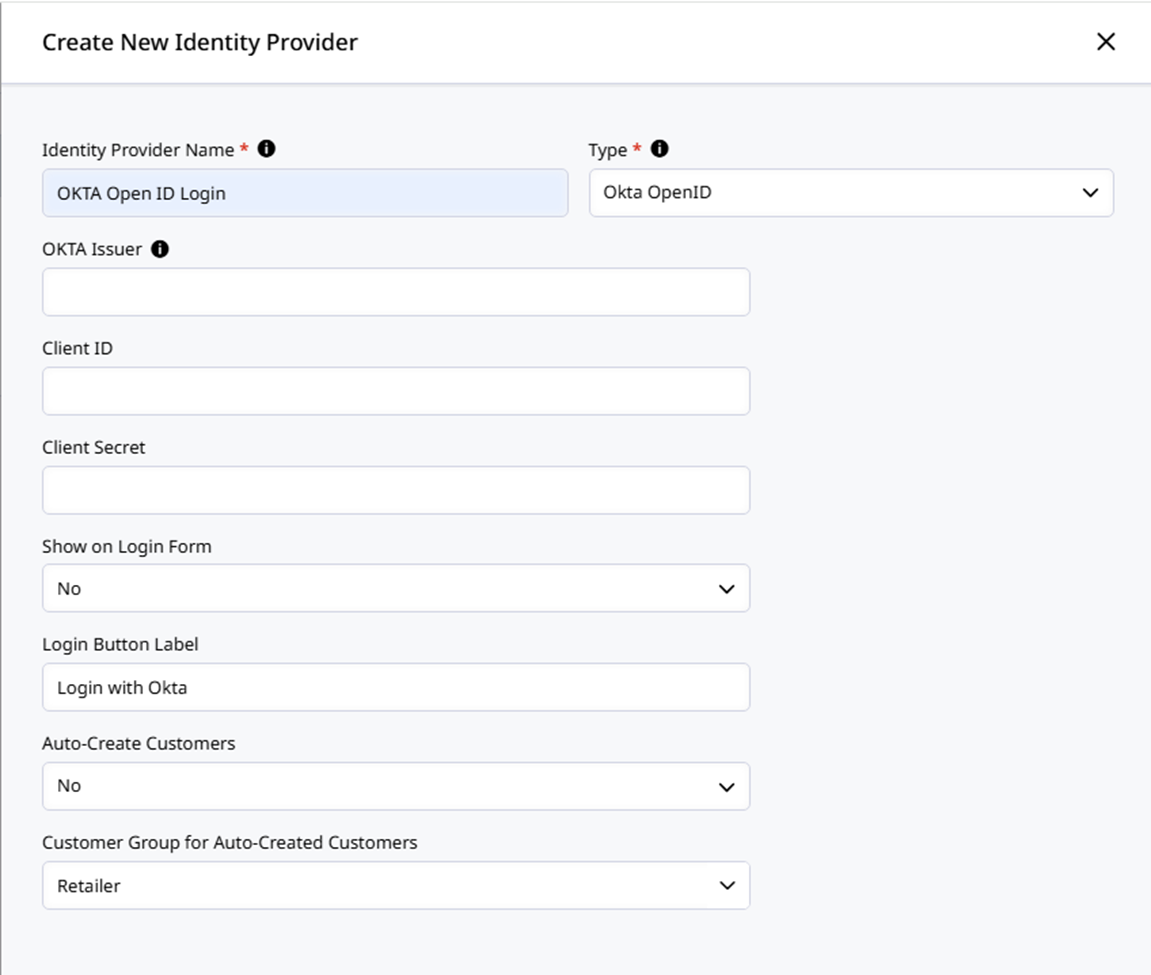
Click Add Identity Provider to get connected to your Okta SSO.

Provide an Identity Provider Name and select Type Okta OpenID. This will prompt the configuration fields to appear. Enter the following values from Okta:
OKTA Issuer
The Issuer URL for your OKTA App Integration. An example format is https://integrator-ZZZZZZZ.okta.com/oauth2/default
The values to use for the ZZZZZZZ values can be found in the URL of your Okta environment.
Client ID
The Client ID from the General tab in Okta
Client Secret
The Client Secret from the General tab in Okta.
Additional Settings
Show on Login Form
This will trigger a login link to appear on the Zoey Customer Login page with the text provided in Login Button Label
Auto-Create Customers
This will allow customers who Log In with Okta whose email is not yet in Zoey to automatically be created as a Contact in Zoey. Automatically created Contacts will be assigned to the Customer Group specified in the Customer Group for Auto-Created Customers setting.
When set to No, customers who Log In with their Okta account and are redirect to a Zoey store where their Okta email does not exist on a Contact will not be able to Log In.
Click Save
Updated 10 months ago