
Creating a Contact Role for Account Locations
Zoey lets you create Roles for your customer Contacts with custom permissions.The Contact's Role also decides which emails they are sent about their Account's orders, invoices, shipments and credit memos.
Use these steps to create a new Contact Role, for example a Role that only receives email about their Account Location's orders, or an Accounting Role that only receives email about invoices.
Creating a New Role
- In the Zoey Admin, go to Customers > Roles & Permissions. You'll see the Roles you can give each Contact.
- Click Add New Role.
- In Label, give the Role a name.
- In Description, record the purpose of the Role.
- Set Role Type to Additional Contact Role.
There are Main Contact Roles and Additional Contact Roles
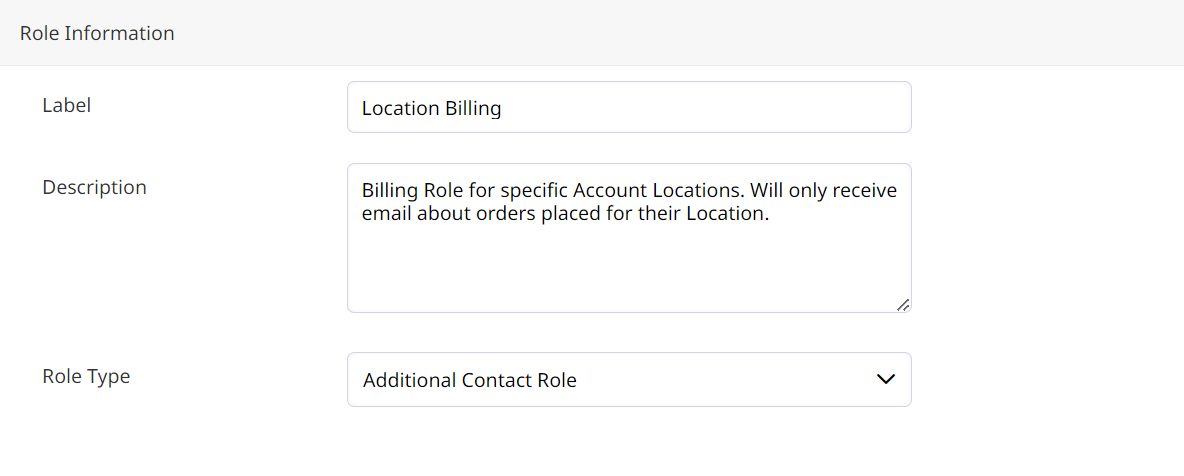
- Choose which Permissions this Role gives the Contact. Some permissions decide which emails the Contact receives, so read through each one carefully.
- Click Save.
Location Permissions
Additional Contacts that are restricted to Location(s) will only have access to their Location's Orders.
- View Account Orders/Drafts - When the Contact views past Orders/Drafts, they only see those placed for their Location.
- Receive Emails for Account Orders - The Contact is sent email about every order placed for the Account, regardless of Location.
- Receive Emails for Own Account Orders - The Contact is only sent email about the orders they place, or the orders placed for their Account Location.
There are other email permissions regarding Orders, Invoices, Shipments, and Credit Memos.Each has an option for Own Company which only sends emails about their Location's orders.
Contact permissions only apply to the Account Location if they are an Additional Contact restricted to Account Locations.A Contact can be restricted to multiple Locations with different Roles at each! See an example.
Example: An Accounting Role for Your Customer's Accounting Department
Create a Role for your customer's accounting contacts, so they only receive email about their Account Location's Invoices and can pay them.
- Go to Customers > Roles & Permissions and click Add New Role.

- Set the Label (for example, "Accounting") and a Description.
- Set Role Type to Additional Contact Role.
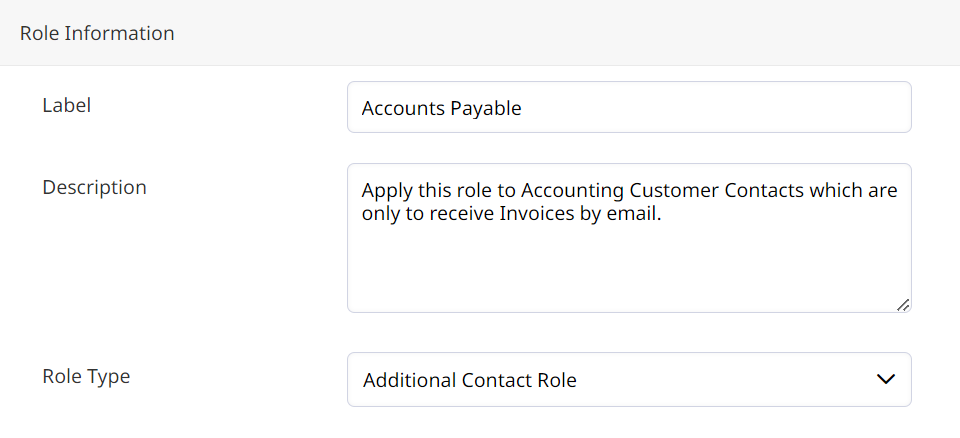
- Check these permissions:
- Receive Emails for Own Account Orders
- Receive Emails for Own Account Order Invoices
- Click Save, then assign the Role to the accounting Contact.
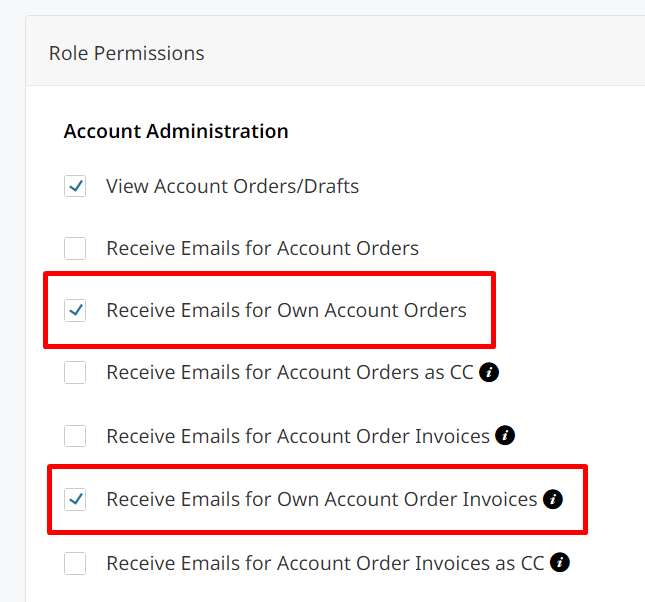
Contacts with this Role receive email about their Location's Invoices and can pay them.
Updated 1 day ago
Did this page help you?