XPS Ship
Steps to integrate with XPS Ship
XPS Ship utilizes an API connection to tie to Zoey. In this tutorial we will explain how to link properly to XPS to manage your shipping.
1. Create a User Role
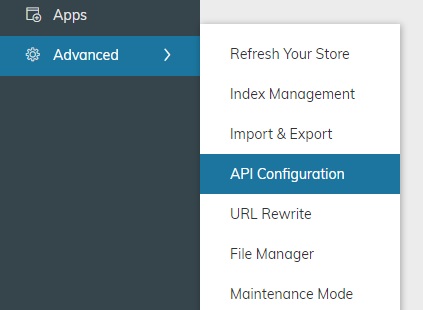
Log into your account and then visit Advanced -> API Configuration

Under Standard API / API Roles, click Manage.

In the top right hand corner, you will now have Add a New Role.
Name your Role and click on Role Resources to continue. The Role Name is for internal purposes only. For this example, we recommend naming your role "XPS" so you know what it's being used for later.

Under “Resource Access” use the dropdown box to select All. Then click Save Role in the top right corner of the screen.

2. Create a User
Creating a user is done in the same area of the administration area. Return to Advanced > API Configuration and then under Standard API / API Users click Manage.

In the top right corner click Add New User.
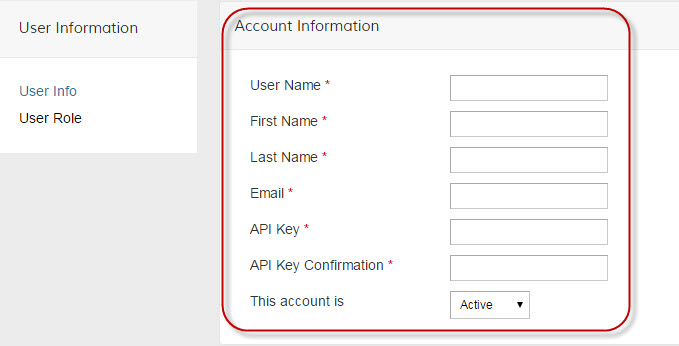
Fill out the user information and be sure to set the account to Active.
The API key is similar to a password, so enter anything you will be able to remember such as "Zoey123".

Then in the User Information menu at left, click on User Role. Select the role you just created (named "XPS" if you followed our recommendation). Then in the upper right corner click Save User.

3. Integrating into XPS Ship
Login to your XPS Ship account and click Settings from the Navigation Menu.

Scroll toward the bottom of the page and select eCommerce Integrations.

Select Add eCommerce Integration.

All integration options will be listed. Select Magento. (NOTE: Zoey's APIs are compatible with Magento, which is why you are using it in this case.)

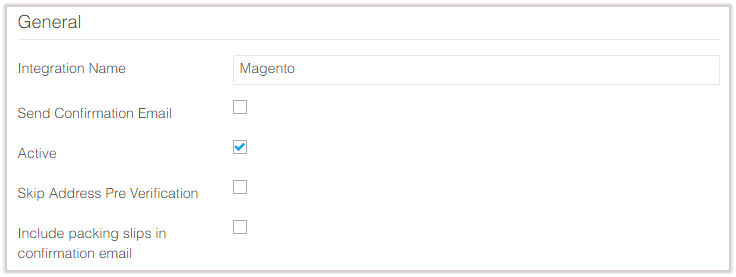
- Add an Integration Name, “Magento” will be the default, but it can be changed to anything you’d like. We recommend changing it to "Zoey" for clarity.
- Check the box if you want to have a confirmation email sent when orders are fulfilled.
- By default, the Active box will be checked.
- Check the box if you want to Skip address Pre Verification on orders.
- Check the box “Include Packing slips in confirmation email” if you’d like the packing slips included with the confirmation email once labels have been generated.

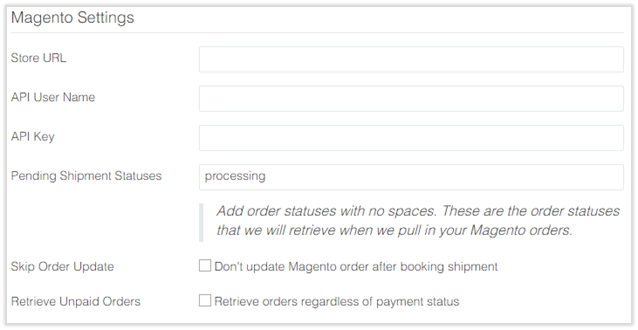
- Enter the Store URL (the site you type in to visit your store in a browser, like http://www.domain.com)
- API User Name and API Key (this was created earlier in this tutorial)
- Enter the type of Pending Order Statuses you wish to pull into your orders list in Webship for processing. (Processing is the default for Zoey for this step, but you can select whatever is better for your workflow.)
- If you wish to skip the Order Update process after booking check the box “Don’t update Magento order after booking shipment”.
- If you wish to retrieve unpaid orders as well, check the box “Retrieve orders regardless of payment status”.

When finished filling out the necessary integration info, select Save New Integration.

Your Zoey store is now connected to XPS Ship. Orders will start appearing in the Ship tab of XPS Ship. XPS Ship pulls orders from the last 30 days that have been paid and are in the statuses you specify.
Updated 8 months ago
