Creating Categories
Categories are used to organize products into logical groups on unique pages. This allows merchants and customers to easily find a set of closely related products on a filterable page.
Creating a set of categories is one of the first steps in getting your store ready, and can be done to create a helpful framework for your products.
If you have started using one of our migration tools you may already have a few categories imported from your old store.
Step 1. Navigate To Products > Categories
In your Categories Page you will see the Category List to the left from where you can click on a Category to edit it or add a new one.
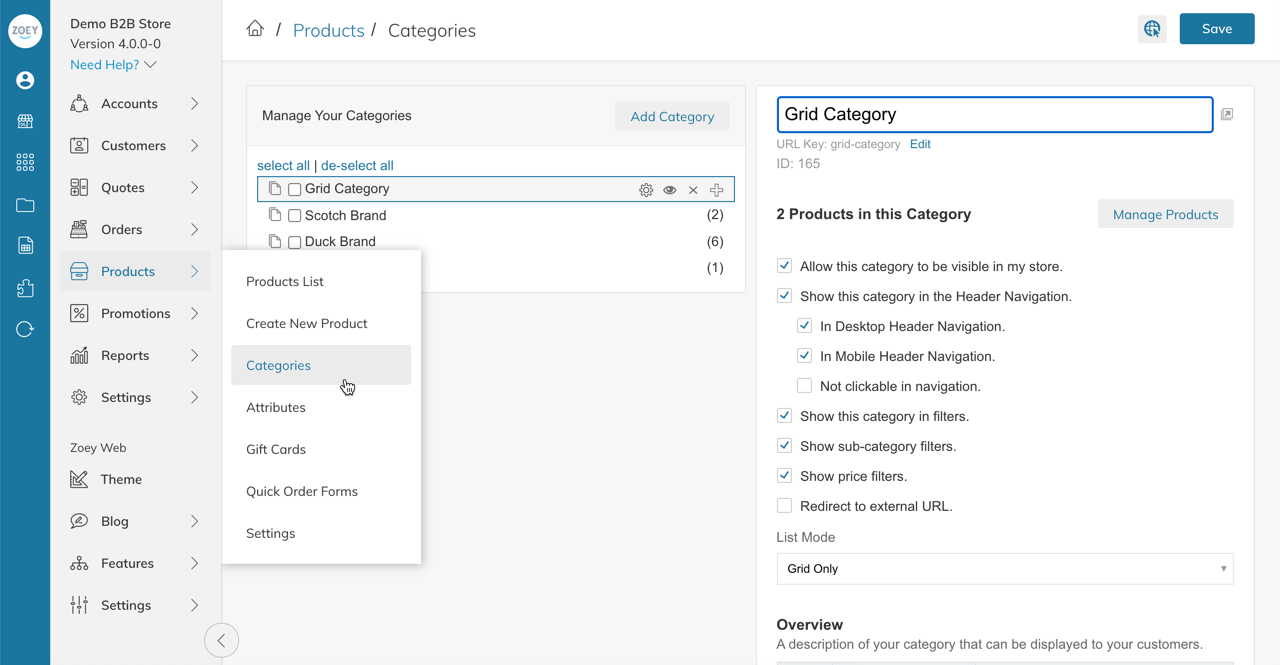
Step 2. Add A New Category
Click on Add Category to the right of "Manage Your Categories" to create a new category.
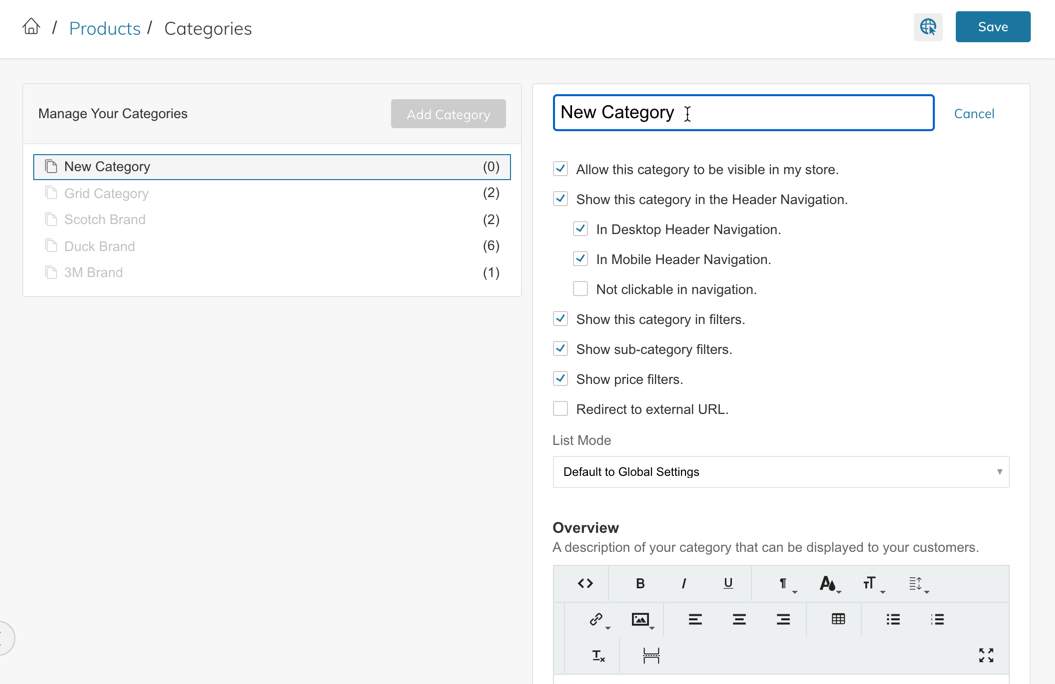
1. Category Name
Enter the name of the Category as it will display in your store (frontend).
2. Enable/ Disable
You can decide if the Category is enabled or disabled by checking off the box for Allow this category to be visible in my store.
By clicking on the "eye" icon in the Category Menu to the left you can control this, as well. If the eye is crossed through, the Category is disabled.
3. Automatically display in Header Navigation
If the box is checked for Show this category in the Header Navigation the Category will be added automatically to your Header Navigation. If the box is not checked the Category remains enabled and accessible with the direct URL, just not through the Navigation.
4. Not Clickable in Navigation
This setting will make the category link not clickable in the Header Navigation. This is typically used when a parent category like "Shop" needs to be in the Navigation, but the customer should not be able to click on it, rather they will need to click on links to the child-categories.
5. Show This Category In Filters
This setting controls whether or not the category will appear in the filters on parent category pages.
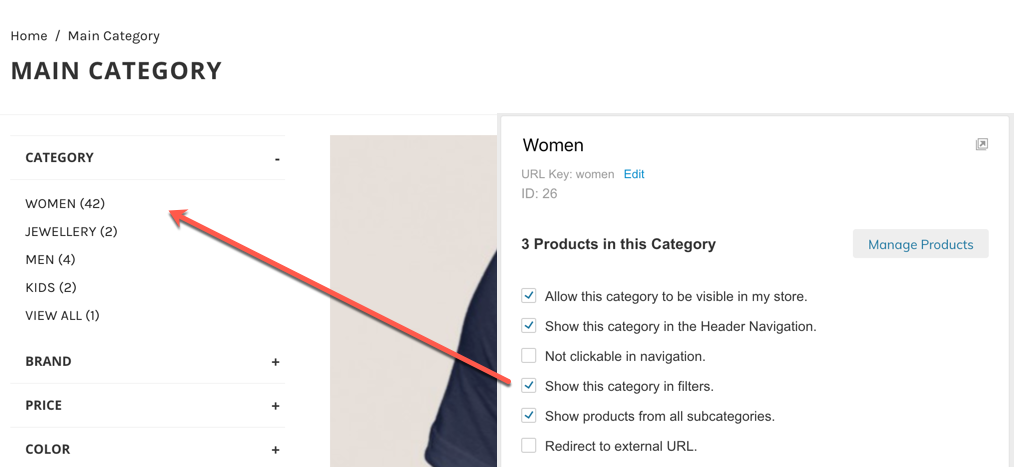
6. Show Sub-Category Filters
This setting controls whether or not the Category filter will show on this category page. Note: This setting only works if "Enable Sub-Category Filters on Category Pages" in Products > Settings is set to Yes.
7. Show Price Filters
This setting controls whether or not the Price filter will show on this category page. Note: This setting only works if "Enable Price Filters on Category Pages" in Products > Settings is set to Yes.
8. Show Products from all Subcategories
This setting controls whether or not the products assigned to this category's sub-categories will be shown to the customer when on this page.
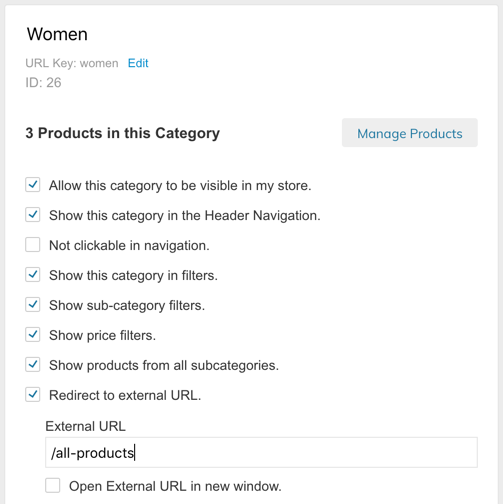
9. Redirect to external URL
If you want to redirect your category to an external URL or you want it to open in a new tab, check this box and enter the full URL. If required, check the box to Open External URL in new window.
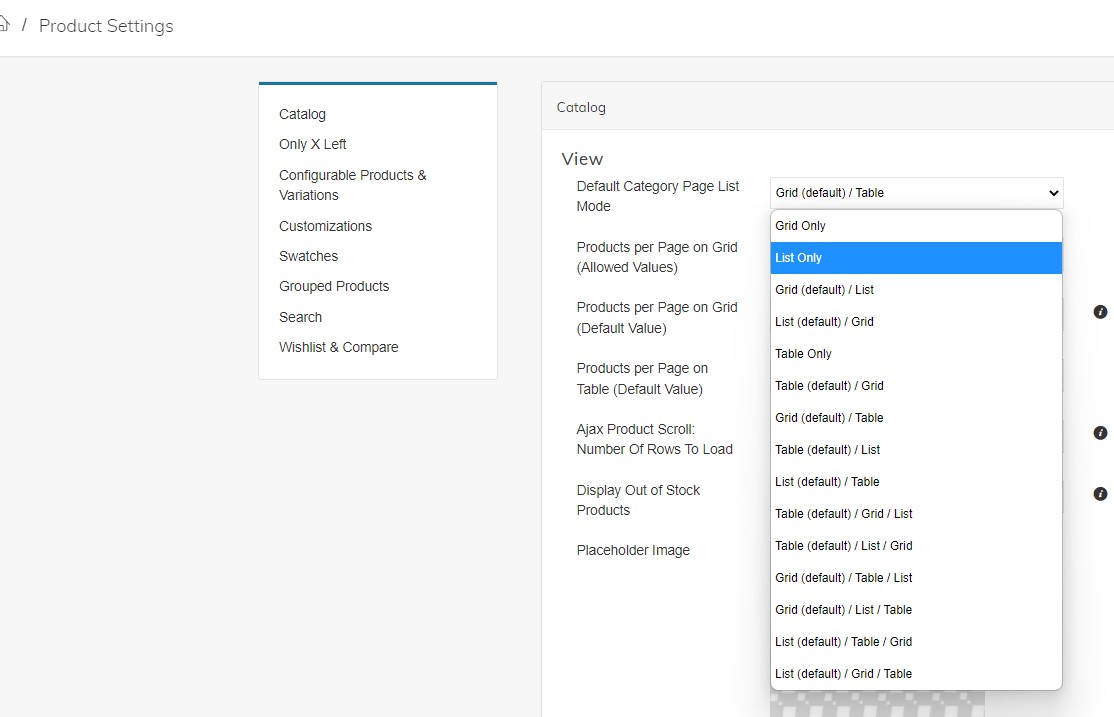
10. List Mode
This setting controls the view of the products on this individual category page. Set to "Default To Global Setting" for the page to use the setting from Web Settings > Product Settings > Catalog
11. Overview
Enter a description of your Category that can be displayed in the Category page, visible to your customers.
Display the Category Description (Overview)The Category Description will only be visible in the frontend if you add a Category Description Block to your Category template within Edit My Design.
12. Images
Click here to learn more about Category Images
Category ImageWhen adding a new category you need to save first, then you will see the field to upload category images.
The category image and thumbnail will be visible on the frontend only if you have the Category Image Block or the Category Thumbnail Block added to the category template.
13. Edit My Design
Once you give the Category a Name and then Save, you will be given the option to edit the design. From the drop-down menu, you can assign a different Category page template and customize the design and layout for specific categories from within Edit My Design.
14. Additional Category Info
This information can be added to your category template using the Visual Design Editor's Additional Product Information block. It is also used for the Mega Menu.
Step 3. Save And Refresh
After completing your configurations, click Save Category from the top right corner.
You may be notified to refresh to view your changes. Only click this button if you are finished with your changes and ready to see them on the front-end
Changes could take up to 5-10min to show on your storeIf you do not click the "Refresh" button when prompted, changes will automatically appear after 5-10min.
When adding a new category you won't be able to add images until you have saved the category first.
Updated 9 months ago
