Amazon Pay
Amazon Pay Overview
Amazon Payments is a payment gateway that allows customers to pay for online products with their Amazon account. It's secure, familiar, and easy-to-use - a great way to grow your business.
Customers can pay using their Amazon account during checkout only.
Add Amazon Pay for Checkout
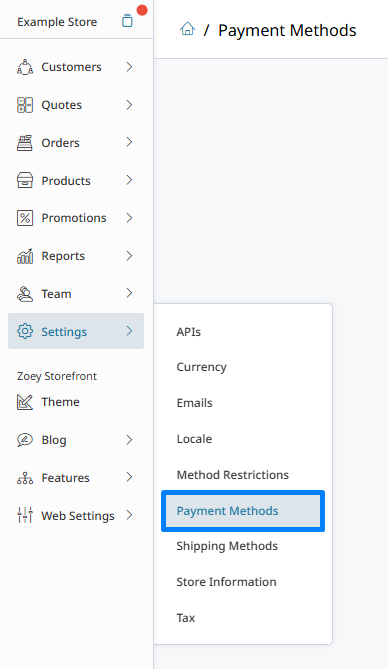
After logging in, hover over Settings and to click on Payment Methods
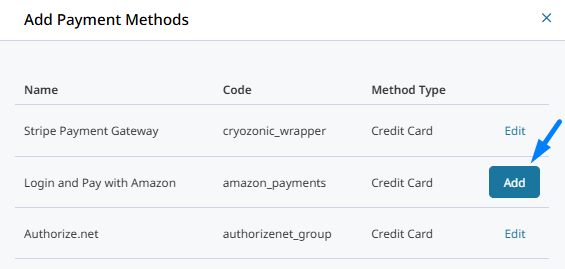
Click Add Payment Method from the either the top right corner of the page. Click Add next to "Login and Pay with Amazon" to enable the method.
Then set Enabled to Yes. Continue on configuring the settings for Amazon Pay to provide that method of payment for your customers during checkout.
Set-up And Configure Amazon Pay
When Amazon Pay is enabled, find it in the list of payment methods and click Configure to open its settings.
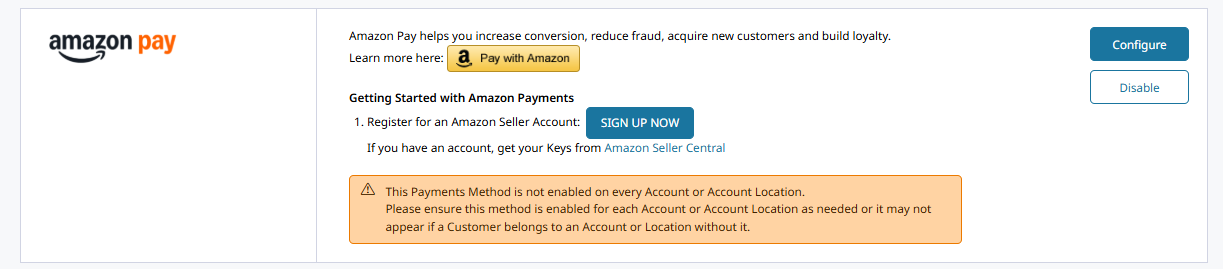
You will see a list of fields that can be adjusted to enable and customize your Amazon Pay gateway.
Getting Your Amazon Pay Credentials
You will need the following credentials from Amazon to configure Amazon Pay in Zoey.
- SellerID or MerchantID
- API Public Key ID and API Private Key
- Client ID
Below are steps to get that information from within Amazon Seller Central.
Merchant ID
- Log in to Amazon Seller Central
- Click the Settings (gear icon)
- Go to Account Info
- Locate your Merchant ID
API Public Key ID & Private Key
- In Seller Central, go to:
Settings → Integration → API Keys - Click Create New Key Pair
- Download the private key file
You will receive:
- Public Key ID (shown in Amazon)
- Private Key (.pem file) (download once)
The private key can only be downloaded once. Store it securely.
Client ID (Login with Amazon)
- Go to: https://developer.amazon.com
- Sign in with your Amazon account
- Navigate to:
Login with Amazon → Security Profiles - Select or create a Security Profile
- Copy your Client ID
JavaScript Origins And Allowed Returns URLs
You MUST follow the steps below to add Allowed JavaScript Origins and Allowed Return URLs to your Amazon Seller Center in order for Pay With Amazon to work.
Allowed URLs Setup
- In the Security Profile, go to Web Settings
- Click Edit
- Add the following:
Allowed JavaScript Origins:
https://yourstoredomain.com
Allowed Return URLs:
https://yourstoredomain.com/amazon_payments/checkout/authorize/https://yourstoredomain.com/customer/authorize/https://yourstoredomain.com/
Add your store's URL as an Allowed JavaScript Origin and for the Allowed Return URLs
Amazon Pay Settings
Set the other configurations to adjust how your Amazon Payments gateway functions and displays.
| Show Pay with Amazon on Cart | Displays a payment button while your customer is viewing their cart. |
| Show In Minicart | Display payment button in the mini-cart in your header. |
| Payment Action | Decide the process on receiving a payment. Authorize Only verifies if your customer has enough money in their account to complete the transaction. You will have to send an invoice to receive their payment. Authorize and Capture both verifies your customer's payment while also debiting the funds into your account. Authorize Only through Amazon Pay can not be captured by ShipStation - Use Payment Action: None if ShipStation will determine when to capture the payment. |
| New Order Status | Useful for communicating the state of your customer's order. If you choose Authorize Only as your Payment action, we recommend Pending so your customer knows the transaction has not been completed until you accept their payment. We recommend Processing if your Payment action is Authorize and Capture. |
| Email Store Name | The name of your store as it will appear in the Amazon Email (if different from your Zoey Store name in Setup > Site Configuration) |
| Soft Descriptor | Additional information used in the Amazon Email on Order Success |
| Asynchronous Mode | Please review Amazon Documentation before enabling. |
| Button Label | Pay With Amazon - Label on the button |
| Button Color | Choose from different button colors |
| Button Size | Choose from different button sizes |
| Sandbox Mode | Only enable if using Amazon Sandbox - you will only be able to checkout using an Amazon Sandbox user created in your Seller Central panel. |
| Debug Mode | Enable if instructed by Amazon or Zoey for testing purposes. |
After choosing your settings, click Save.
Updated 3 months ago