Stripe ACH
The Stripe Payment Method allows you to enable ACH payments
Stripe must approve your Financial Application to enable ACHTo get approved for Stripe ACH Production, Stripe has to approve your Financial Application. Stripe calls this "Financial Connections." Their email often comes from [email protected].
Once your application is received by Stripe, they may take several business days to approve it. Once approved, you may set ACH to Live mode in Stripe, and then you can switch Zoey ACH to Production/Live.
How It Works
Using Stripe ACH payment, the customer will be able to log-in to their bank account and select an account to link. This "Instant Verification" will allow the user to place the order and immediately initiate ACH payment. ACH Transfer may take 1-4 business days to process depending on the financial institution being linked.

Once a Bank Account is Linked, it will be available to select for future Orders and on the Invoice Payment screen for both the Customer and the Zoey Administrator.
When the order is placed, a payment intent in Stripe will be initiated and processed. In Zoey the invoice/payment will not be created until the Bank Transfer is complete. Please note, if ACH is used for placing the order, the payment transfer will be processed, it will not wait for the order to ship. Depending on the Financial Connection processing the transfer could take a few minutes to a few days. If the ACH Transfer fails, the Order will be canceled.
Step 1: Setup Stripe for ACH
Part 1: Enable Stripe's "Financial Connections"
Use the link below to fill out the application to use Stripe's Financial Connections. This will allow users to connect to their bank accounts.
https://dashboard.stripe.com/setup/financial-connections/activate
Note: If you do not complete this step, the following message will be shown when trying to use ACH for Payment: You are not registered to use Financial Connections. Please submit your registration at https://dashboard.stripe.com/financial-connections/application
Part 2: Setup Webhooks
In your Stripe Dashboard, navigate to Developers > Webhooks.
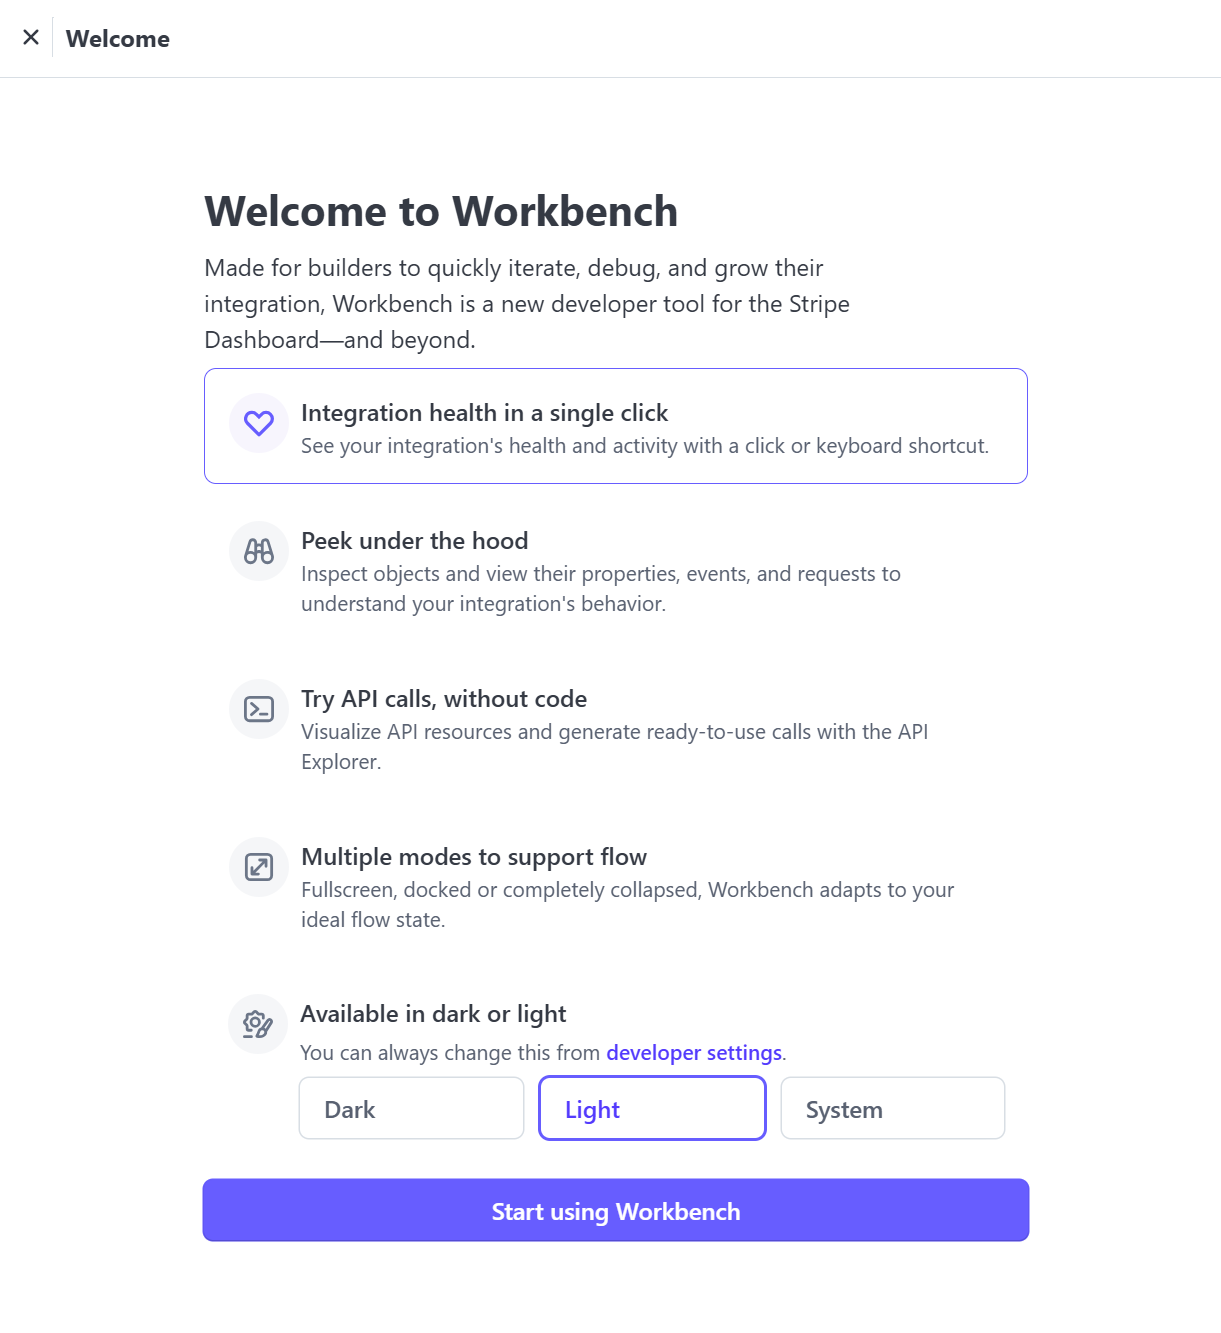
- Choose a display mode (light/dark) and the Start using Workbench
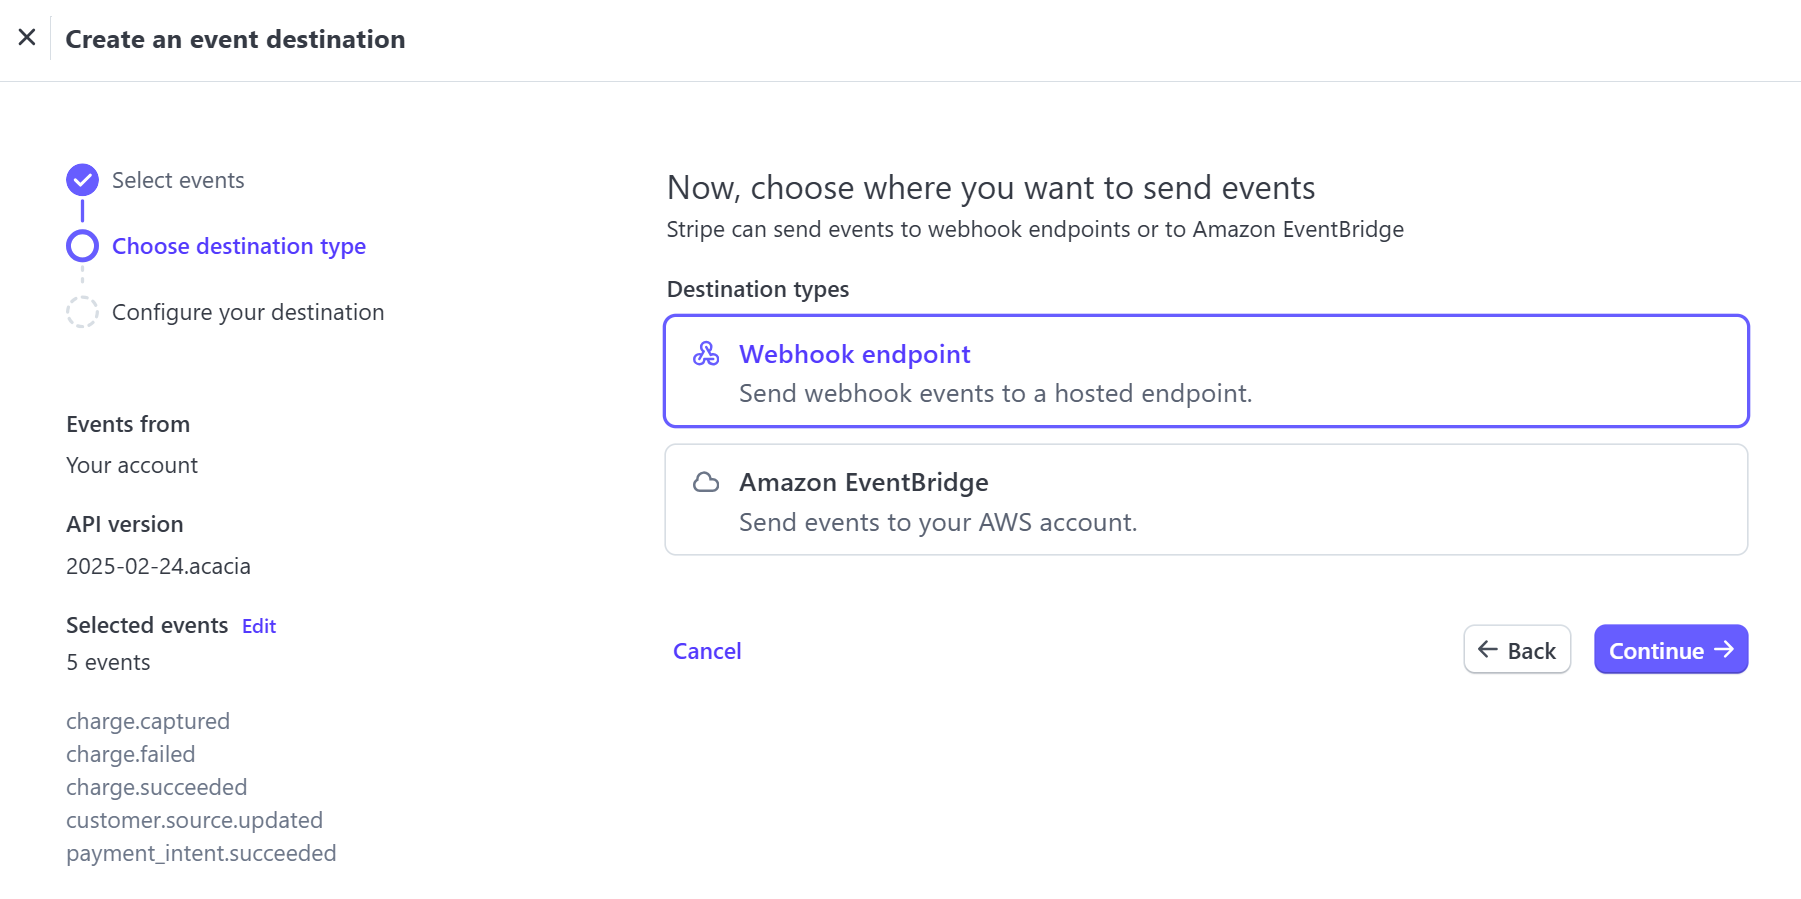
- Click +Add destination and then in the next page we'll configure the endpoint and events.
Select Events
- Events from should be left as Your Account
- API Version leave as the default, or choose most up-to-date version.
Select events to listen for:
Only the events below are required for ACH. Search for them under Events to select them.
charge.capturedcustomer.source.updatedcharge.failedcharge.succeededpayment_intent.succeeded
Once all 5 are selected, click Continue.

Set the Destination
-
Leave Webhook endpoint as the Destination type, then hit Continue.
-
Input the Endpoint URL like so:
https\://{YOUR-ZOEY-ADMIN-DOMAIN}.com/zoey_stripe/webhooks{YOUR-ZOEY-ADMIN-DOMAIN}must be replaced with the actual URL of your Zoey admin or if you have a domain configured that domain name. Stripe will not follow 301 redirects so if you have a domain setup for your Zoey Store you must use that.
Resulting in a full Endpoint URL like:https://ts123456-container.zoeysite.com/zoey_stripe/webhooksorhttps://www.domain.com/zoey_stripe/webhooks -
Description can be left blank.
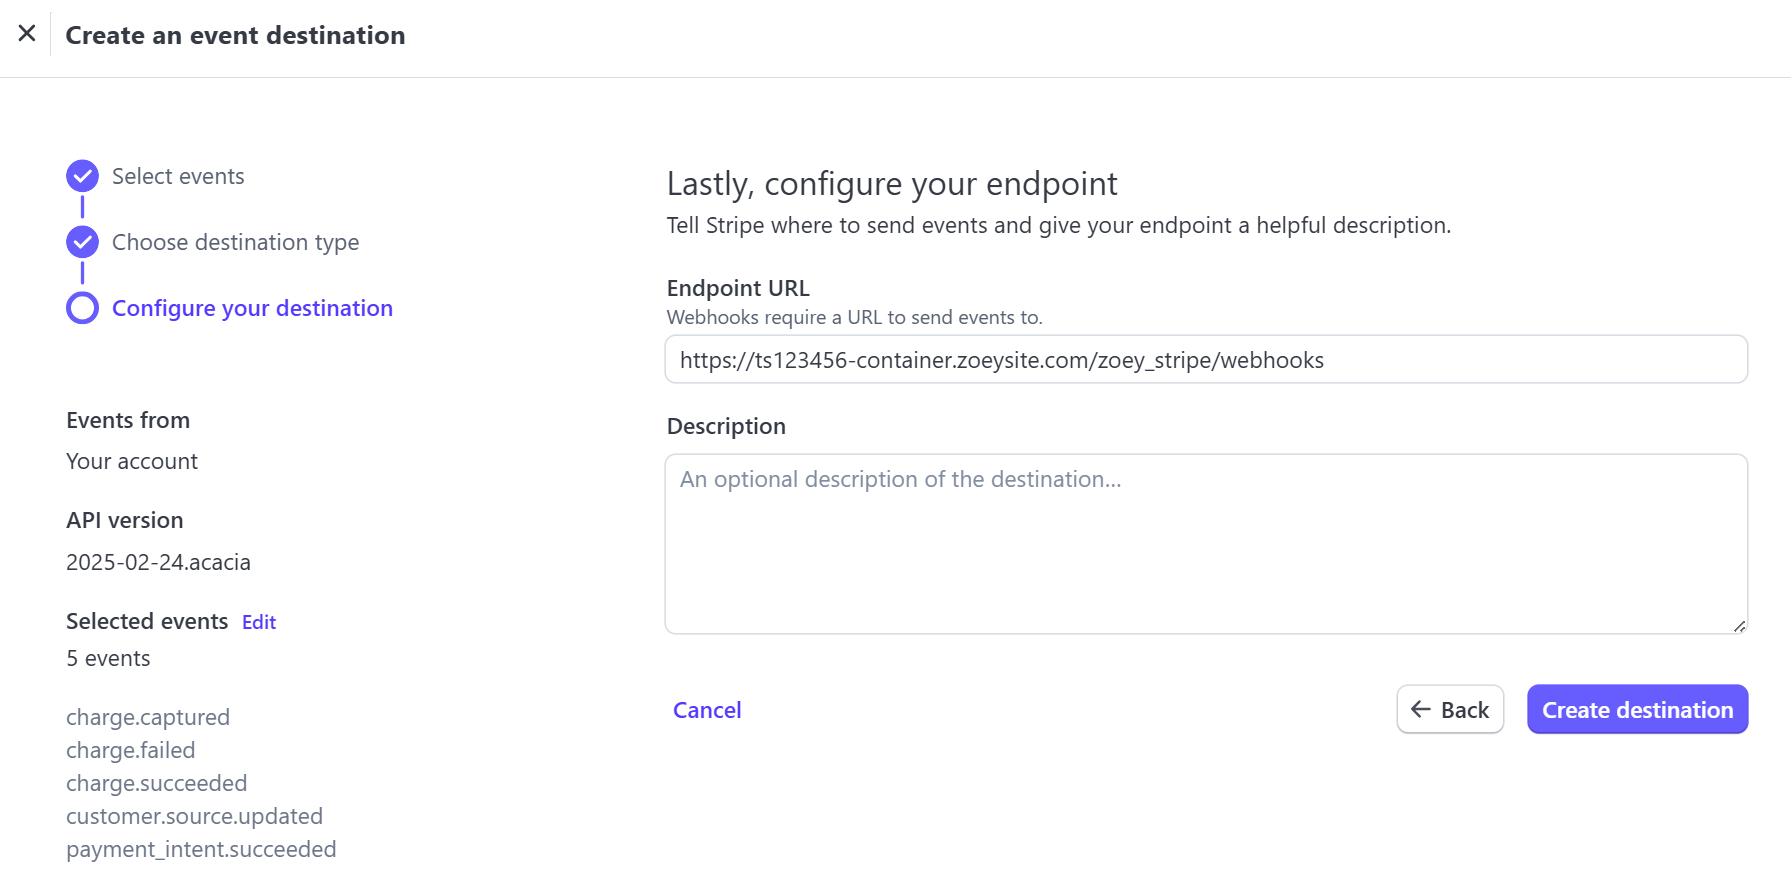
Click Create destination and you'll have completed the webhook setup in Stripe!
Step 2: Enable Stripe ACH in Zoey
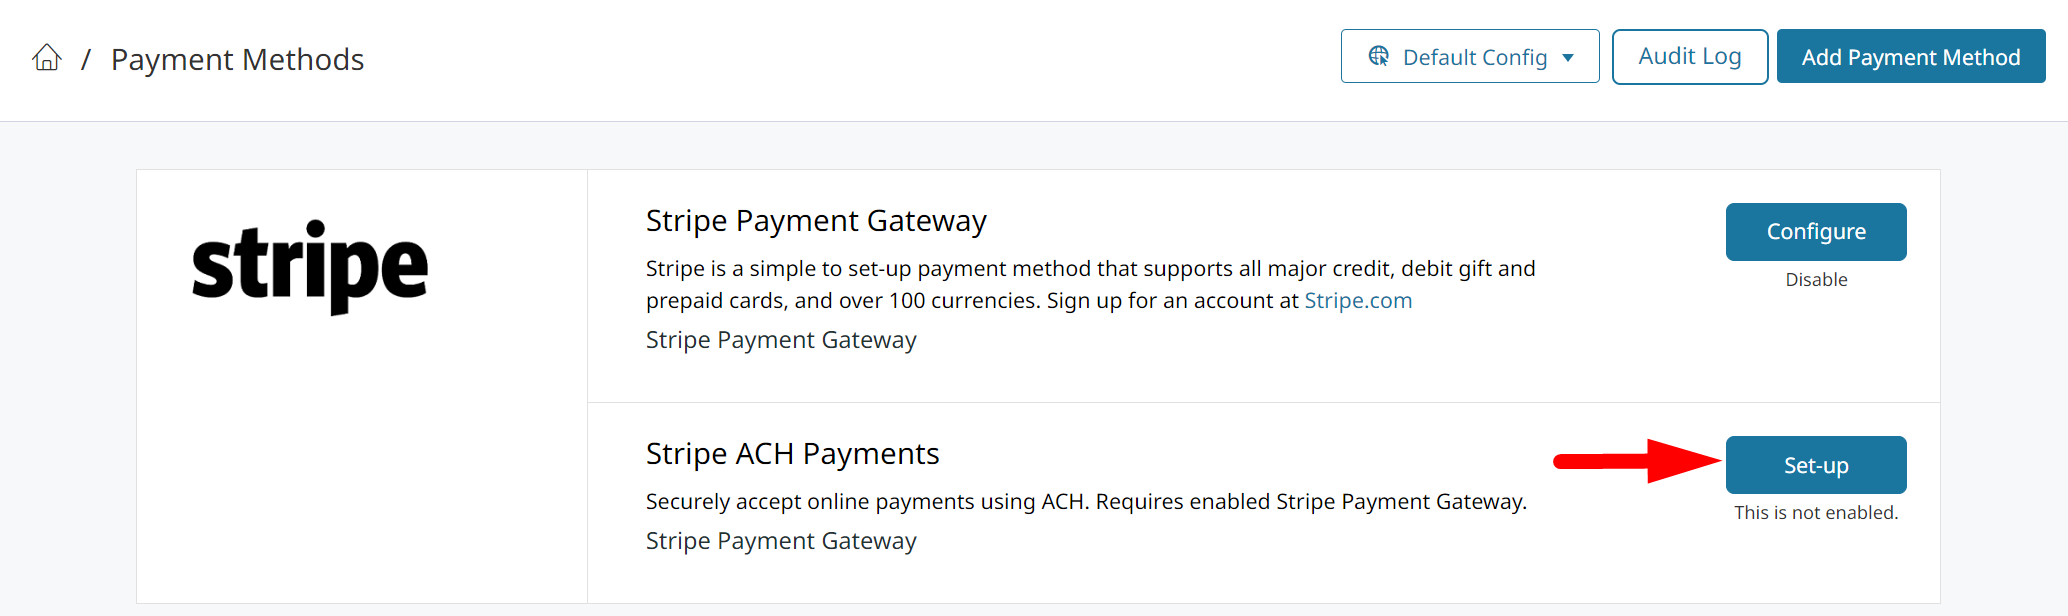
Navigate to Settings > Payment Methods and click Configure on Stripe ACH Payments
Enable Stripe ACH Payments, and set Use Stripe Financial Connections (V2) to Yes.
Using V2 for Stripe Financial Connections is REQUIRED.You must be approved by Stripe for their Financial Connections and have Use Stripe Financial Connections (V2) set to Yes in order to accept ACH payments.
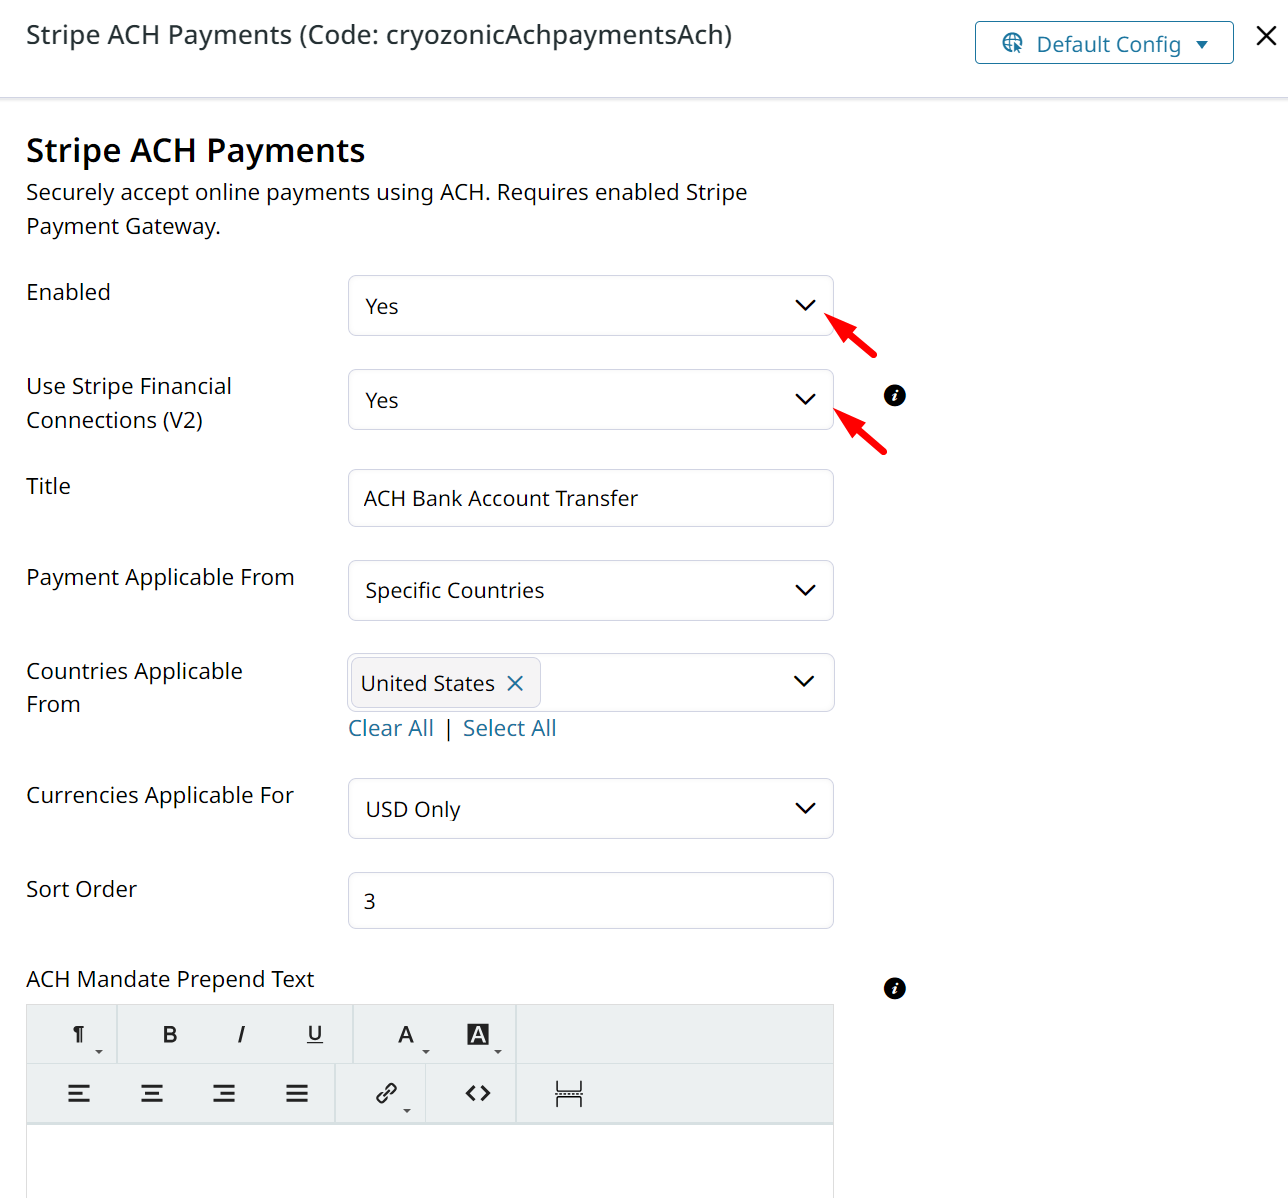
Optional: If you only want ACH to be available to specific customer groups, you can restrict it using Payment Restrictions
Step 3: Add Link to ACH Account Management
Your customers can add and remove Bank Accounts which have been saved to their Contact or Account by going to /ach/v2/accounts/. Learn more about saved Bank Accounts here.
You'll want to make that page easily accessible by adding it to your My Account page's Quick Links. Click here to learn how.
Stripe Mandate Text
When customers make their first payment via Stripe ACH, they must provide authorization for you to take payment in the form of an ACH Mandate.
Stripe has this well documented here.
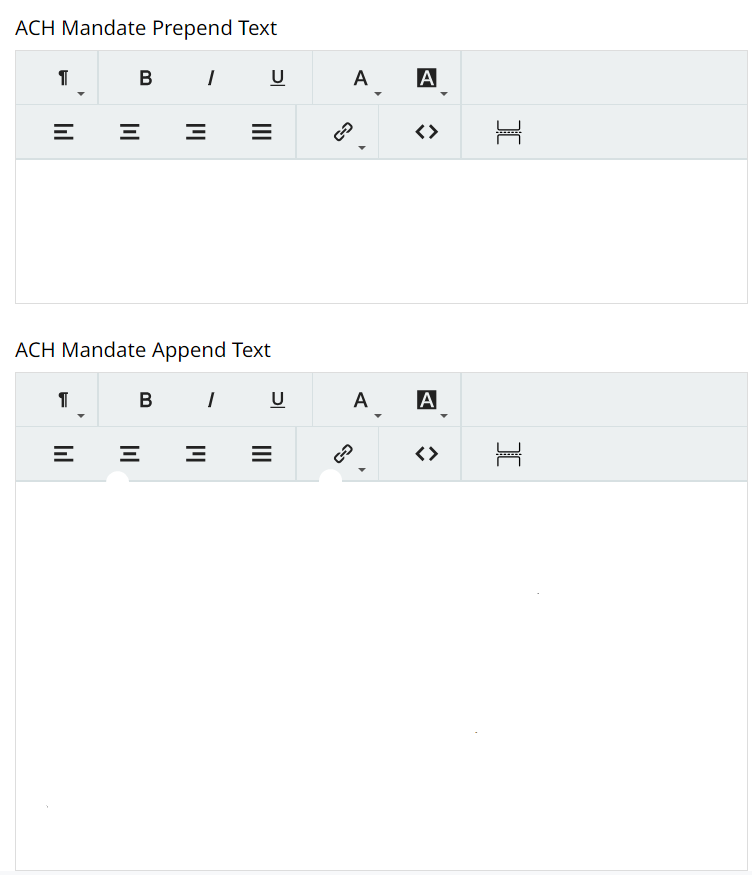
Editing Mandate Text
The ACH Mandate must always contain certain text, so it is not fully editable.
You can prepend or append text to the ACH Mandate so that customer's approval is granted to your ACH terms.
In Settings > Payment Methods > Stripe ACH scroll all the way to the bottom. There are 2 WYSIWYG editor to enter your text into.
Stripe ACH Refunds
When a customer makes payment via ACH they can be refunded by Store Credit, or an Offline Refund.
ACH payments can't be returned to the customer's bank account through Zoey.The payment will need to be returned outside of Zoey. You can then create the Credit Memo to document the refund in Zoey.
Updated 4 months ago