Creating Your Blog
Before you begin:Set your Blog Web Address (URL) when prompted or by going to Blog > Settings > General > Route to Blog. Then Save.
Example:www.yourdomain.com/blog
Adding a Blog Post
From the Control Panel, hover over Blog > Add Post.
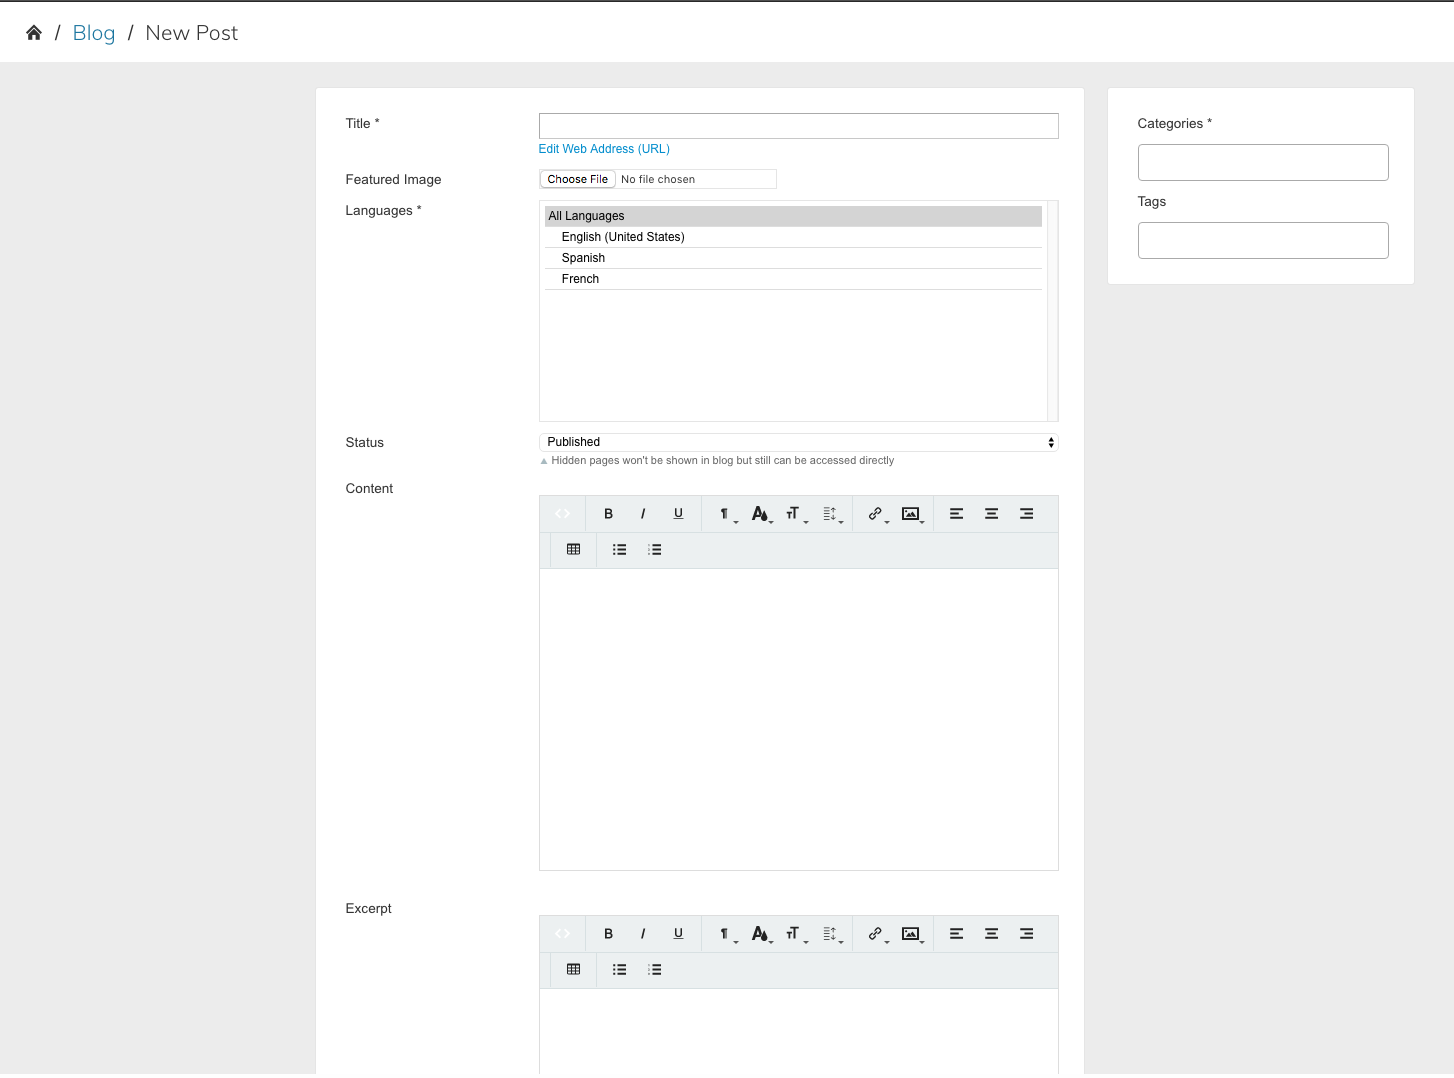
Fill in the blog post fields:

Title | Name of Blog Post |
Edit Web Address (URL) | An optional field that allows you to give the post a specific URL |
Featured Image | Optional image to be displayed on post |
Languages | All Languages or select a specific store view |
Status | Published |
Content | Use the WYSIWYG editor to create your Blog post |
Excerpt | Short passage of the blog post to be displayed |
Created On | Date of post |
Categories | a way to group similar posts together |
Tags | optional keywords to describe the blog post in more detail |
When you are finished, click the Save Post button in the upper right hand corner.
You'll want to Index and Refresh Your Store after saving to see changes immediately show up on the frontend.
Have the Blog Appear in Store
In order to have the Blog appear in your store, you will need to create a Custom Link.
You can either create a link in the Header Navigation by going to Edit My Design > Header & Navigation and add a link with the Blog URL key, which is /blog.
You can also add a Link to the Footer Navigation by going to Edit My Design > Footer and add the link from there.
Updated 9 months ago
