Adding Custom Attribute Values to Products
Products can have Custom Attributes added to them manually or via CSV. This tutorial will go over how to set values for custom attributes using a CSV import.
Step 1: Create the CSV File
Custom Attribute values for existing attributes can be done by creating a CSV file with the below columns:
Column Name | Value |
|---|---|
sku | sku of the product you want to add custom attribute values to |
attribute_code | Values for the specified attribute |
The CSV can have as many columns with different attribute codes as needed.
See example CSV below:

Step 2: Import CSV
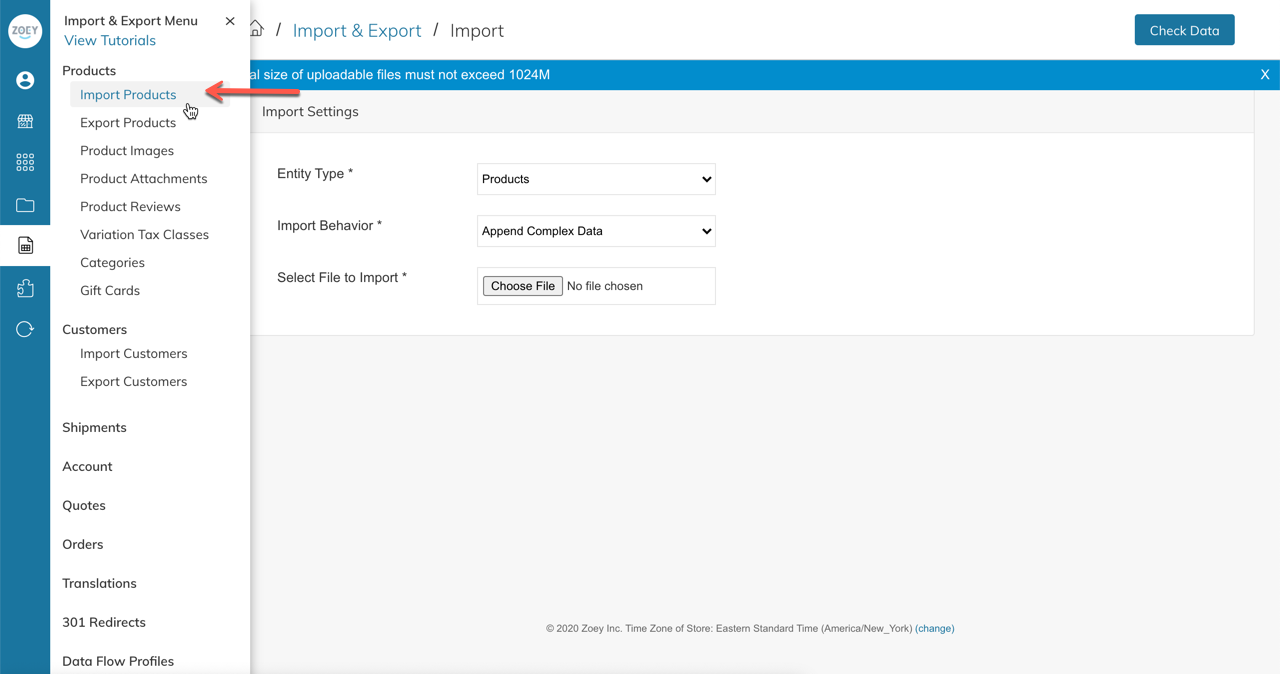
Once your CSV has been Created, proceed to Import & Export > Import Products

- Entity Type = Products
- Import Type = Append Complex Data
- Upload your CSV file
- Click "Check Data" button in top right of screen
- If everything looks good, you will have a green bar with a button to import
IMPORTANTThe CSV will set values for existing Custom Attributes and for Drop-Down or Multi-Select attributes, existing Attribute Options.
This Import WILL NOT create new Custom Attributes and WILL NOT create new Drop-Down or Multi-Select Options for existing Attributes.
If you have a Drop Down or Multi Select Attribute that you need the Values imported for, please create the Attribute first in the Zoey Admin and then a new CSV file that contains the column names being your attribute_code and the rows being the values. Then create a ticket with Zoey Support, attach the file, and request for us to Import the Attribute Values using that CSV. Otherwise, you can create the values manually in the Admin and then run the import.
Updated 7 months ago
