Glew.io analytics - Getting Started
This article will help you get your Glew.io analytics set up to properly import your Zoey, Google Analytics and other data to begin reporting.
To initiate Glew reporting, you'll need to connect your Zoey account to Glew. Other accounts, like Google Analytics, are highly recommended to pull in other helpful data.
1. Enable Glew Analytics (May not be required)
If you go to the Analytics menu and see "Enable Glew.io Analytics" then you must follow this step. Otherwise you can simple click on "Glew.io Analytics" and go to Step 2.
Only the Account Owner can enable Glew AnalyticsIf you are not the Account Owner and Glew Analytics has not been enabled you will receive an error message. If you are unsure who the Account Owner is, login to your Zoey Store, go to My Account->Account Manager and on the right side it will say who the Account Owner is.
Login to your Zoey Store as the Account Owner. Go to Analytics->Enable Glew.io Analytics
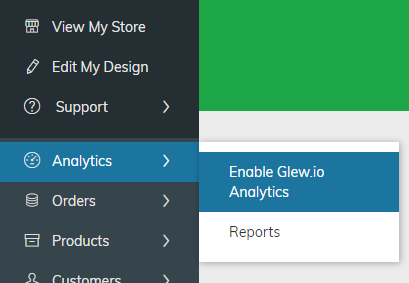
Enabling Glew Analytics May Cost Additional MoneyDepending on the Zoey Subscription Plan you are on, enabling Glew Analytics may cost more money. The fee will be displayed in a popup when you try to enable it and you must confirm the charge prior to proceeding.
2. Integrate Google Analytics
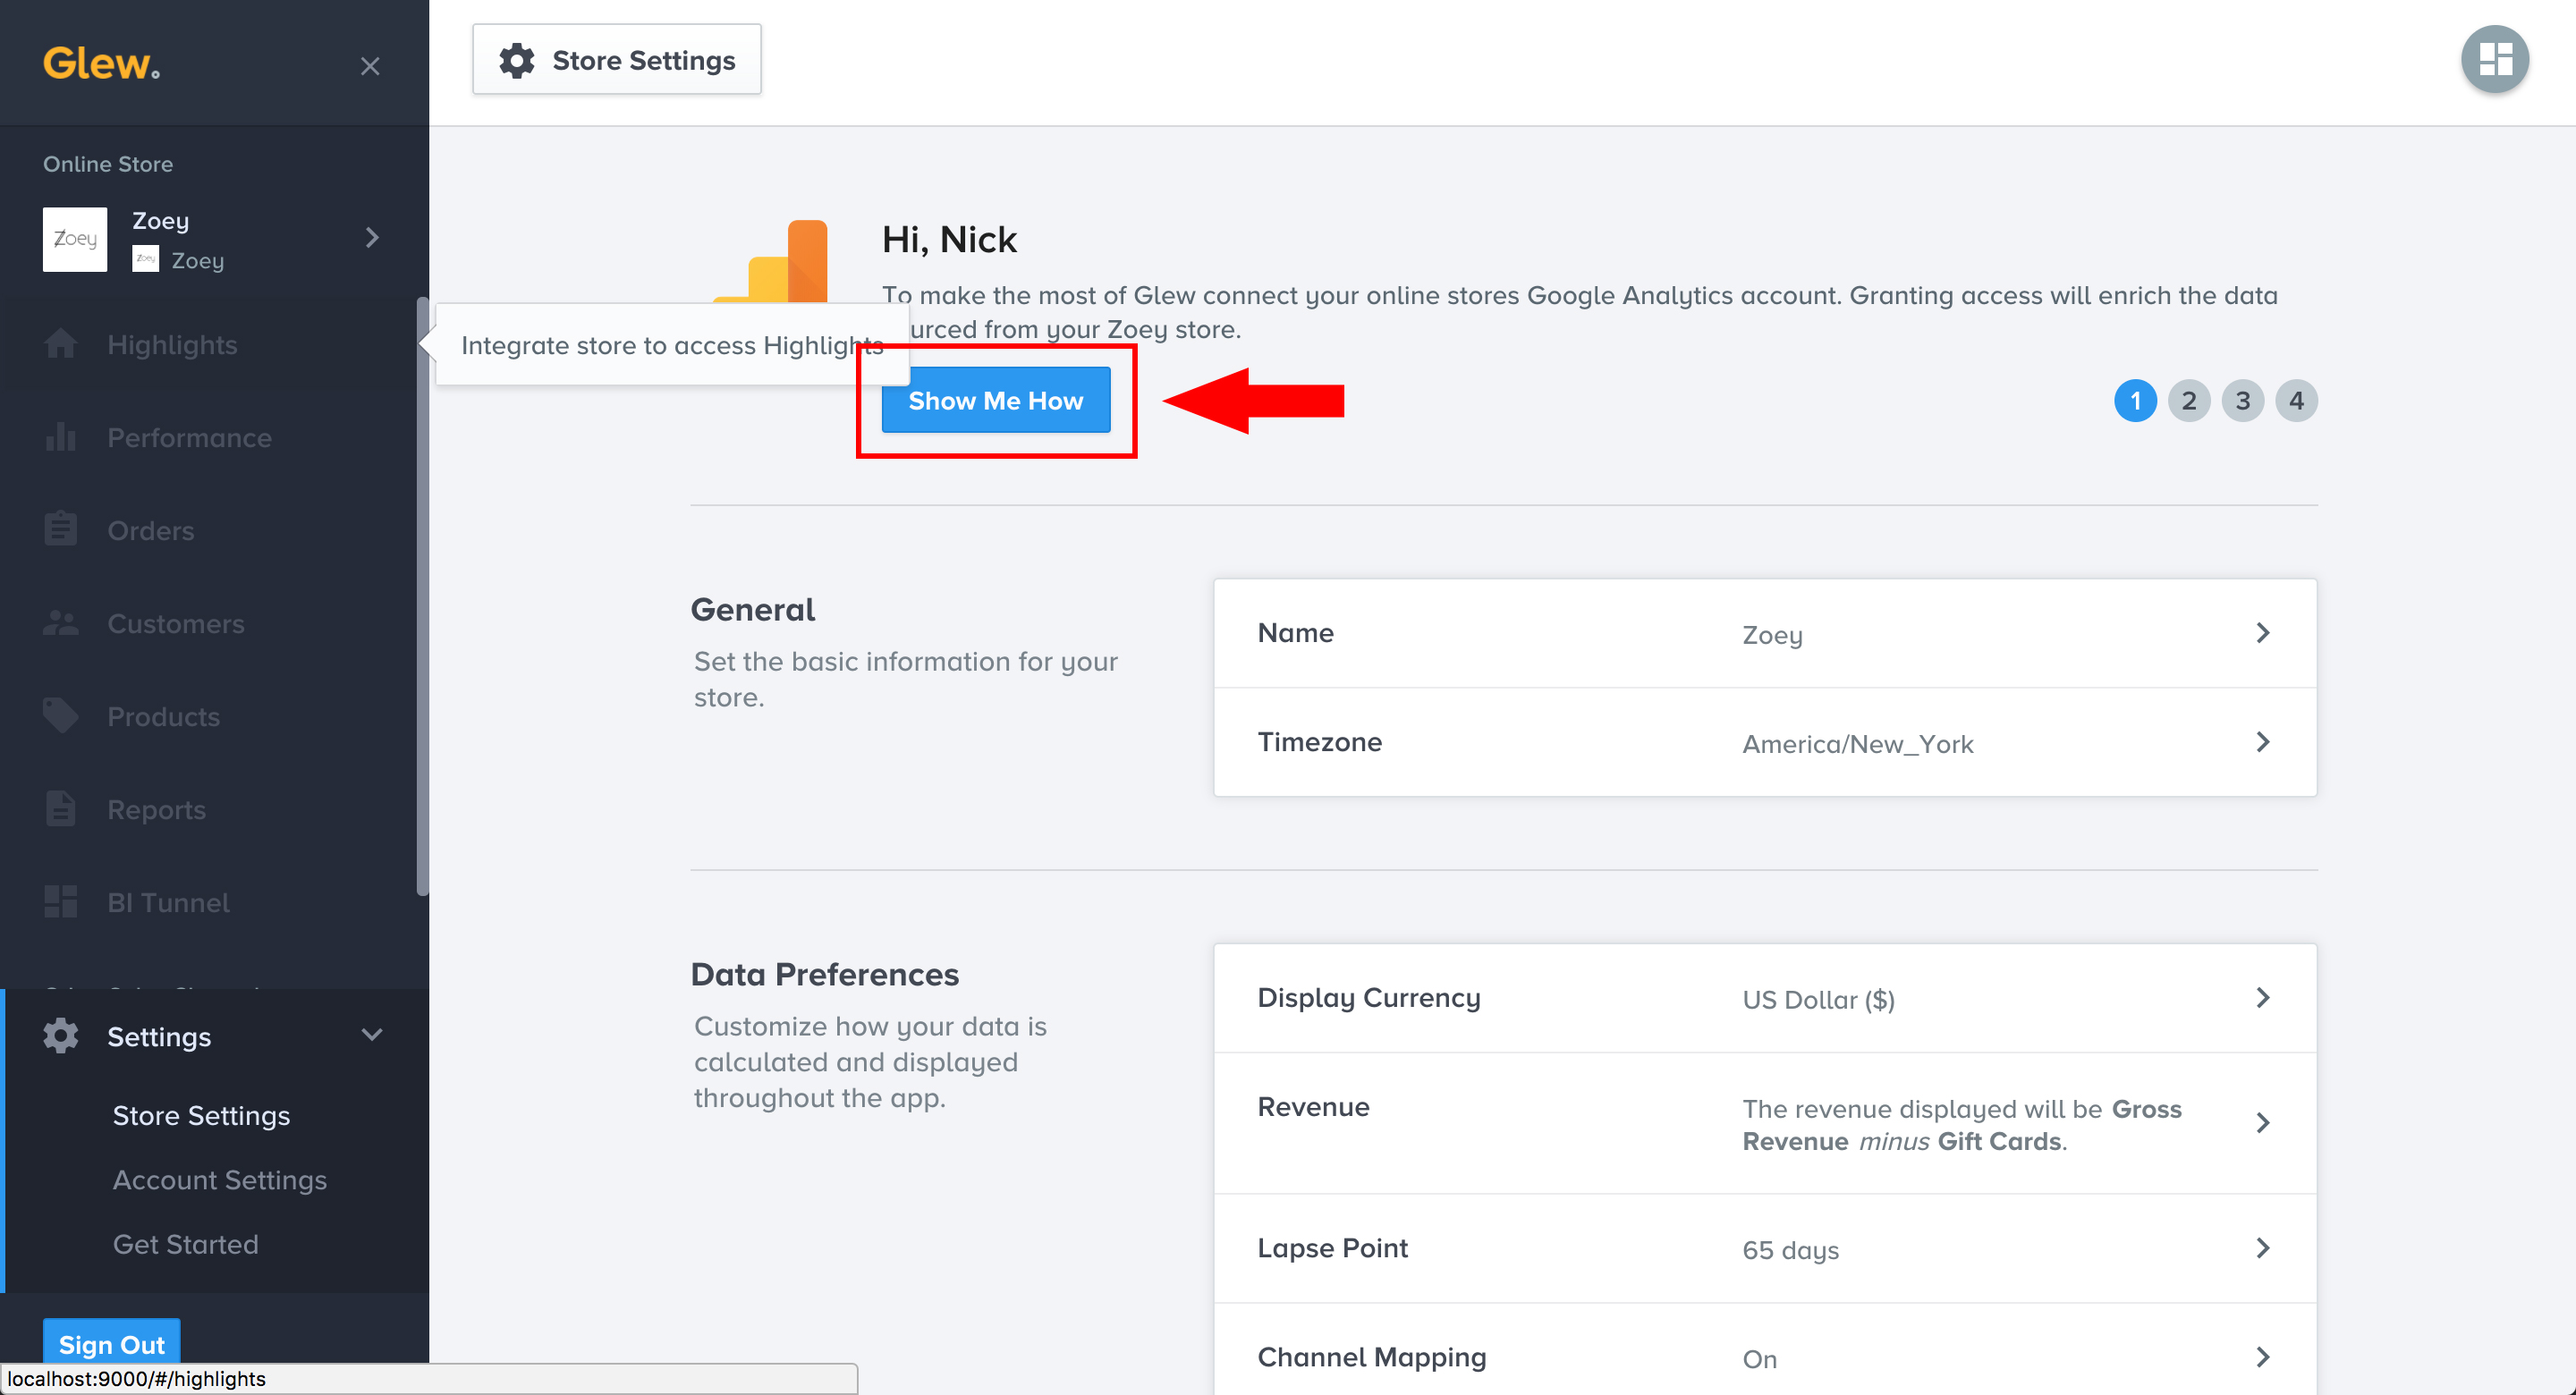
Once you are into Glew, you will need to connect Google Analytics. To see where to do this, click the “Show Me How” button. It will scroll you down to the Integrations section.
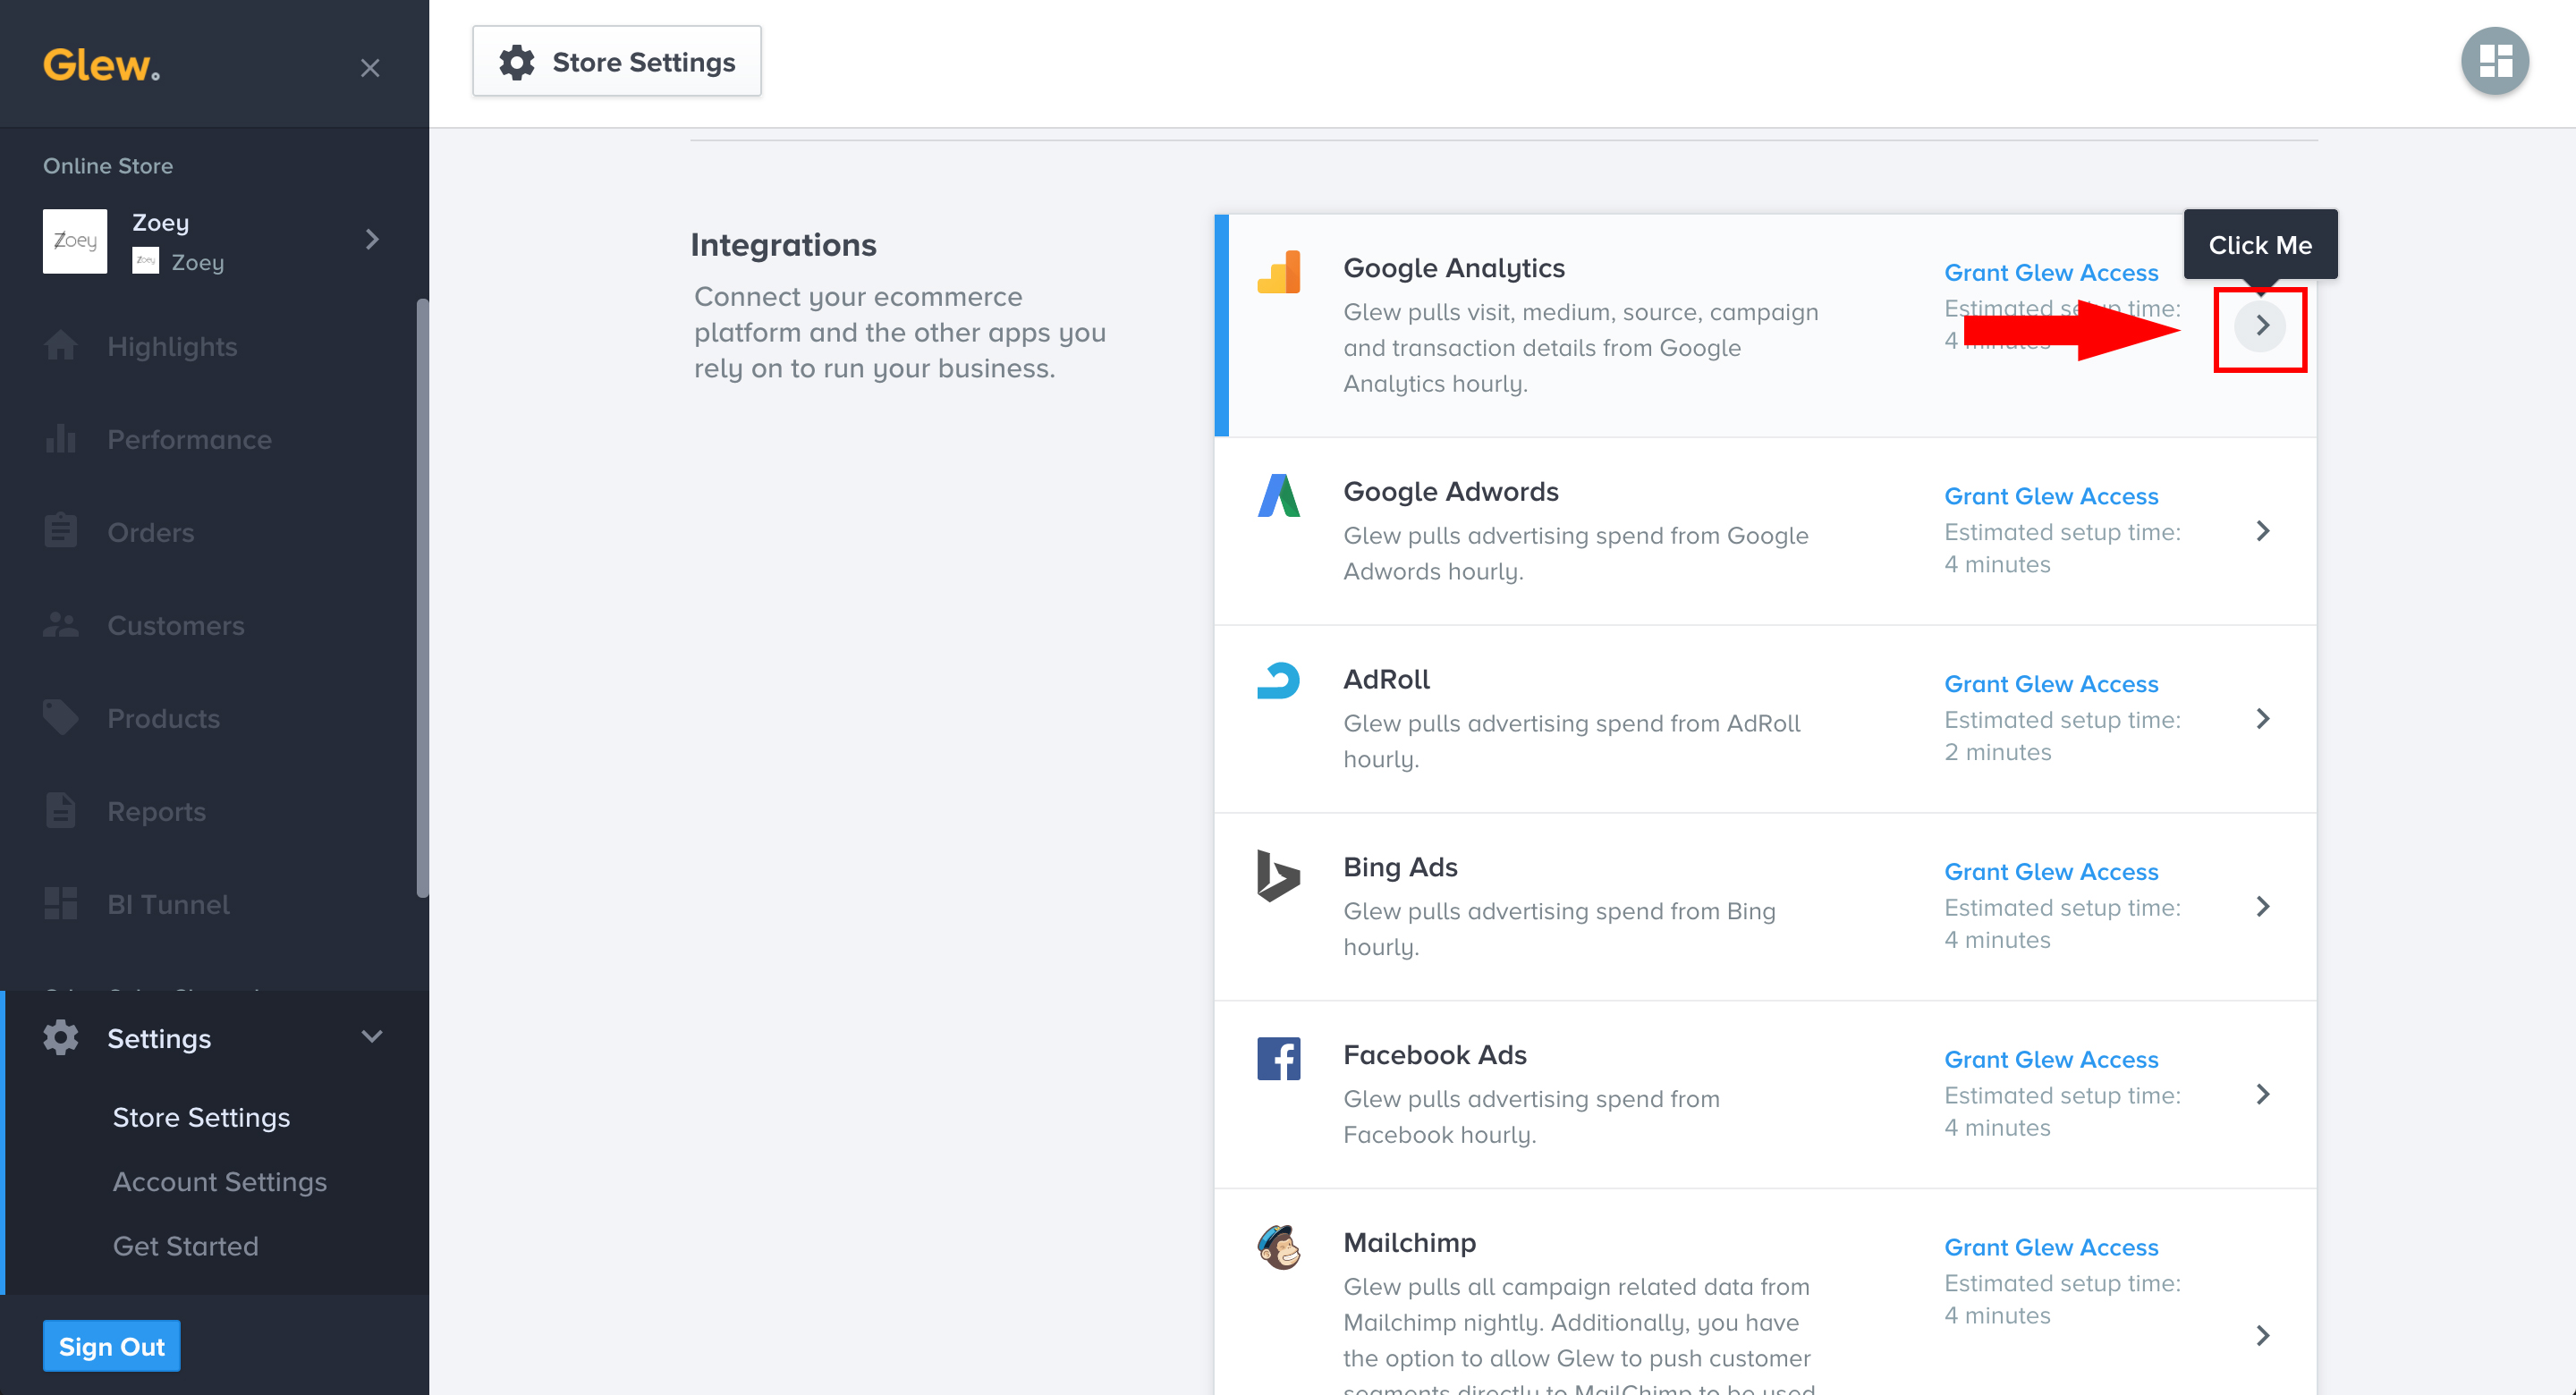
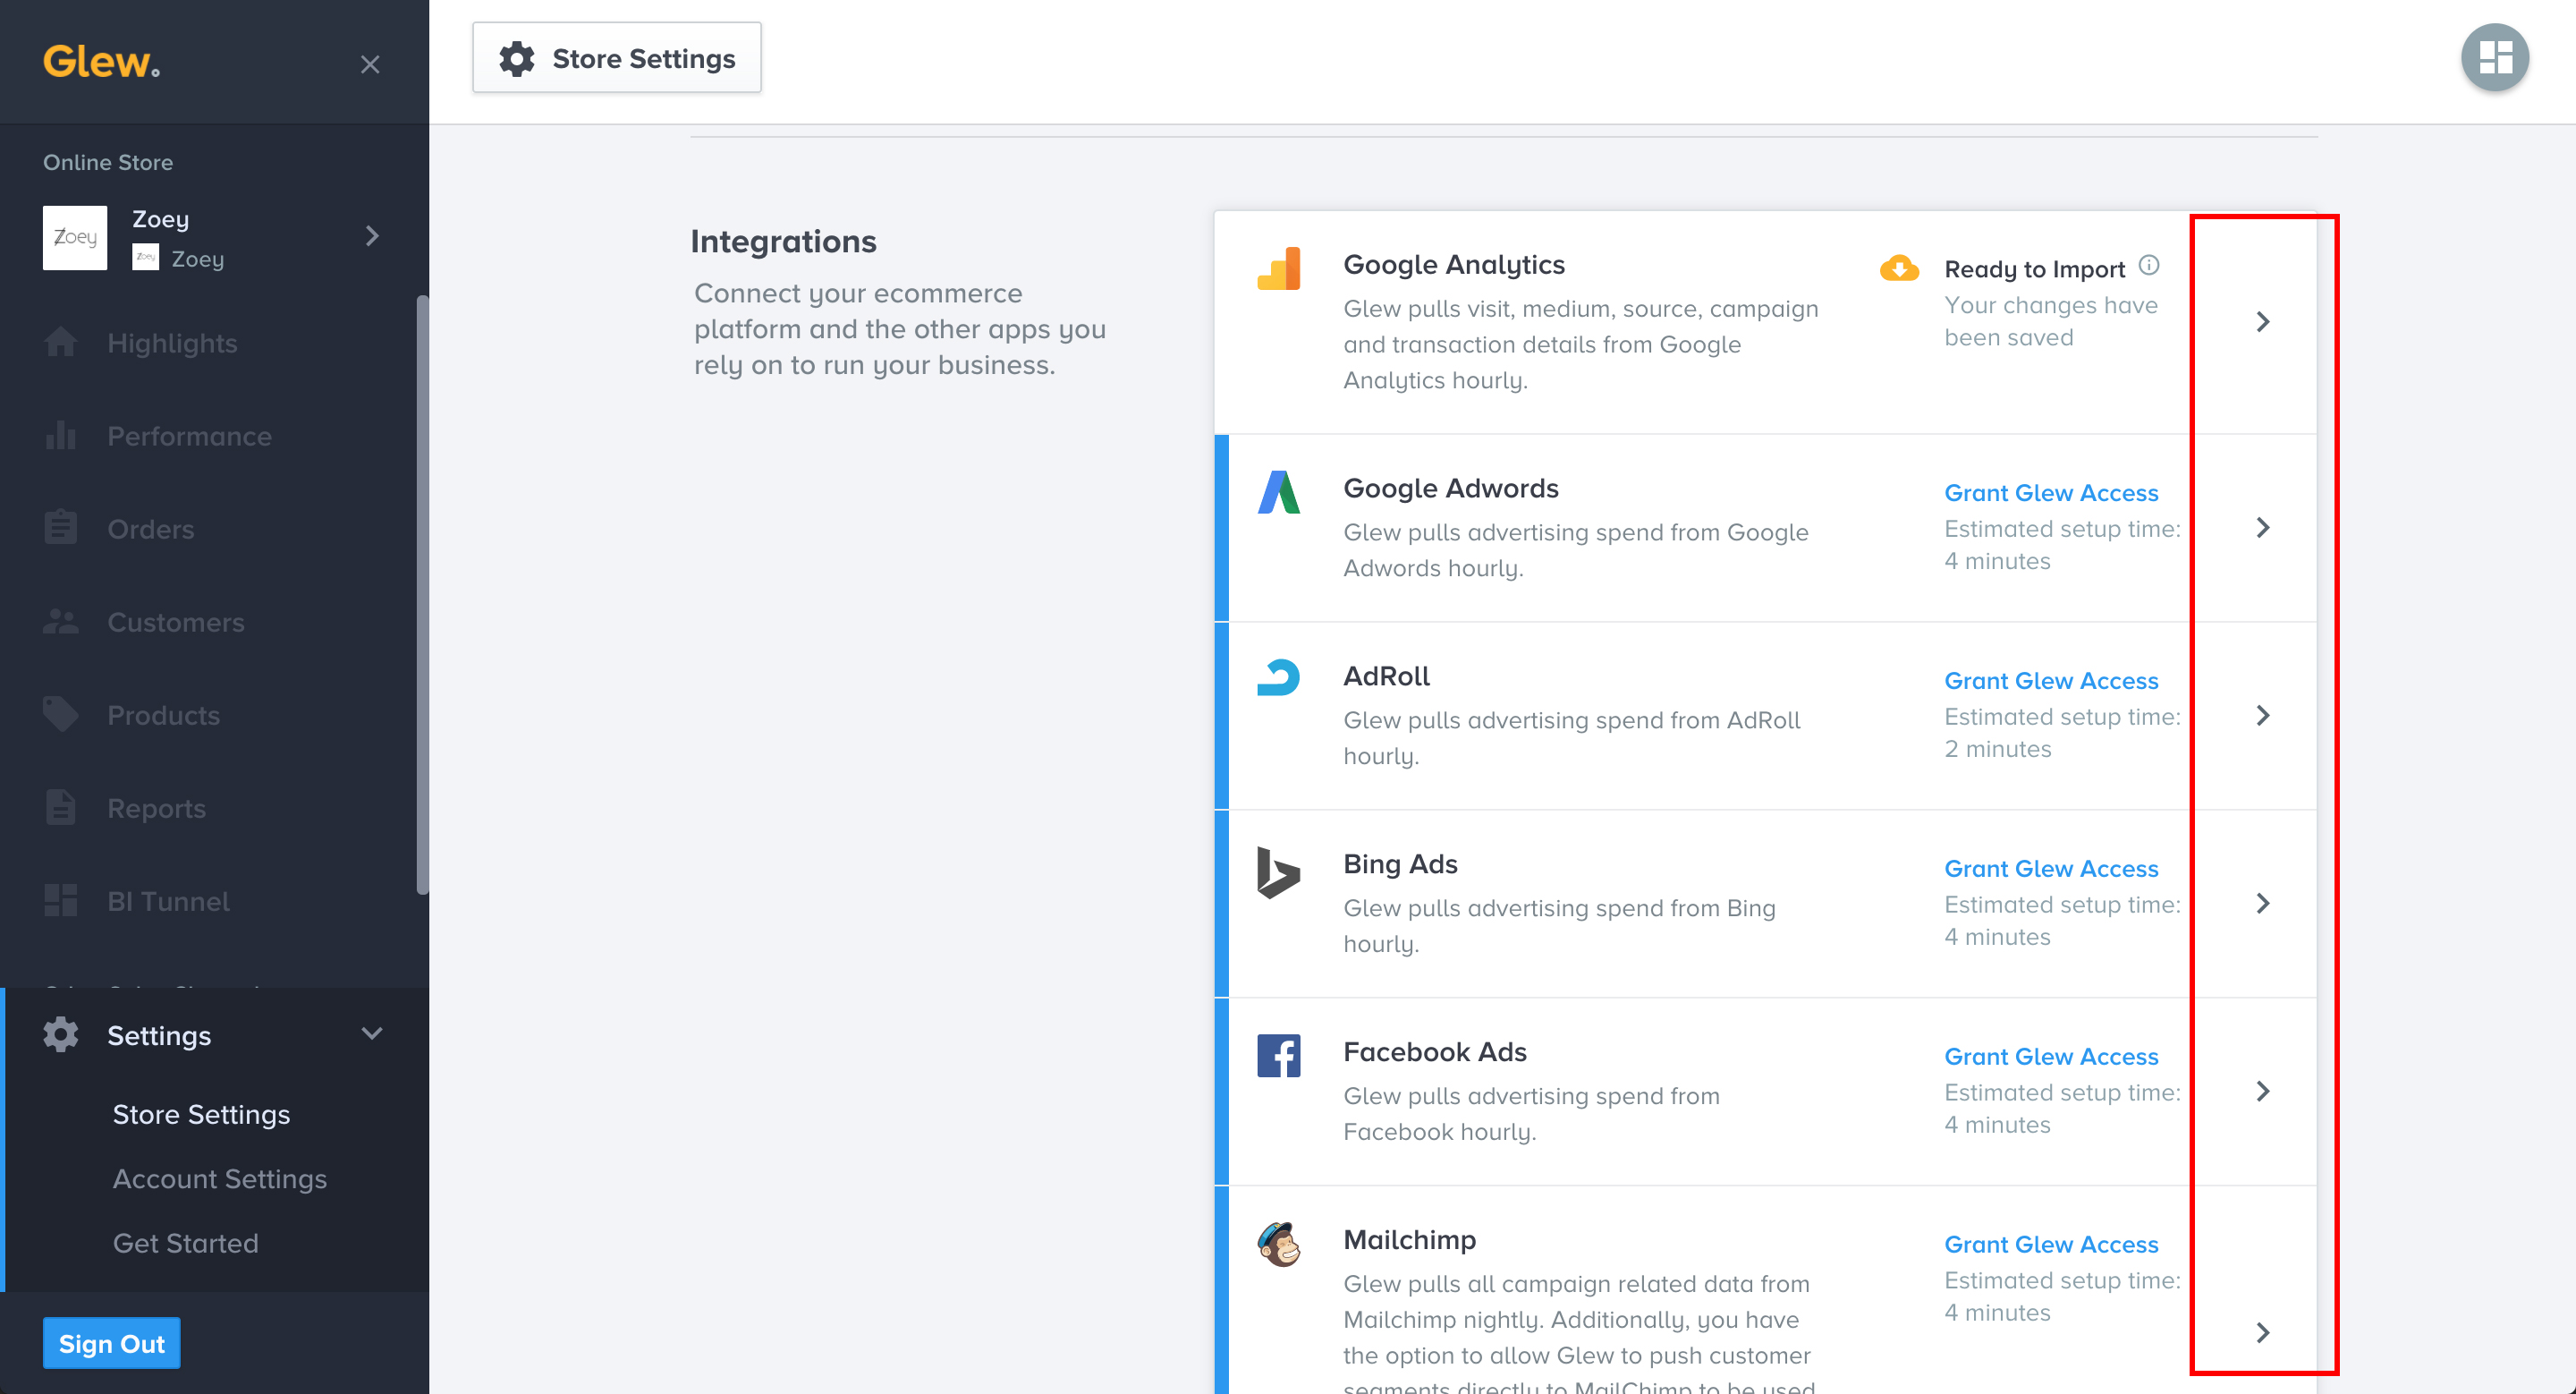
Click the arrow in the Google Analytics area to access the integration settings.
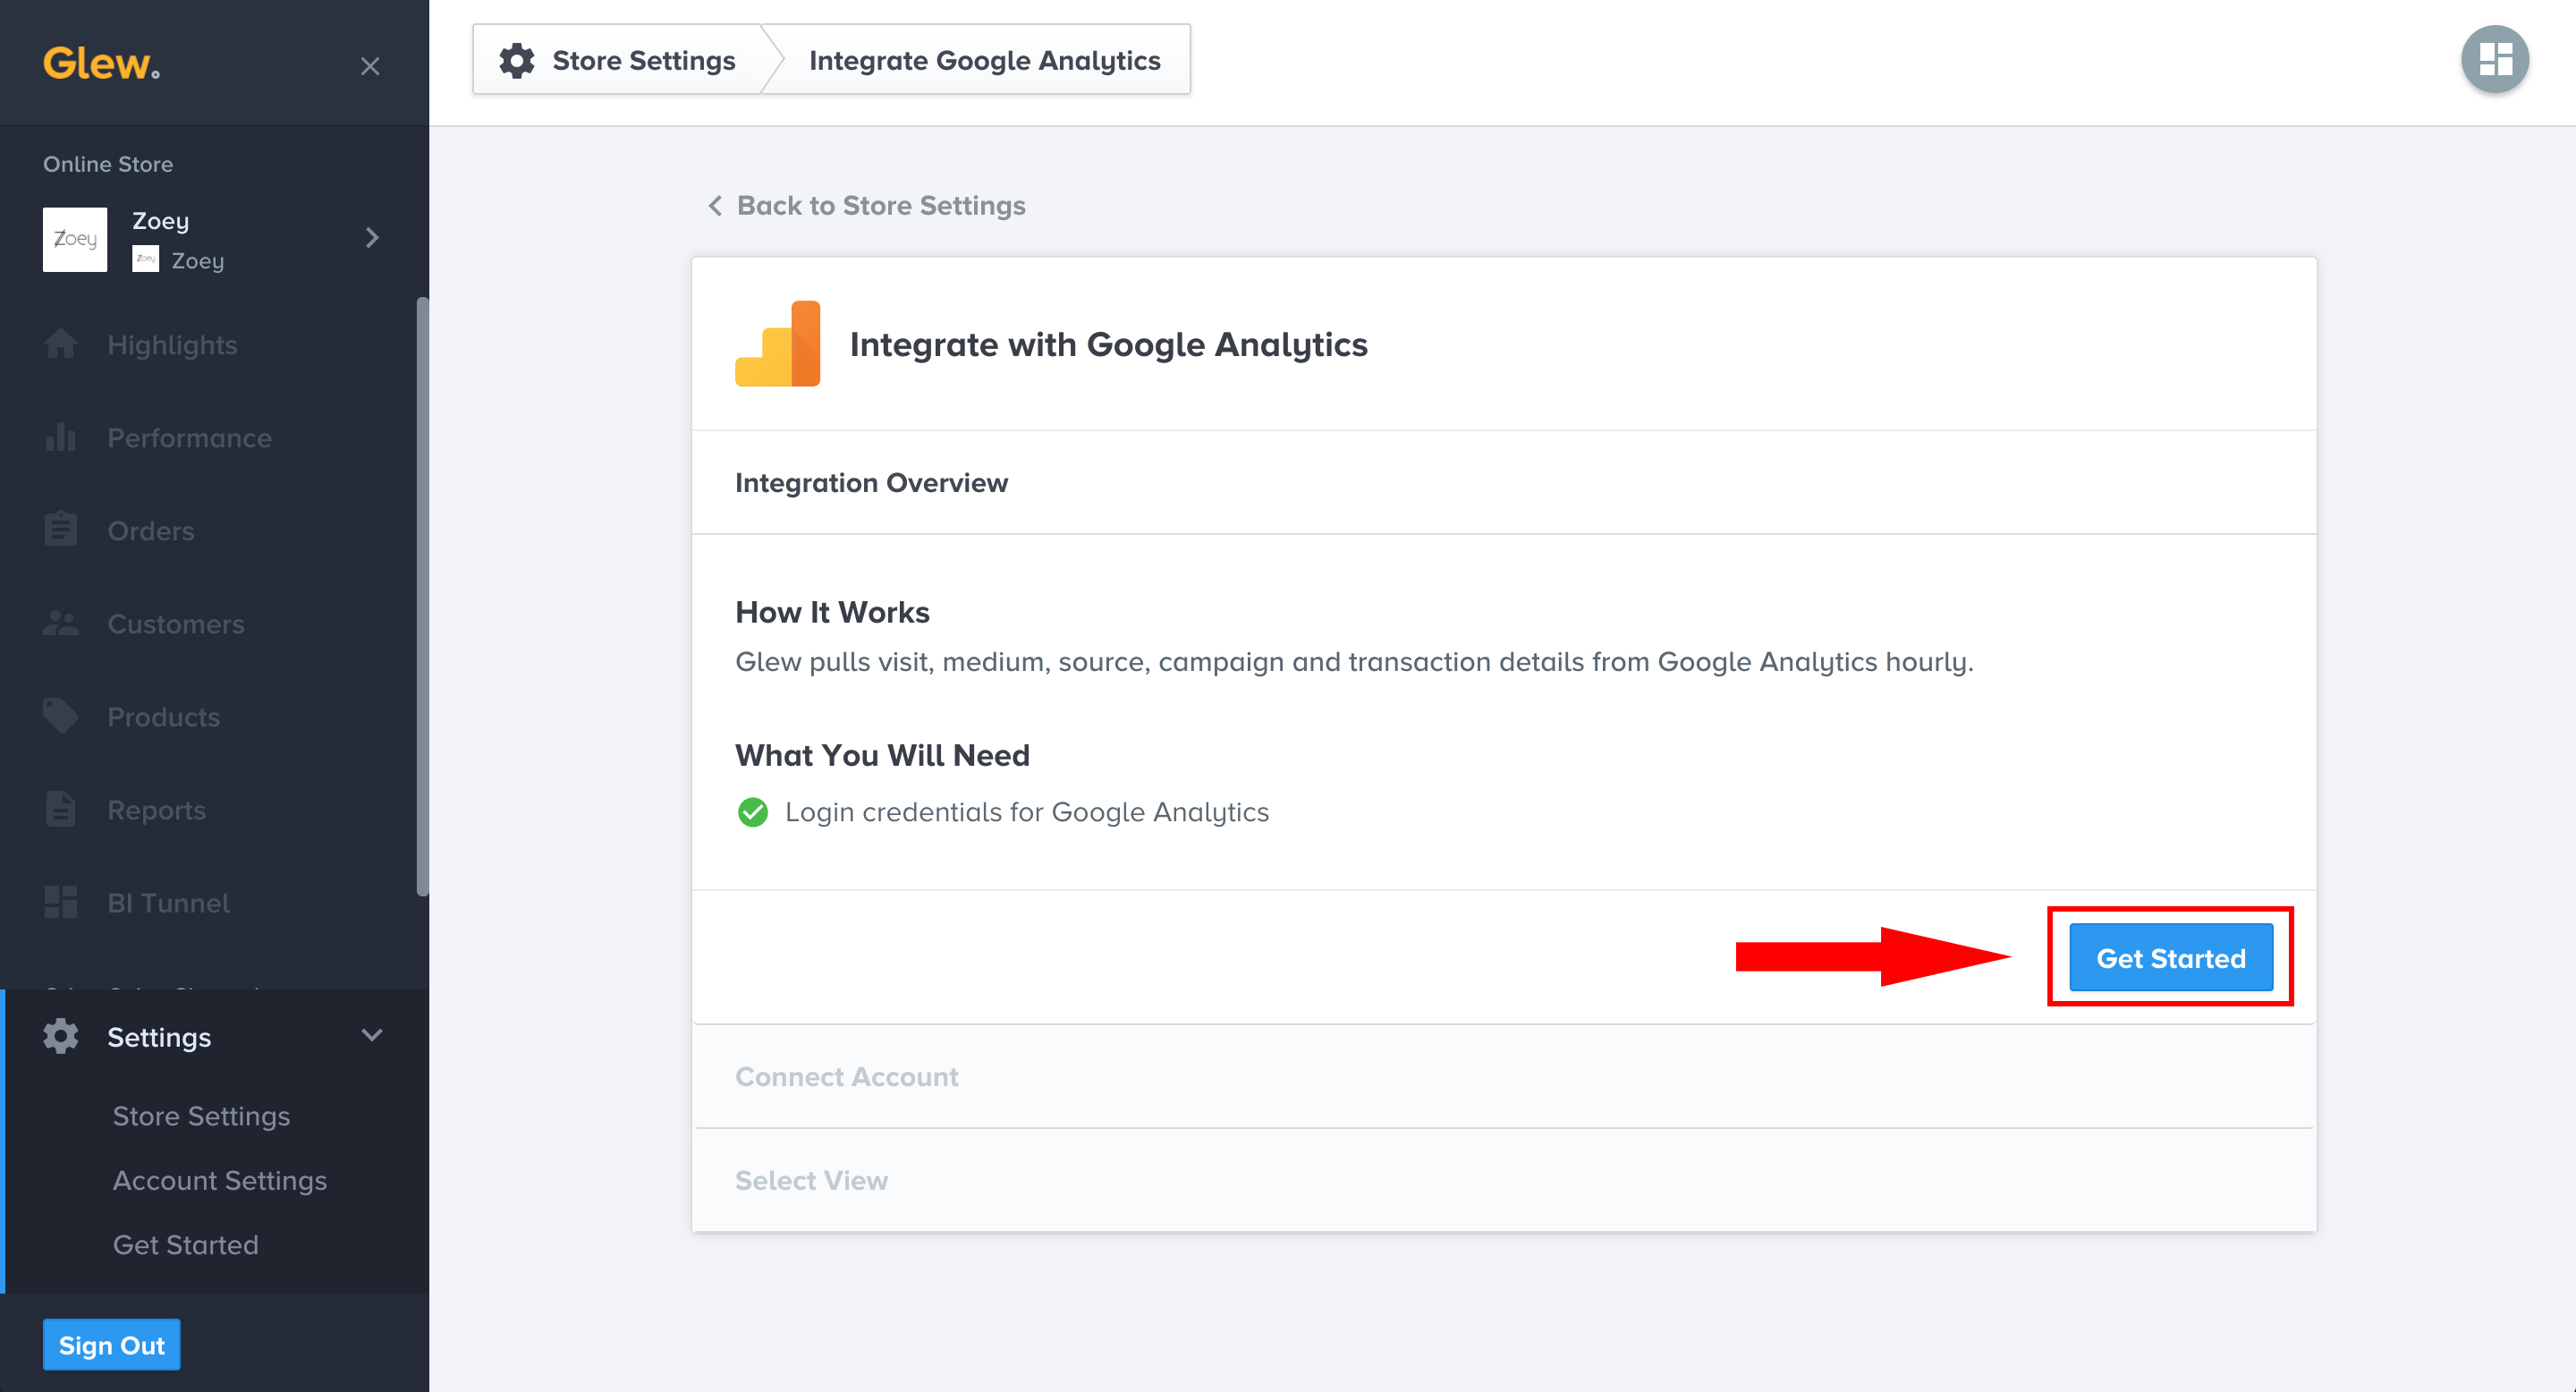
When you’re ready, click the “Get Started” begin the Google Analytics connection process. The next step is where you will authenticate your account with Glew. (You will enter your login credentials for Google Analytics, so you will need that information handy.)
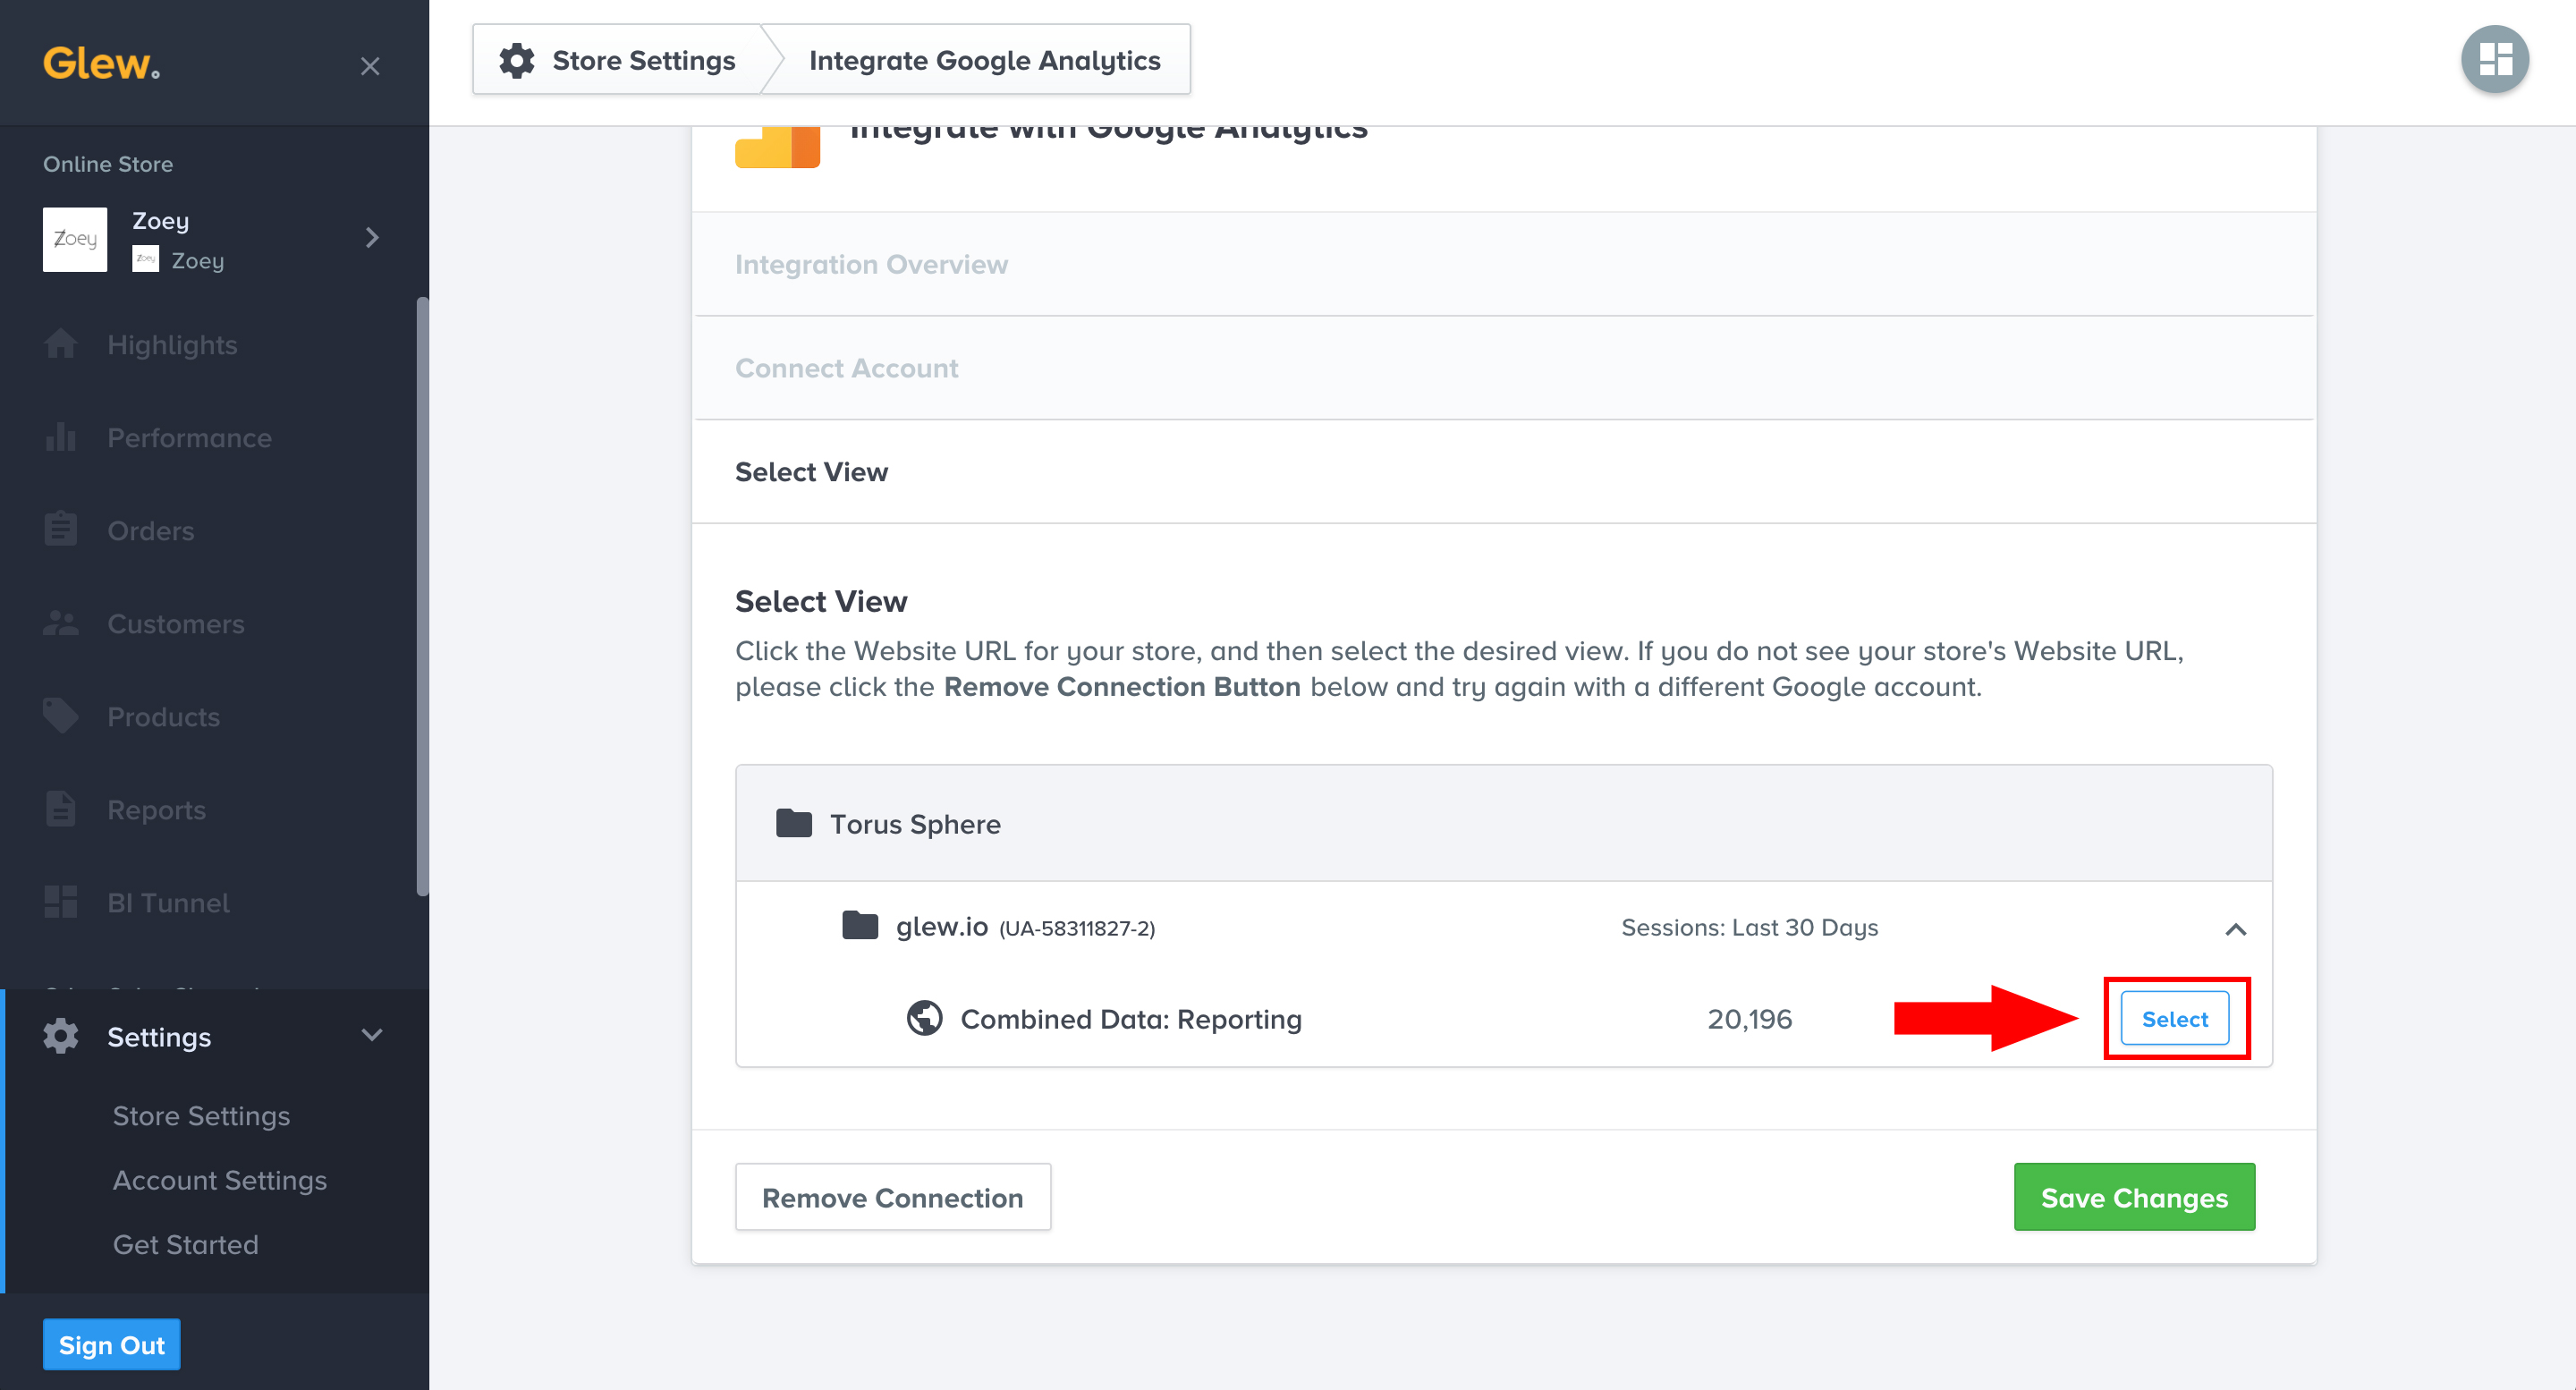
Once you have authenticated your Google Analytics account, you will then need to select a view. Click the “Select” button next to the view that contains the tracking data for your online store.
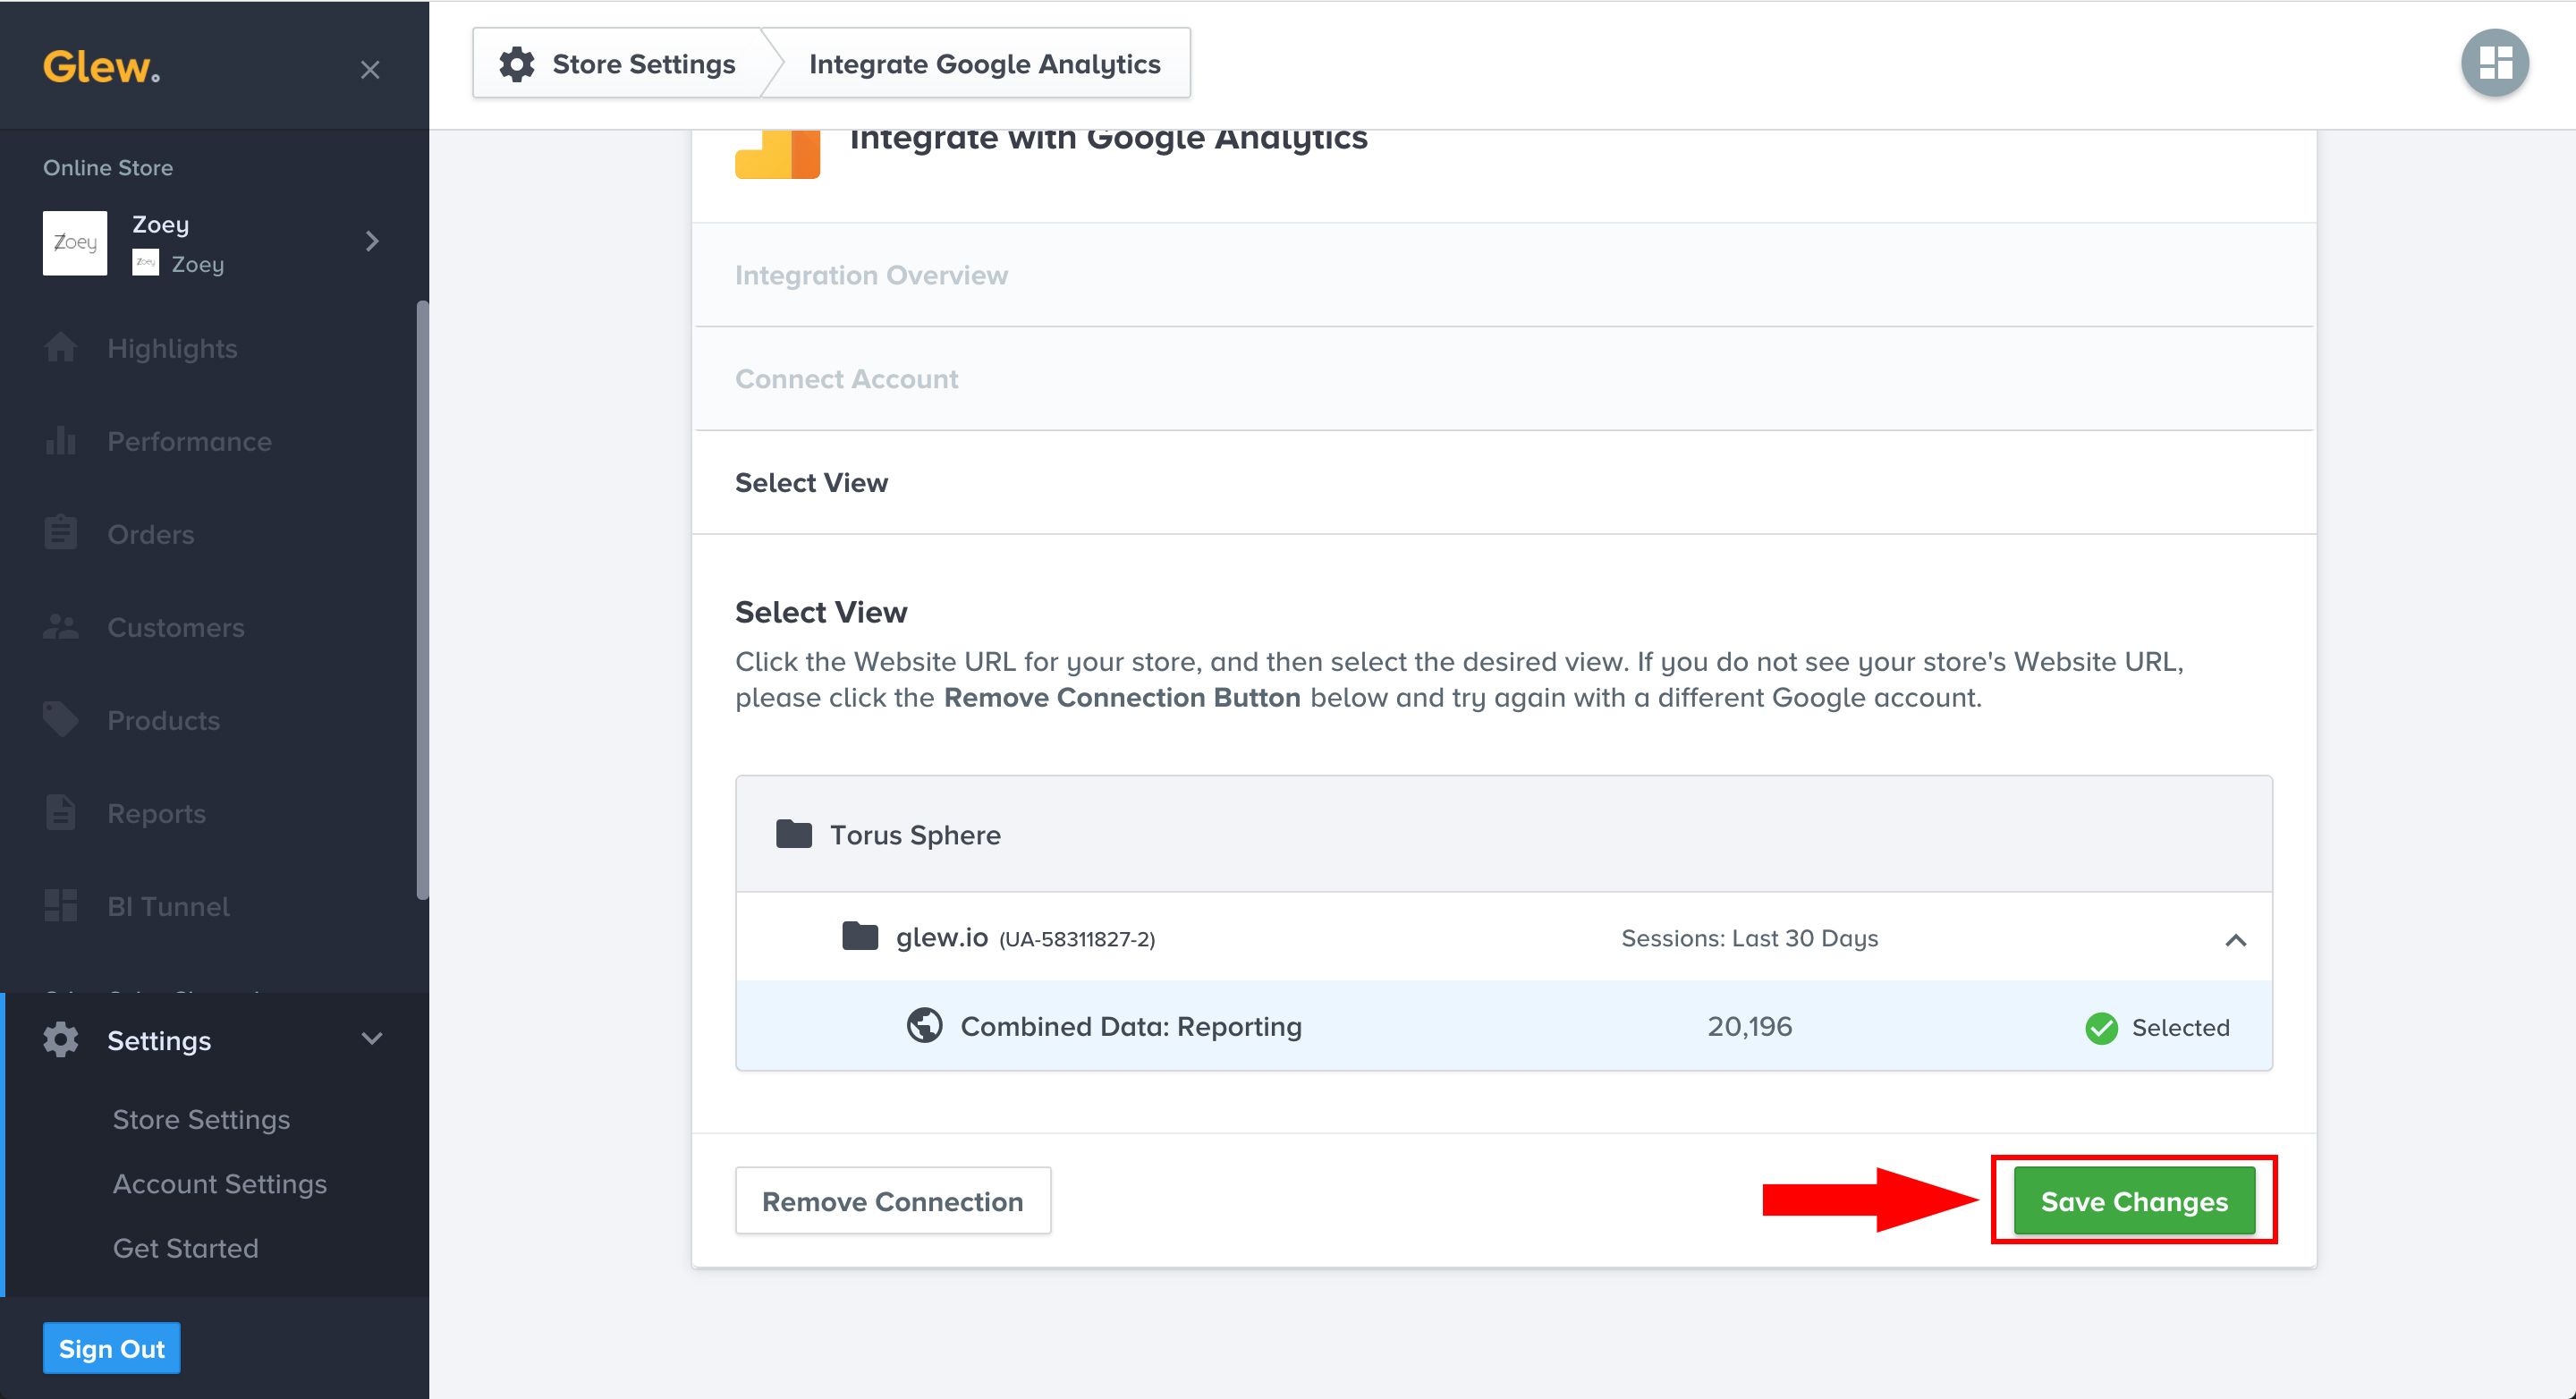
After you have selected a view, click the “Save Changes” button to complete the Google Analytics integration.
3. (Optional) Integrate Other Apps
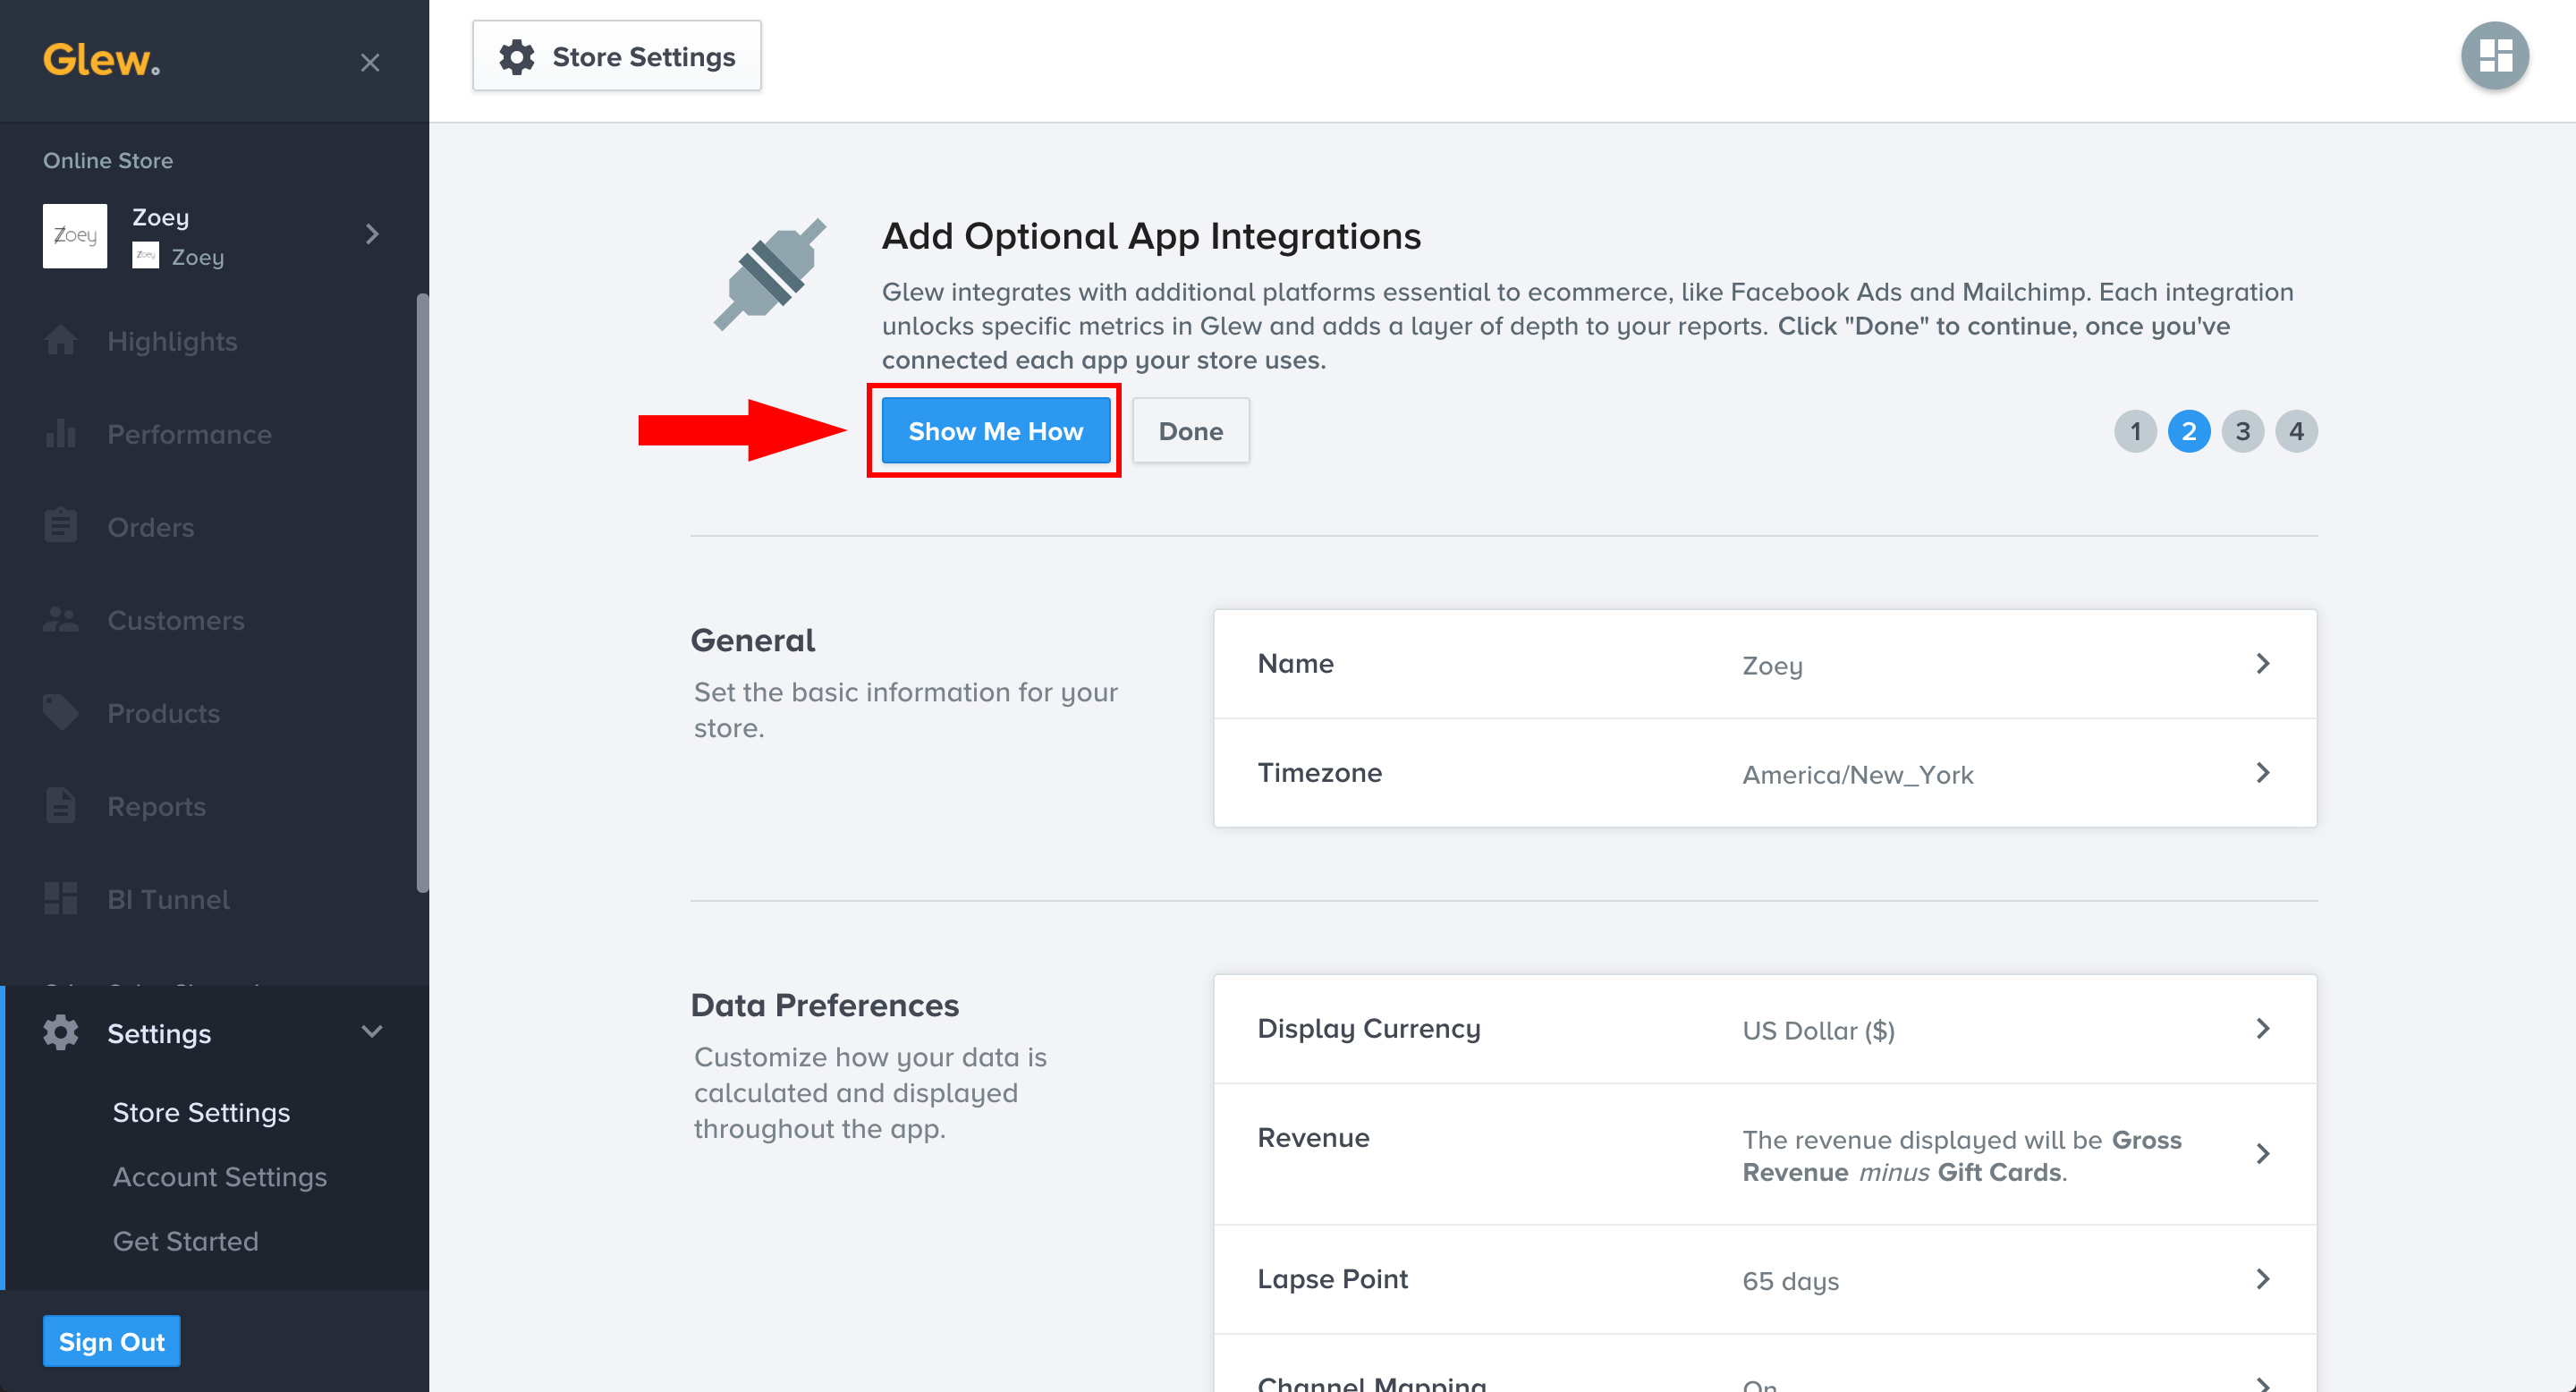
You can connect additional integrations to bring even more data into Glew. Click the “Show Me How” button to see what else you can connect. These are optional.
To connect additional integrations, click the arrow to go into the settings for each one you want to connect and follow the steps.
4. Set Revenue Preferences
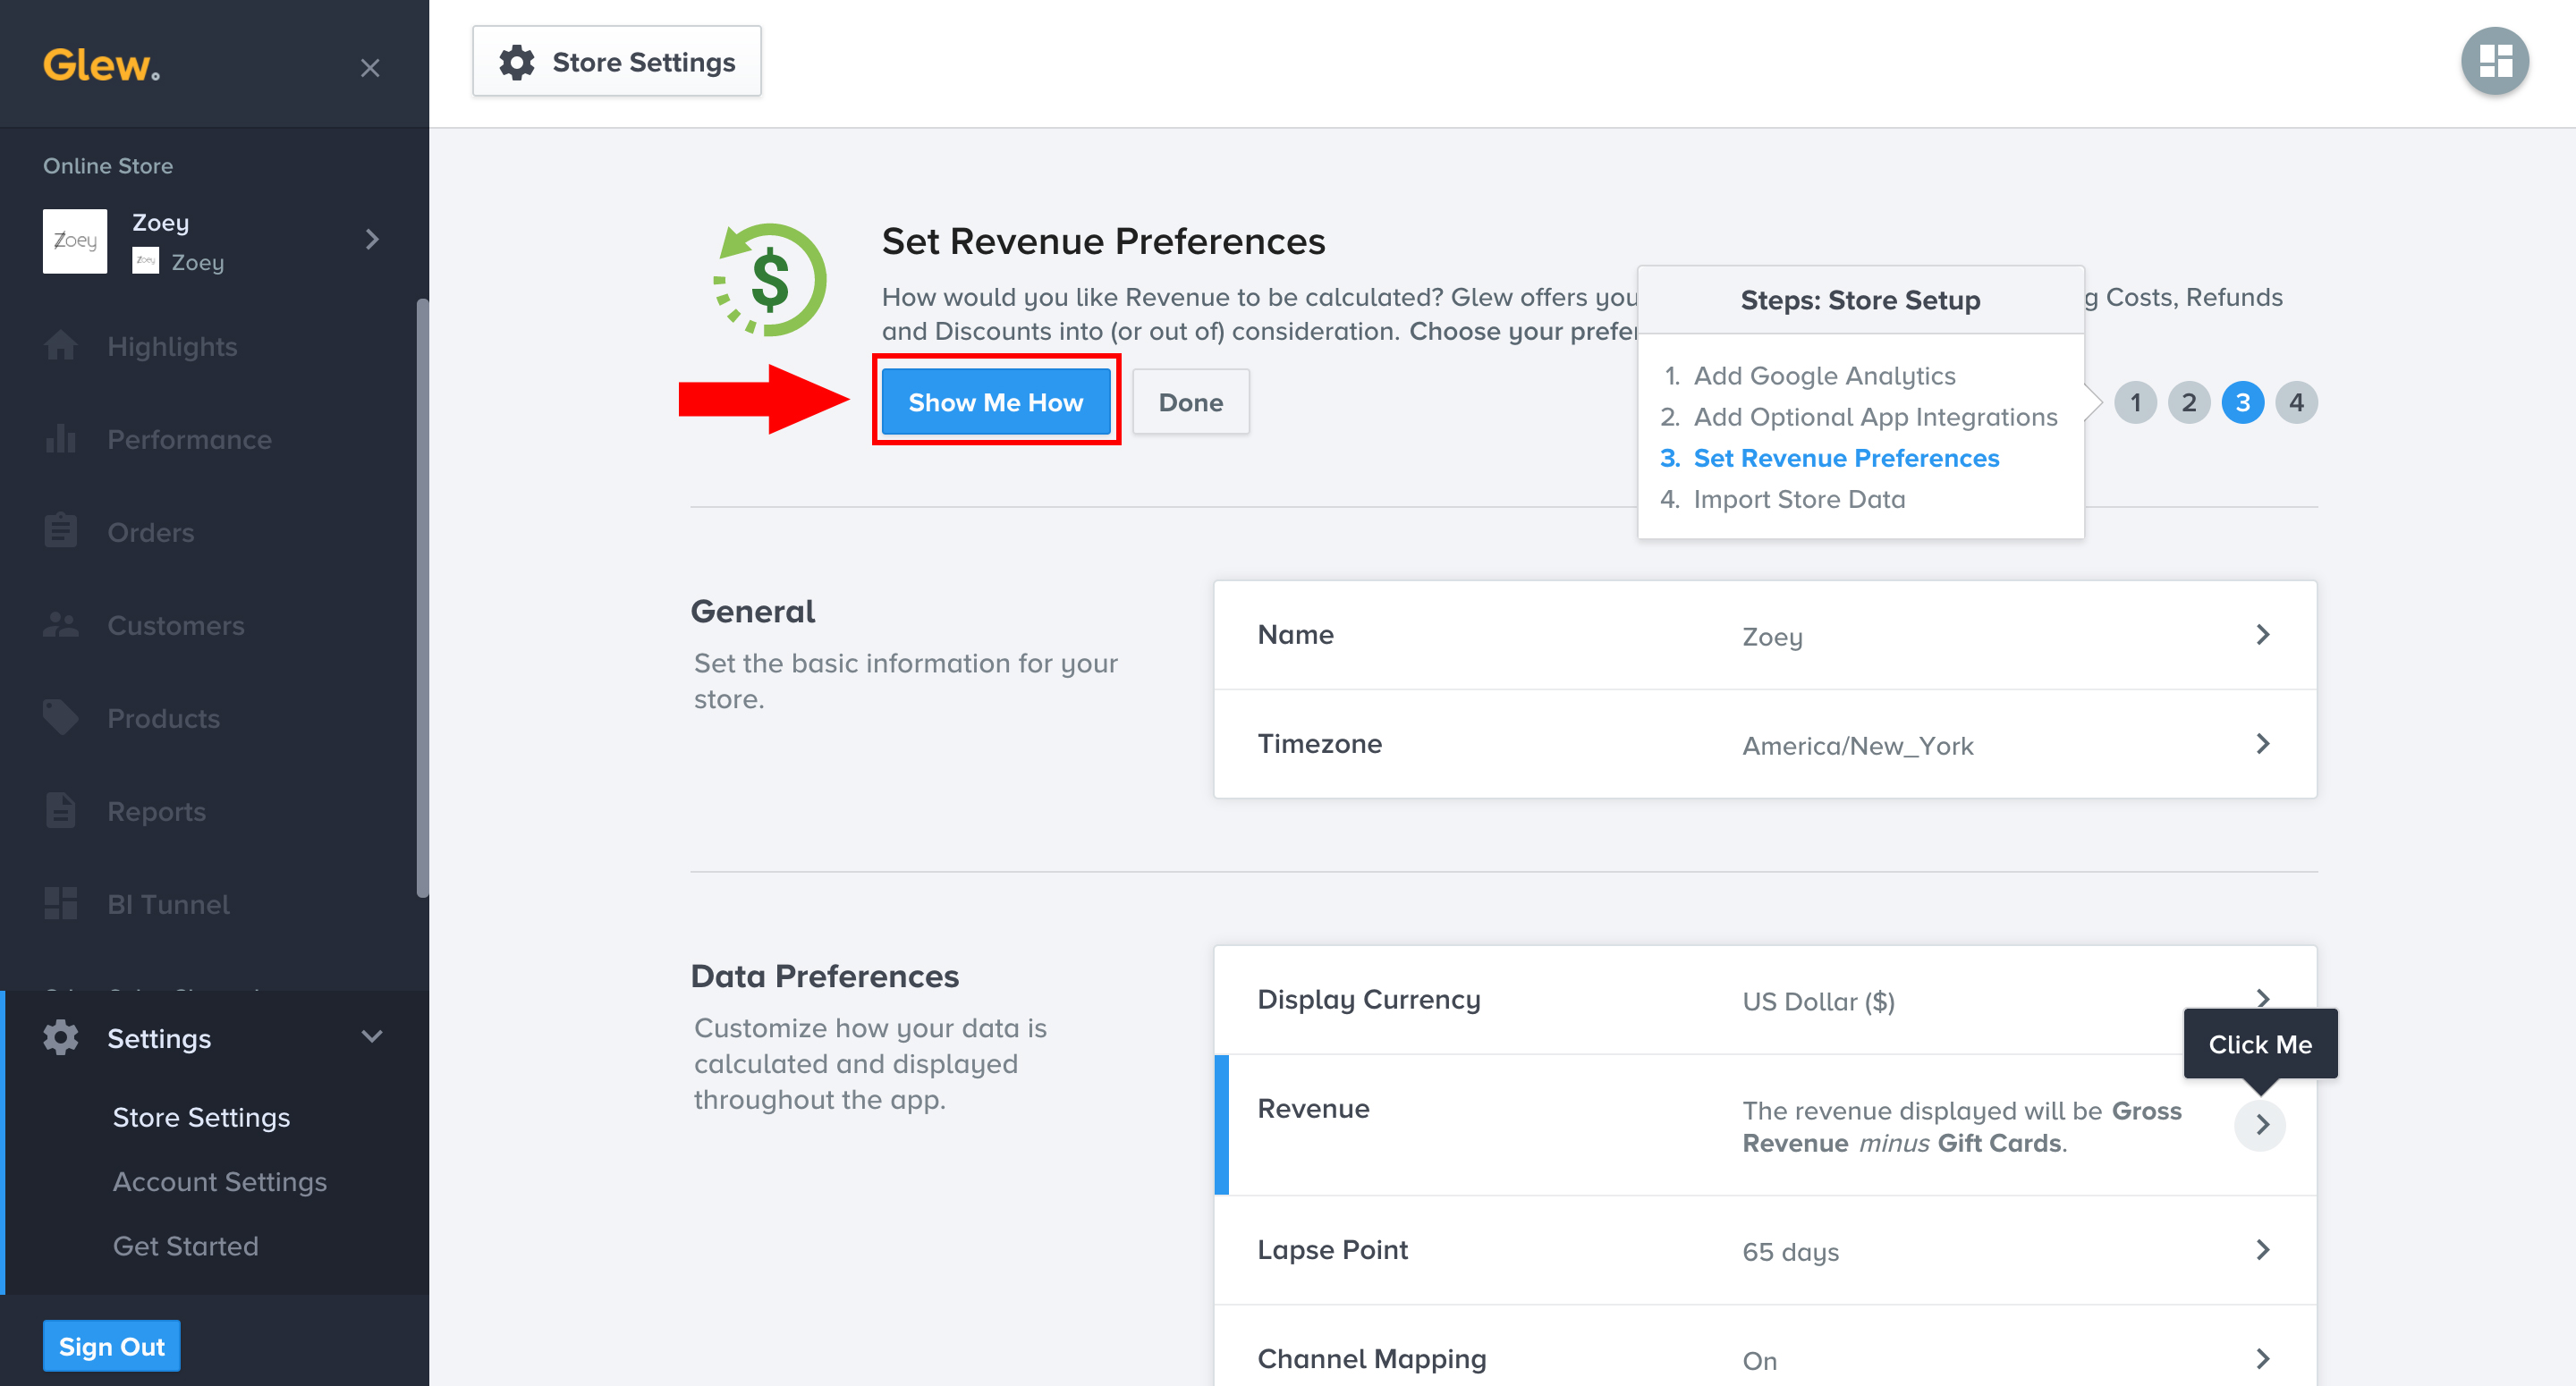
Next, you need to set some Revenue Preferences. This controls how we calculate things like discounts, refunds, sales tax, and shipping costs. Click the “Show Me How” button to scroll down this section.
5. Import Your Data
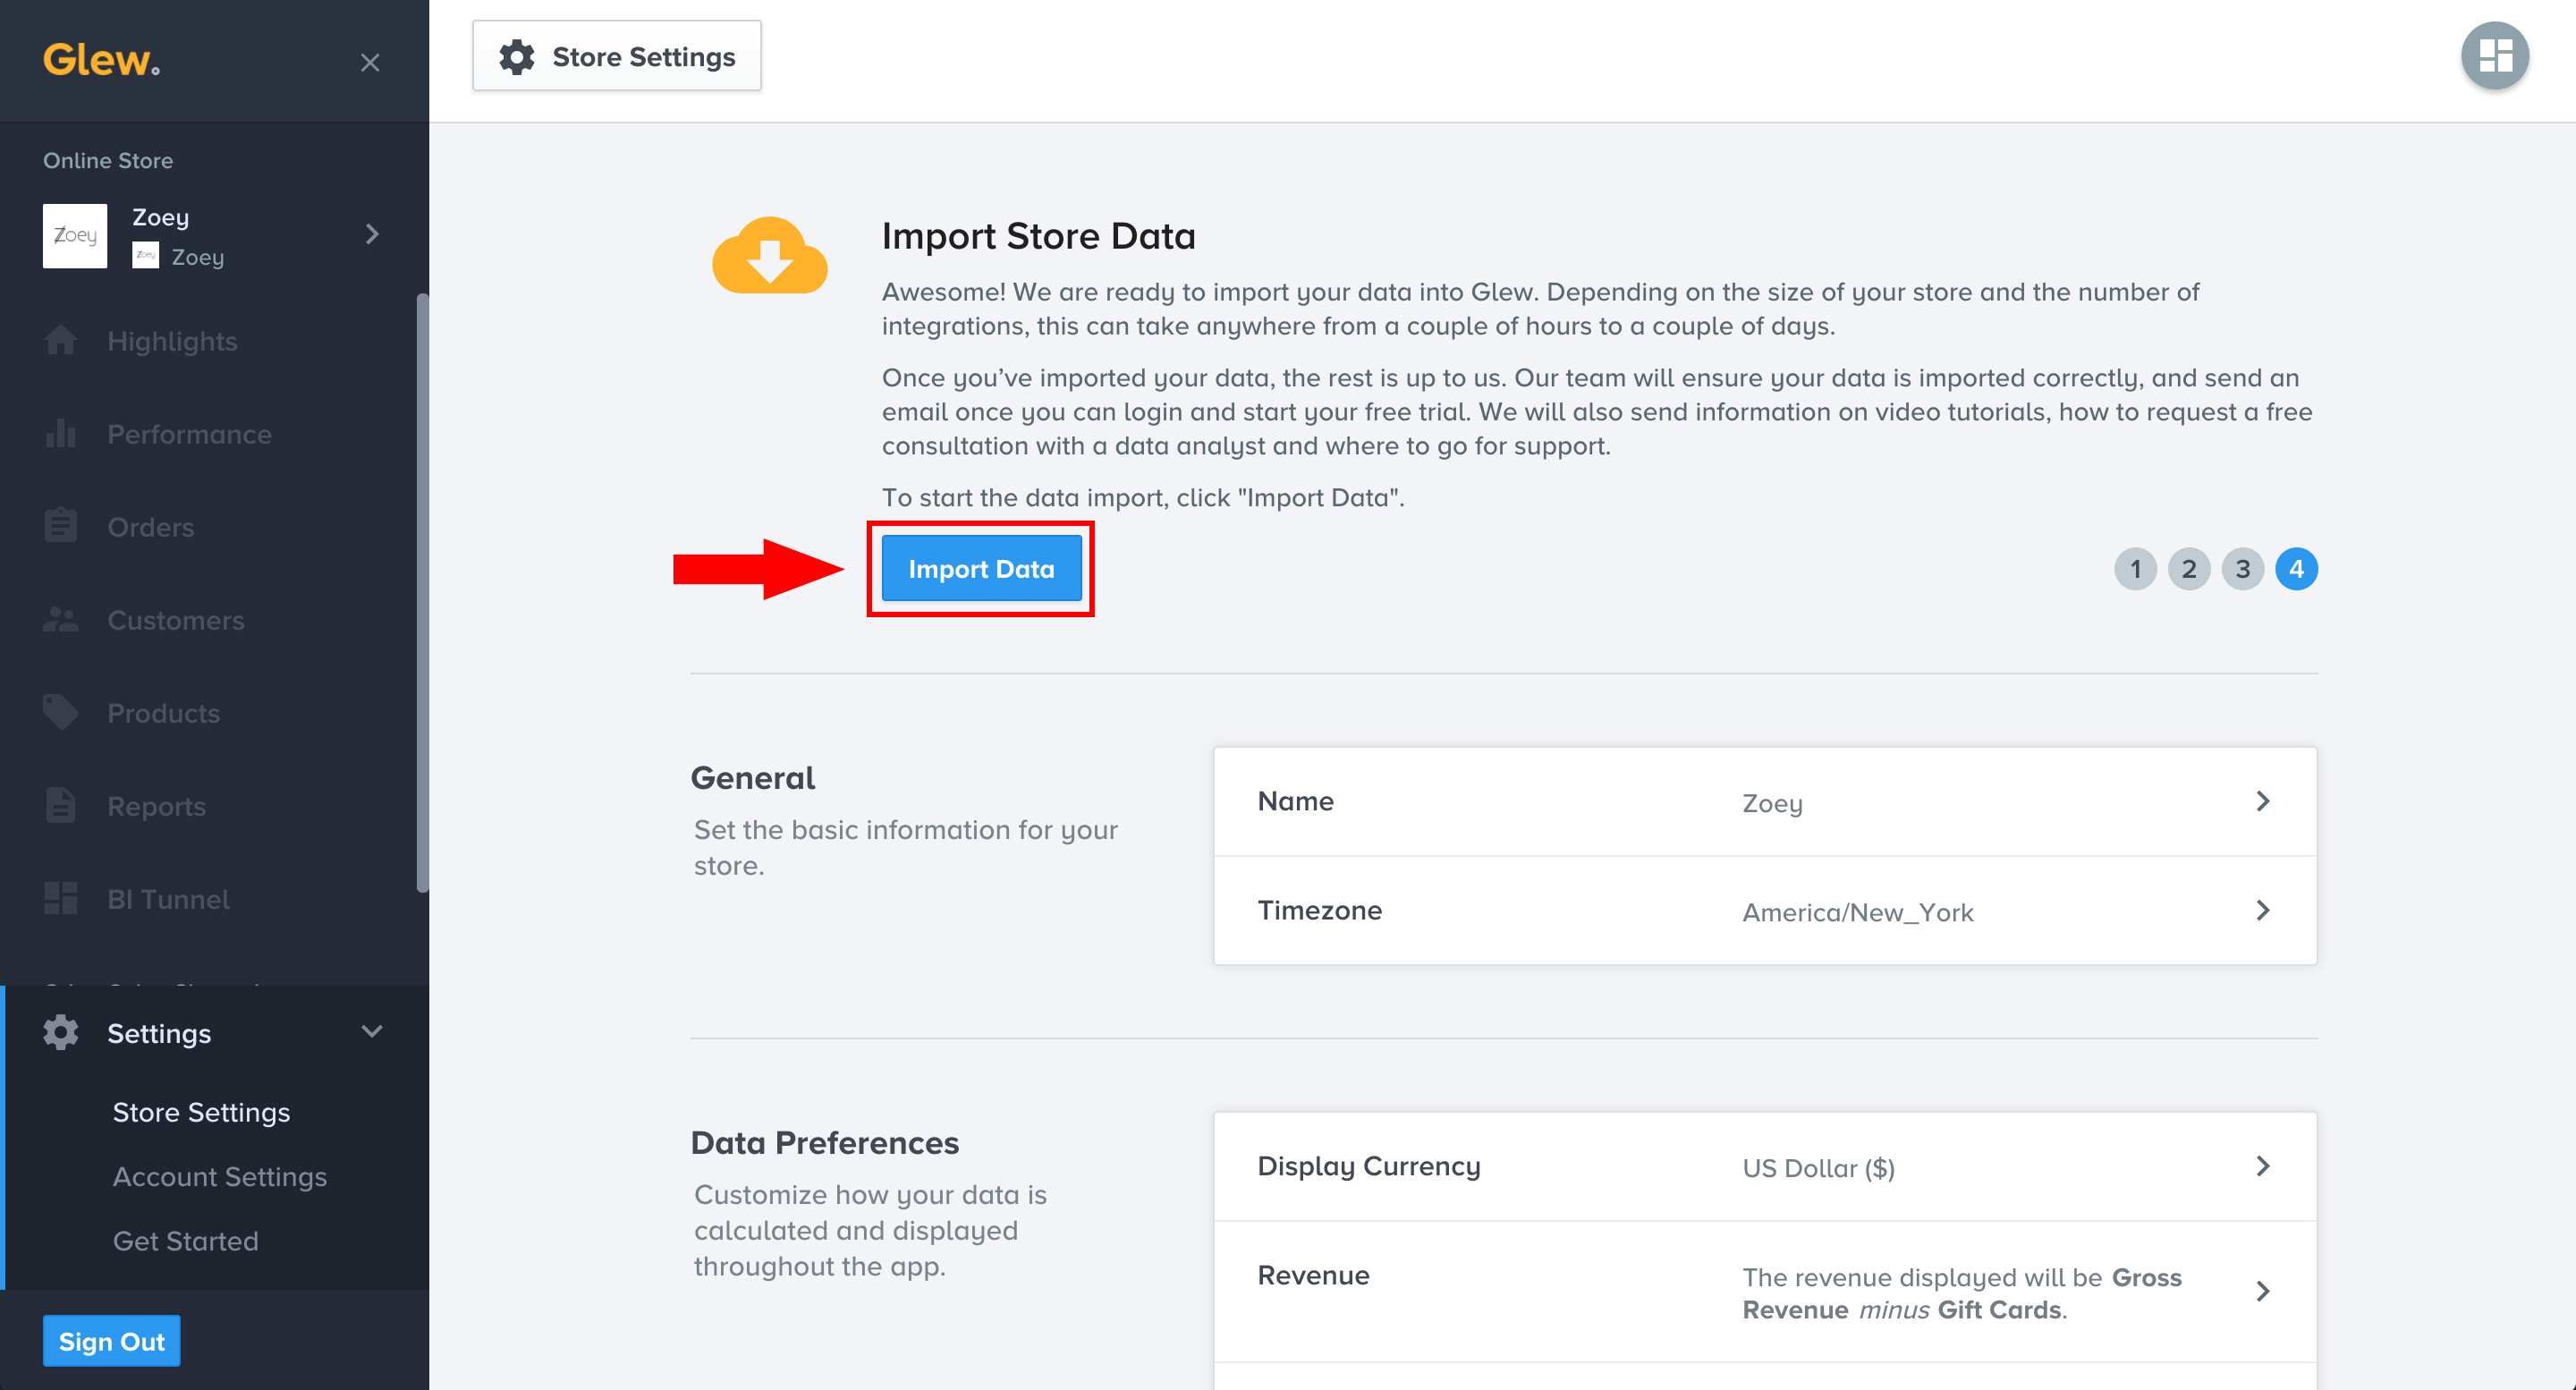
Lastly, it is time to import data from the all of the connected integrations. When you are ready, click the “Import Data” button to begin the data import process.
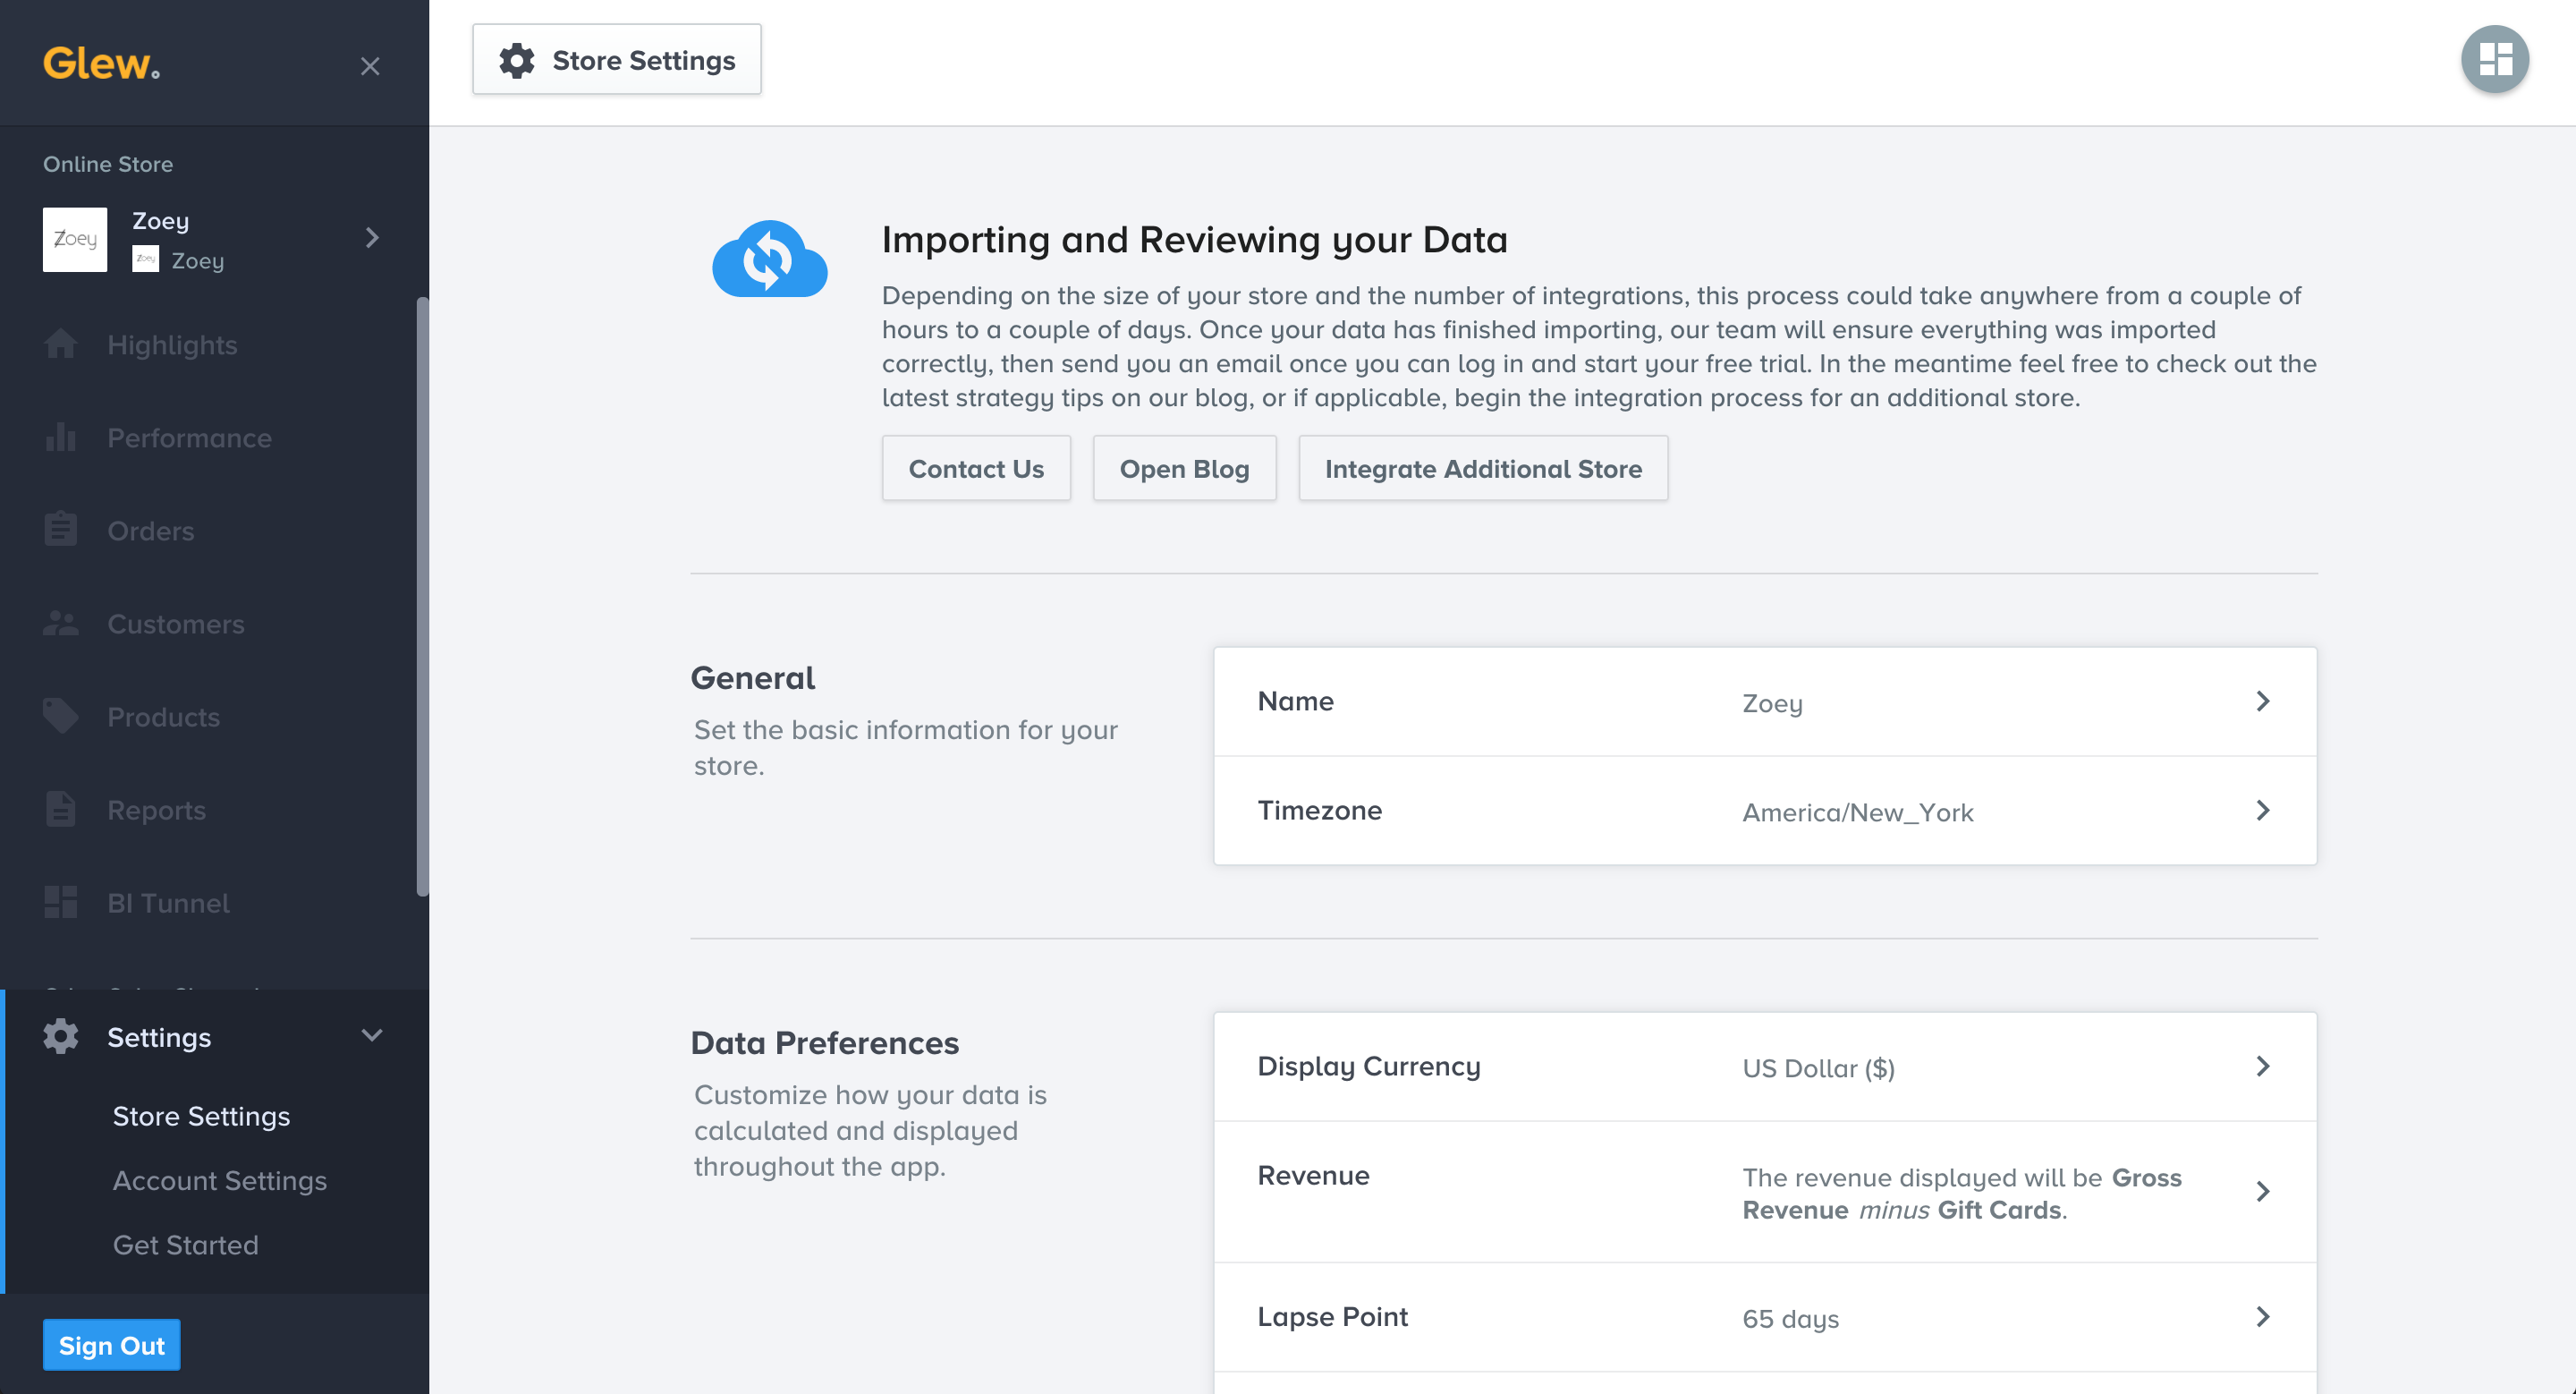
Once you get to this step (see below screenshot), you’re work is complete. The data is importing. You will be notified via email when the data import and review is complete.
Updated 7 months ago
