Locale Settings
Localization settings allow you to determine which markets your store will serve with precision and flexibility. It can be most helpful if your store address is outside the US.
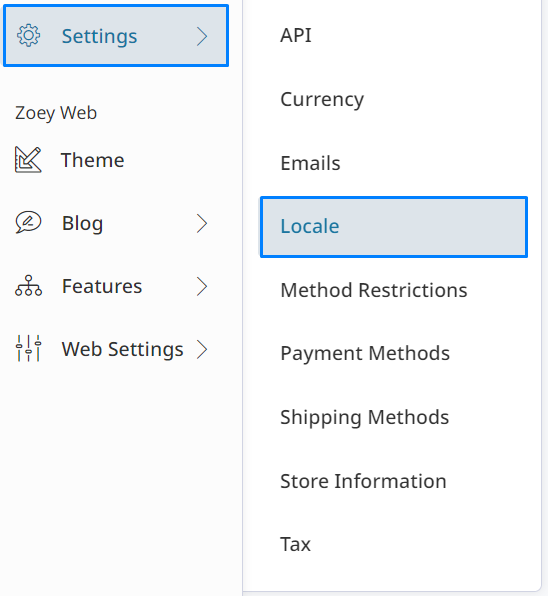
Locale Settings
In your Control Panel, hover your cursor over Settings and select Locale.
Set Locale Options
Find Locale Options. You can update the following settings:
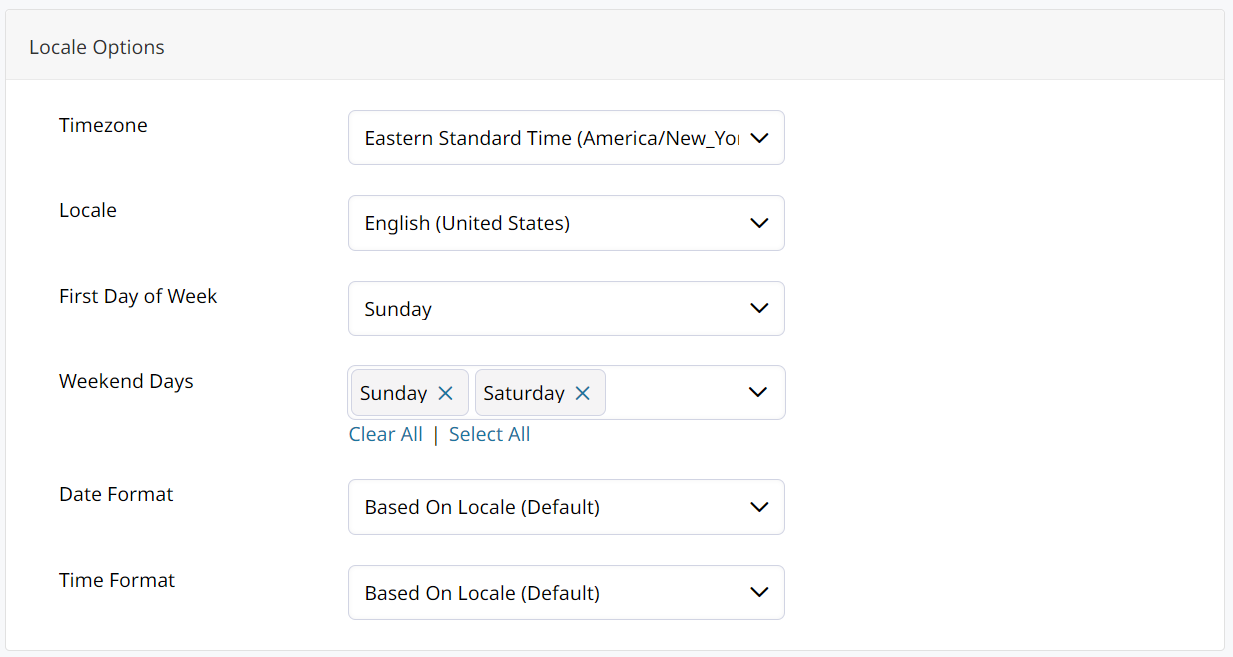
| Timezone | Set the time zone of your store's primary market. |
| Locale | Set to your store language. |
| First Day of Week | Set the first day of the week in your primary market. |
| Weekend Days | Set the days that fall on the weekend in your primary market. |
| Date Format | Set the format of dates. |
| Time Format | Set the format of time. |
Set Allowed Checkout Countries
Scroll to Countries Options. You can choose which countries are eligible to place orders from your store. This also controls what country can be selected on the Customer Registration Form.
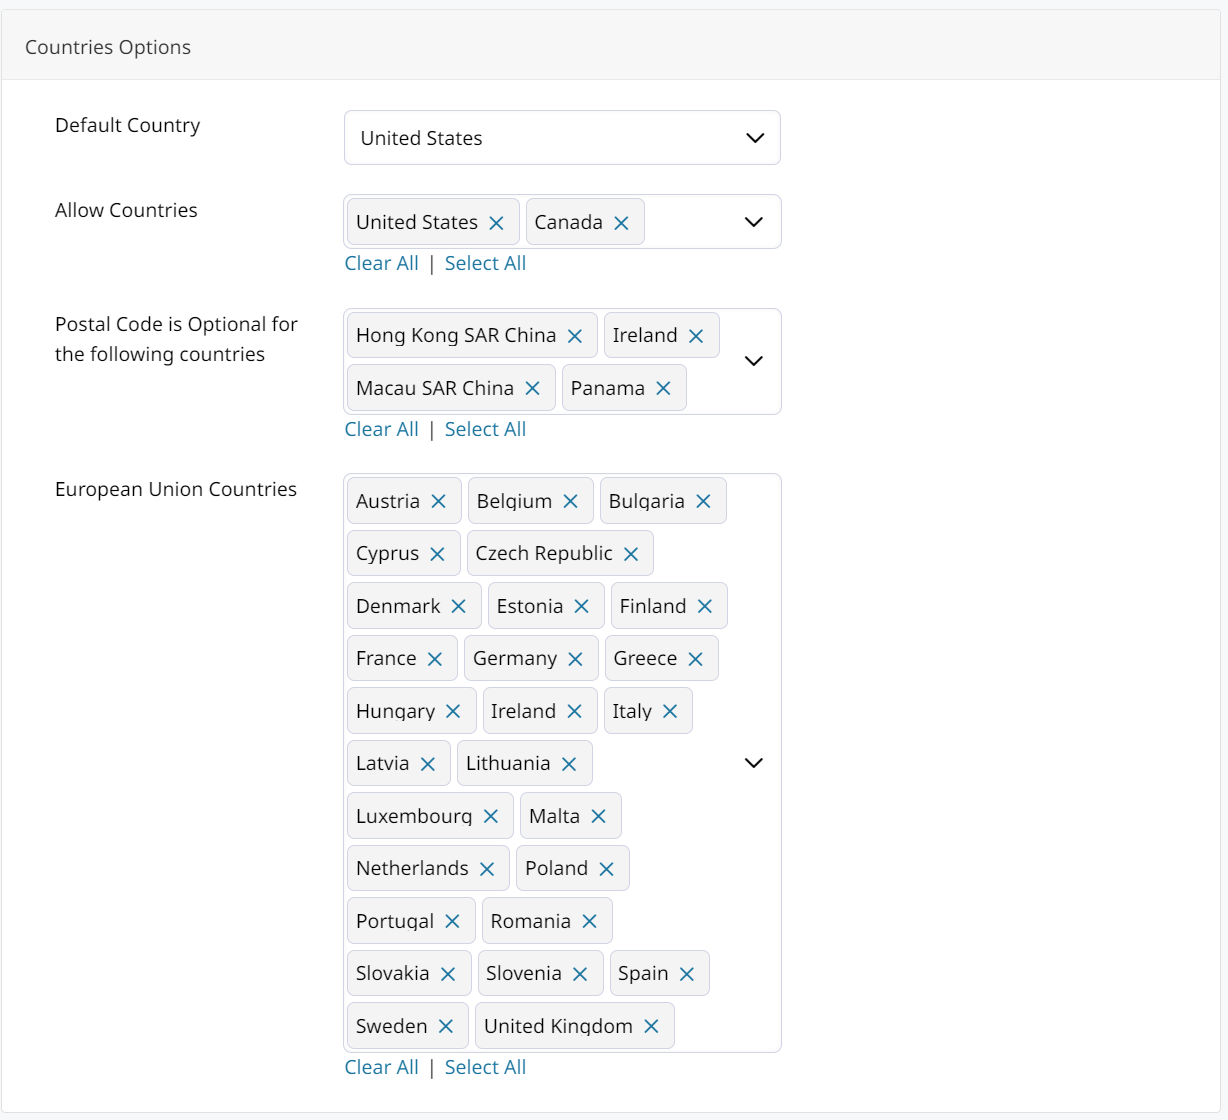
| Default Country | This displays as the first country a customer can select at checkout. |
| Allow Countries | Set the countries your customers are allowed to checkout from. This is required for checkout. |
| Postal Code (Optional) | Select countries that will not require entry of a postal code. |
| European Union Countries | Select the countries that will appear as European Union. |
Set State and Province Options
Scroll to States Options. Then, update the following settings:
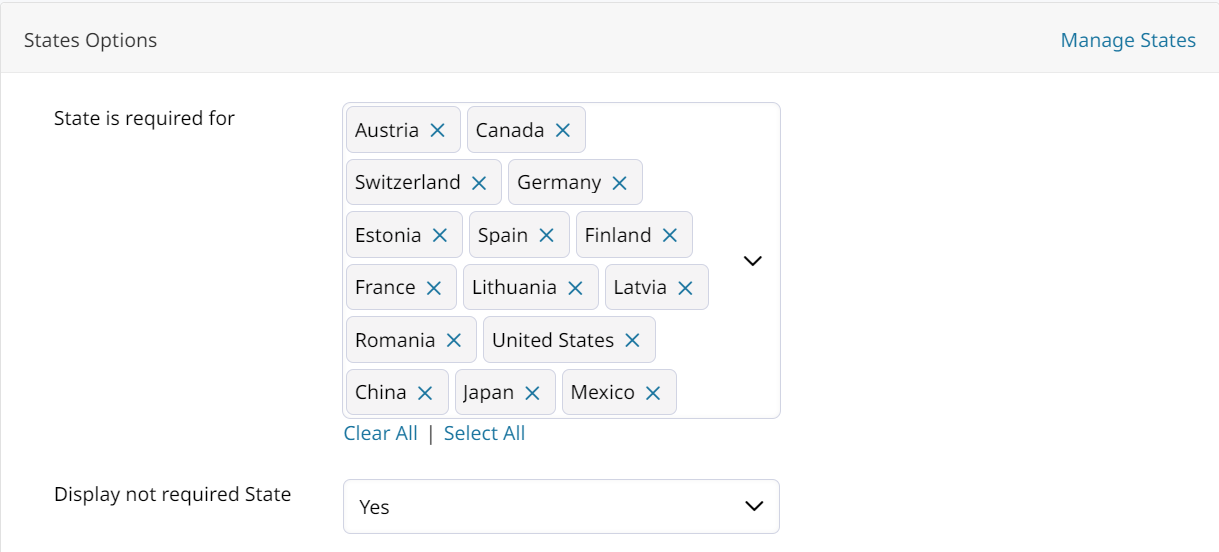
| State is Required For | Select the countries you require a state to be entered by customers in checkout. Make sure this includes your default country. |
| Display not required State | Select Yes to allow countries that don't require a state or province entry to display a State field on your store front end. Select No to hide the state field for those countries. |
Save
At the bottom of your Locale Settings, click the Save icon.

Now, your checkout process is set to allow purchases from locations that represent your market.
Updated 5 months ago