
Customer Attributes
Account, Contact, and Address attributes let you add custom customer information and fields to checkout and customer registration forms.
Use customer attributes to collect and display custom account, contact, and address information across customer-facing and admin forms.
A customer is the person purchasing from your store. In Zoey, a customer is typically a Contact on an Account or an Additional Contact at an Account Location.
Open Customers > Attributes to manage attributes on the Account, Contact, and Address tabs.
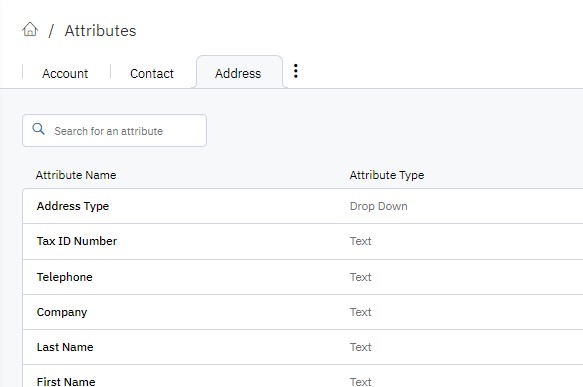
- Account attributes appear on the company-creation form in the admin, the customer portal registration form, the order-creation form, and the Account Overview.
- Contact attributes appear on the contact-creation form in the admin, the customer portal registration form, the order-creation form, customer checkout, and Contact Information.
- Address attributes appear on the company-creation form in the admin, the customer portal registration form, the order-creation form, and the Ship To fields.
Customer attributes and order attributes are differentCustomer attributes store information about a customer or the customer's business that may be required or helpful during registration. Order attributes store information about a specific order, so a customer can provide a different value for each order. Customer attribute values generally remain constant.
Create an attribute
- Click Create New Attribute.
- Set the attribute name, type, entity type, and visibility options.
- Save the attribute.
- For Dropdown and Multiselect attributes, add the available values after saving.
Configure attribute settings
Attribute name
Enter a unique, descriptive name, such as Customer Notes.
Attribute type
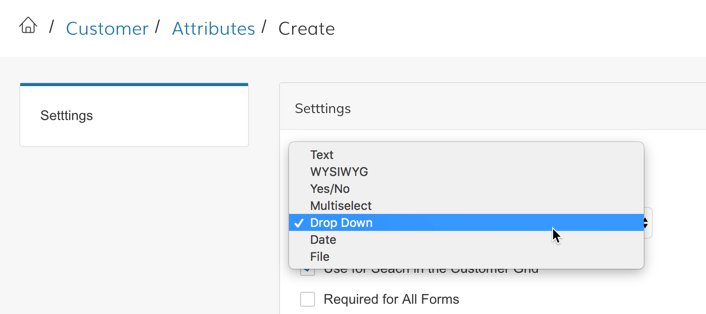
Select one of the following types:
- Text: A single-line field for short text.
- WYSIWYG: A multi-line field for longer text.
- Yes/No: A choice between yes and no.
- Multiselect: A field where the user can select multiple values. Configure values after saving.
- Dropdown: A field where the user can select one value. Configure values after saving.
- Date: A date field.
- File: A field where the user can upload a file.
- Matrix (Table)
Entity type
Choose the entity the attribute applies to:
- Account: Stores a value for the account and displays it on the Account Overview.
- Contact: Stores a value for the contact and displays it on the Contact record.
- Address: Stores a value for each address and displays it with that address. A customer can have multiple addresses, each with a different value.
Help text
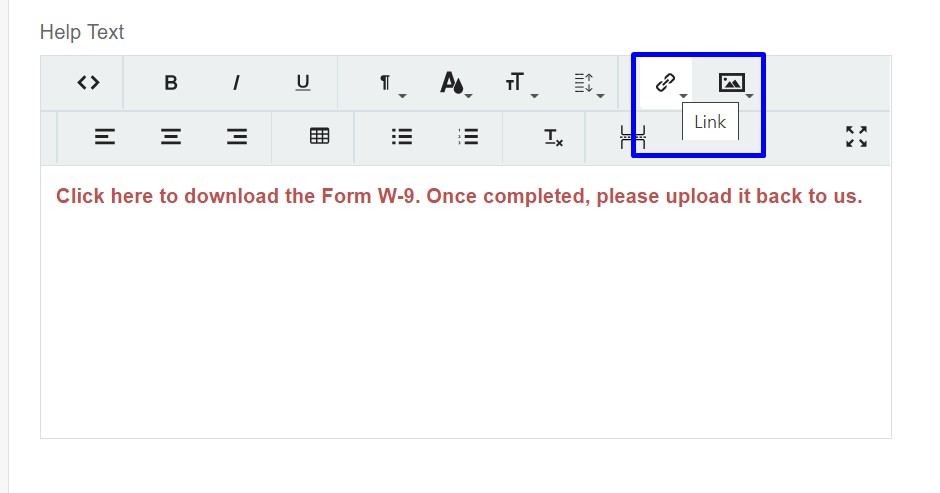
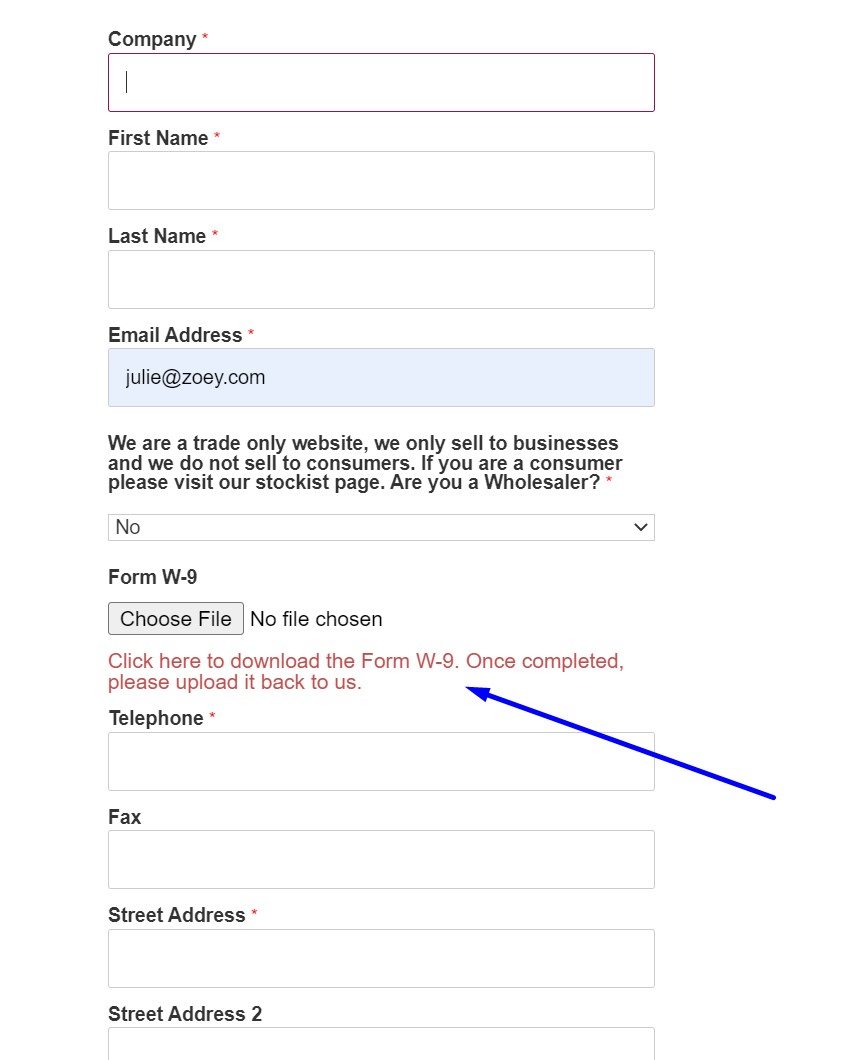
Add instructions or helpful text in the WYSIWYG editor. You can link to downloadable forms, such as credit applications, W-9s, and MAP agreements, on the registration page.
Configure visibility
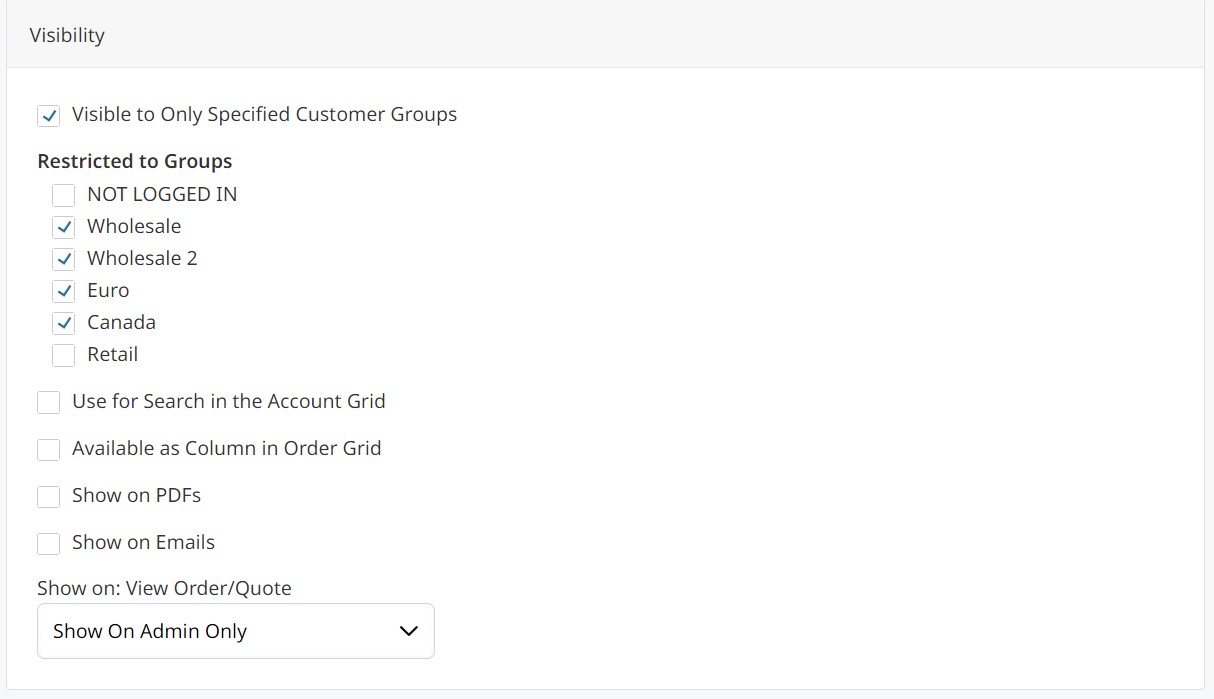
Visible to only specified customer groups
Enable this setting, then select the Customer Groups that can use the attribute.
Use for search in the customer grid
Set this option to Yes to search for customers in the Zoey admin by this attribute's value.
Available as a column in the order grid
Set this option to Yes to make the attribute available as a column in Customers > Customers List in the Zoey admin.
Show on PDFs
Set this option to Yes to include the attribute value on order, invoice, shipment, and other PDF files that an admin or customer can download.
This setting appears only after you save a new attribute.
Show on emails
Set this option to Yes to include the attribute value in order, invoice, shipment, and other emails sent to the customer.
This setting appears only after you save a new attribute.
Show on View Order/Quote
Choose where the attribute appears on an order or quote:
- Admin only
- Storefront (customer) only
- Both admin and store
Set validation rules
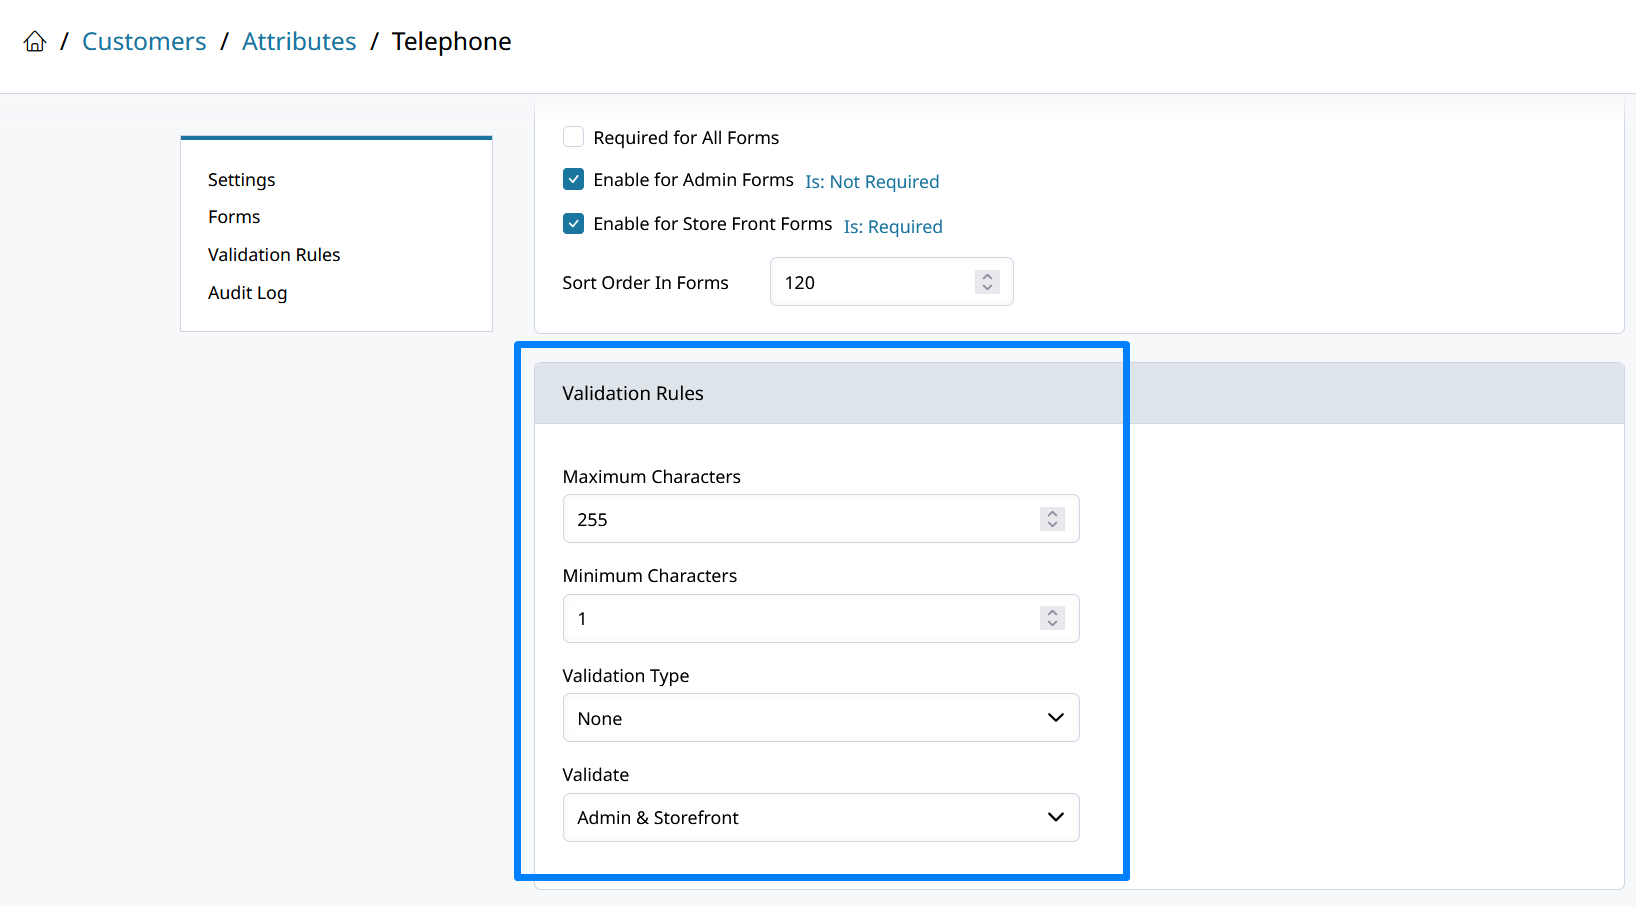
Some attribute types include a Validation Rule section. Set Minimum Characters and Maximum Characters to control the permitted input length.
For supported attribute types, set Validation Type to require numeric, alphanumeric, or email-address input. You can validate input on the storefront only or in both the storefront and admin.
Add attributes to forms
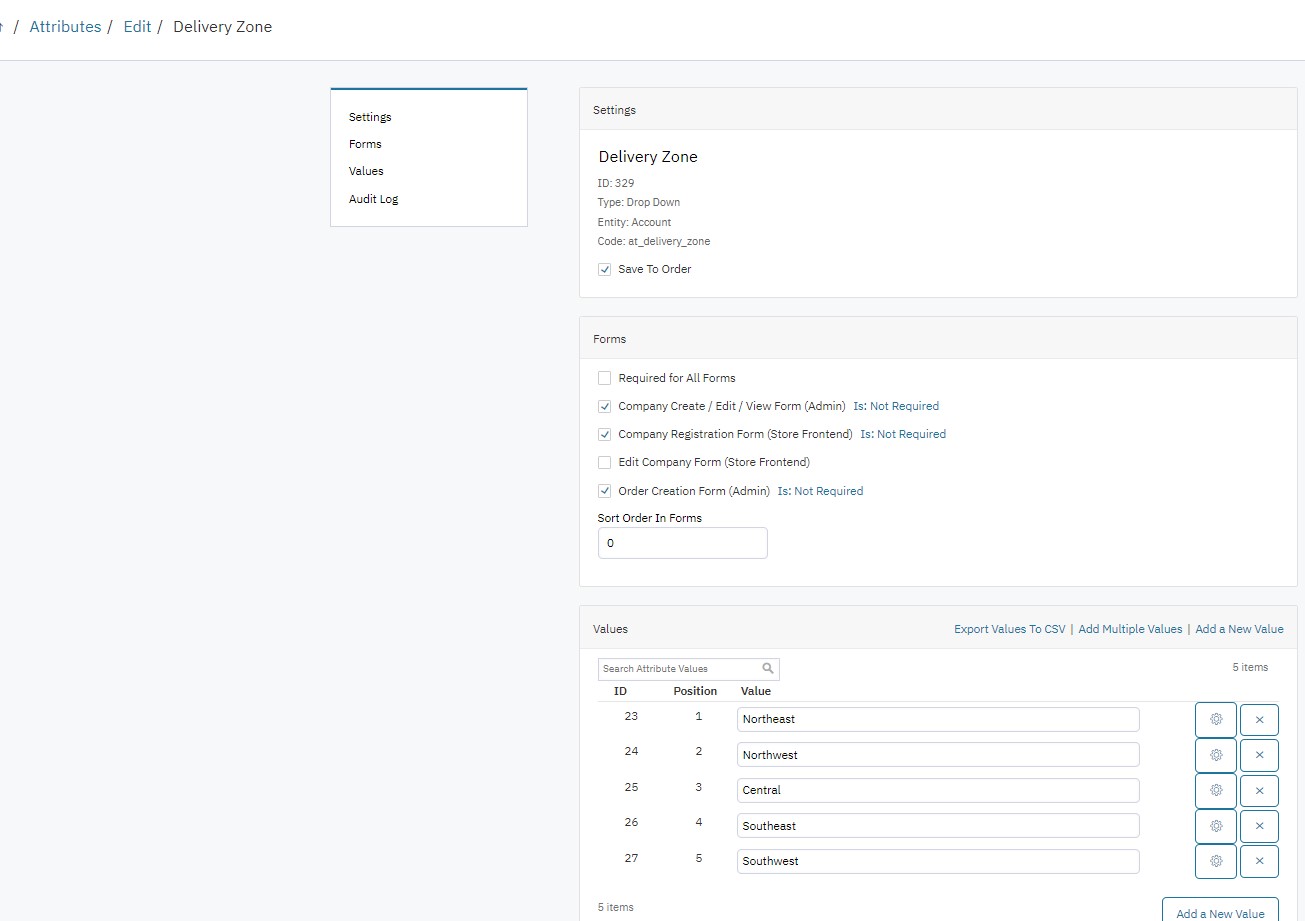
Required for all forms
Set this option to make the attribute required on every enabled form.
Customer Create / Edit / View Form (Admin)
Add the attribute to the Customer Edit screen in the admin.
Customer Registration Form (Storefront)
Add the attribute to the customer registration form.
Edit Customer Form (Storefront)
Add the attribute to the Edit Account Information screen in the customer's My Account dashboard.
Checkout Registration Form
Add the attribute to the customer registration form during checkout.
Order Creation Form (Admin)
Add the attribute to the Create Customer screen when placing an order in the admin.
Restricted Customer Group Form
Add the attribute to the custom registration URL page enabled in Customers > Settings > Require Approval.
Show on Export Full Customer Data CSV
Include the attribute value in the Customer Data CSV export.
Sort Order in Forms
Enter a value to control this attribute's position when multiple attributes appear on the same form.
Add Dropdown or Multiselect values
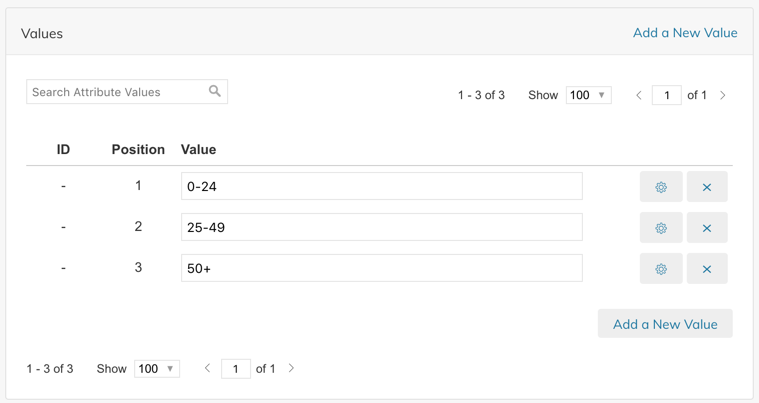
After you save a Dropdown or Multiselect attribute, add the values available for users to select.
Add customer attributes to email templates
Use the following variable format for a customer attribute:
{{htmlescape var=$customer.__getCustomAttributeValue('attribute_code')}}For example, use the following variable for a customer attribute with the code company_name:
{{htmlescape var=$customer.__getCustomAttributeValue('company_name')}}Use the following variable format for a customer address attribute:
{{htmlescape var=$address.__getCustomAttributeValue('attribute_code')}}If the address variable is not provided directly, retrieve it from the parent entity variable. For example, use the order's billing and shipping addresses in order emails:
{{htmlescape var=$order.getBillingAddress().__getCustomAttributeValue('attribute_code')}}

{{htmlescape var=$order.getShippingAddress().__getCustomAttributeValue('attribute_code')}}
Import customer attributes
Add customer attributes as columns in an Account import CSV.
Use the entity prefix in an Account importUse the attribute code as the column header and prefix it with the entity:
account,contact, oraccount_address.
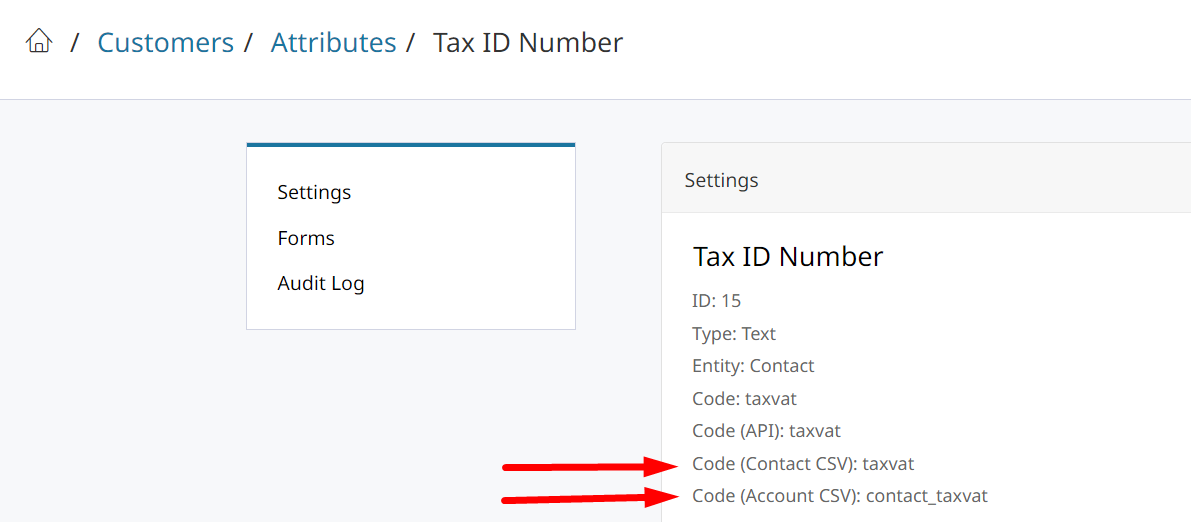
The code depends on the object the attribute belongs to and how you are importing it.
For example, a Tax ID attribute on an Account uses the column header account_tax_id. If the Tax ID is on a Contact, use contact_taxvat.
Updated about 1 month ago